Content
Recommendations and Tips
- Choosing a bituminous tile as a roofing material, it is worth considering that the roof slope should be at least 11.5 degrees.
- The Katepal roof cannot be installed directly on thermal insulation. Between it and the base for fixing the tiles should be provided through space for ventilation.
- In order to reduce color mismatch, you need to mix sheets of bitumen tiles from several packs and then install them.
- On each flexible tile from its reverse side there is an adhesive strip coated with an insulating film. It must be removed immediately before installation. After this, you can not fold the sheets one on one, because under the influence of solar heat, the tiles can stick together.
- To sheets of tiles easily separated from each other, before opening the package, it must be bent.
- During work in a warm period of time, you should not walk on laid flexible tiles, as traces may remain on it.
- When laying flexible tiles at an outside temperature of less than + 5 ° C, packaging with tiles should be stored in a warm room until installation begins.
- In order for the gluing of the shingles between themselves and with the base of the roof to occur powerfully, and at the same time the proper tightness of the roofing is ensured, the presence of sunlight is required, which should gradually melt the self-adhesive layer. In the cool season, such solar heat is lacking. For this reason, you can use a hot air gun or heaters. At the same time, the shingle of flexible tiles is fixed to the base of wood and the lining carpet, which is spread over the surface of the base, due to the self-adhesive layer. In this case, a larger number of nails is used and additional lubrication with glue is performed.
Maine steps for installing flexible tiles
Foundation preparation
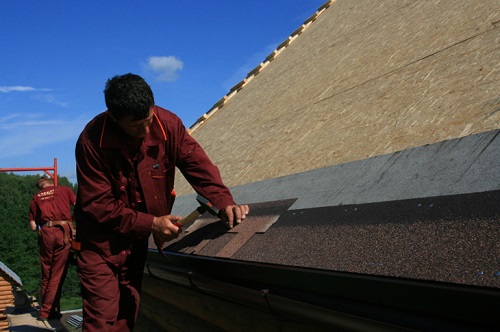
After the rafter system is installed, together with the crate, they begin to prepare the base. It is necessary to lay the roof on a hard base, having a smooth, even, solid surface, using OSB boards, edged tongue-and-groove boards or moisture-proof plywood as such.

Before laying the foundation, a thorough check of the moisture content of the wood materials is necessary. They should have a moisture content of dry weight of not more than 20%.
The thickness of the plates or plywood is determined by the design calculation. This takes into account the weight of the material, wind, snow and point load.
Arranging the base under the shingles, the joints of the boards are placed in the places of support, since the wood is able to expand and narrow when humidity and air temperature change.
Ventilation gap device
An important step, which in no case should be neglected, is the installation of a ventilation gap. Ventilation should ensure the removal of water vapor from roof elements such as insulation, directly roofing material and wooden rafter structures.If the installation of ventilation was done correctly, a soft roof will serve for a rather long time. And to ensure good ventilation, the size of the air gap should not be less than 50 mm. The exhaust hole is installed in the upper part of the roof, and for the air flow in the lower. Roofs with a slope of 15 ° to 25 ° should have a ventilation exit area of 33 sq.cm. With a slope of slopes from 25 ° - 85 ° - 16 sq.cm. per meter of ceiling area.
Lining installation
When waterproofing the under-roof space, the role of the lining carpet is to strengthen it, since moisture should not penetrate under the roofing material. A lining roofing carpet comes on sale in rolls, it must be laid across the entire roof area from the bottom up parallel to the eaves overhang, in which case it will be reliably protected from moisture. On the edges of the lining material is fixed with nails at a distance of 20 cm. The joints are filled with sealant.

When the roof slope is at least 18 degrees, then the lining material is laid only in places such as the perimeter of the roof, skates, valleys, end parts, curtain rods, places where the roof adjoins the walls, places around chimneys and near dormers.
Installation of cornice metal strips
Eaves levels are designed to protect the eaves of the roof from falling under the attic floor of rain and snow. They must be made of corrosion resistant material. They are mounted on top of the lining material with an overlap of 2 cm and fixed using roofing nails in a zigzag manner in increments of 10 cm.
Installation of end (pediment) strips
Protection of the roof structure at the ends is carried out using end or pediment strips. Installation is carried out directly on the end carpet of the roof. The strips are also laid with a 2 cm overlap and fixed in the same way as the cornice strips using a zigzag pitch of 10 cm.
Laying an end bitumen carpet
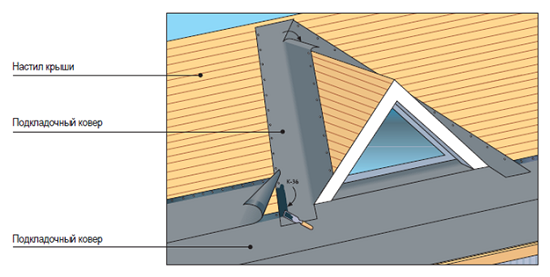
In order to provide better waterproofing in the locations of the valleys, a valleys carpet is installed on top of the lining carpet. It is fixed with nails in 10 cm increments, and special mastic is used for gluing. When installing a rug carpet, the overlap should be at least 30 cm.
Application chalk lines
Guide lines are applied to the lining material with chalk, which will greatly facilitate the installation process. So you can lay tiles, aligning them horizontally and vertically along the slopes and around the perimeter of dormers and pipes.
Laying soft roofs of different types
Each type of flexible tile has its own way of fastening.
Eaves bituminous tile
Installation of the initial or starting strip of the initial row is carried out using self-adhesive cornice-ridge tiles. The film is preliminarily removed from it and glued along the eaves overhang. Mount the eaves flexible tile, stepping back from the edge of the curvature of the eaves strip to a distance of 10-20 cm. The fixation of bitumen tiles is carried out using roofing nails at the perforation sites. In the future, the attachment points of the ordinary tiles are blocked.
Mount tiles
The quality and hermetic properties of a soft roof directly depend on the proper nailing of roofing nails. They should be fixed so that the hat is flush with the shingles and does not cut into its surface. When fixing the coating, nails should be nailed at a distance of 2.5 cm from the cutouts in the tile sheet and at the same distance from any edge of the sheet.

In regions where strong winds blow, and with a roof slope of more than 60 degrees, the bituminous tiles are additionally glued and fixed with an additional number of nails. During installation work in the cold season, you need to increase the amount of glue and glue at least 5 of the top rows of the finish coating.
Private flexible roof
Lay ordinary bituminous tiles begin at the same level as the initial strip. To avoid deviations in color, it is worth using tiles of flexible tiles from different packages. From the roof you need to remove the protective film and lay its prepared base. Then it is fixed with 4 nails - each tile is slightly higher than its groove (20-30 mm). When the slope of the roof is more than 45 degrees, each tile is fixed with 6 nails. If you removed the protective film, do not stack the tiles of flexible tiles in a pile one on one, so that they do not stick together.
In the first row, bituminous tiles are laid in such a way that the lower edge is not higher than 1 cm from the lower edge of the eaves tile. Petals should cover the joints of the eaves tiles. Subsequent rows of soft tiles are mounted so that the ends of the "petals" are located at the same level or higher with the cutout of the tiles of the previous row. Laying rows takes into account the location of the picture. In each subsequent row, for this purpose, you need to move half the plate of the tile (it can be cut off). To protect against atmospheric precipitation, the tiles are glued with bitumen glue along the edge of the roof.
Installation of soft tiles in the valleys
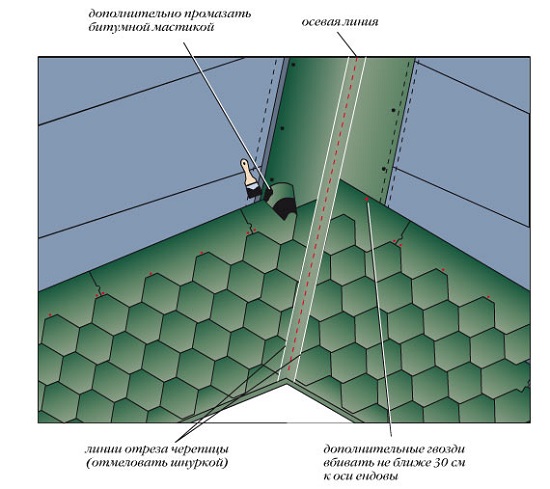
The type of valleys and the type of cutting of flexible tiles determine how to lay tiles in grooves. When using the open gutter method, tiles are cut off in places of the valley to leave the end carpet strip 15 cm wide. The edges of the tiles of the bitumen tile are glued with special glue at a distance of at least 10 cm. plywood or other materials with a hard surface.
Maze tile
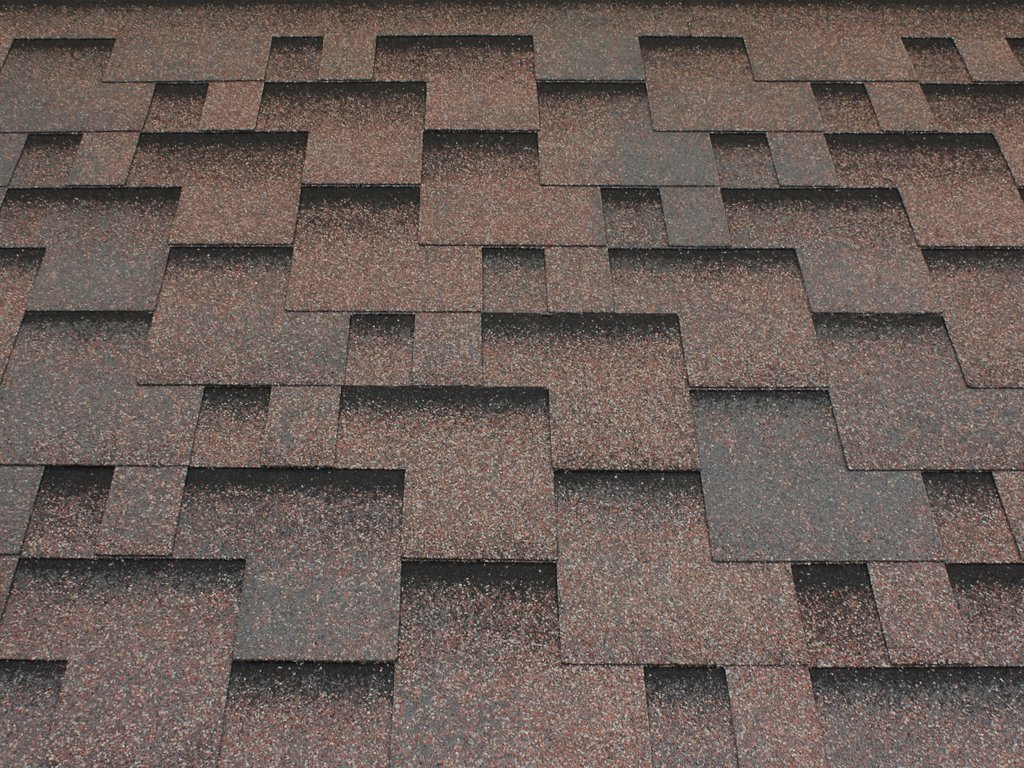
Ordinary tile of labyrinth type is laid from the center of the eaves overhang towards the end of the roof and the ridge. The laying of the first row is carried out in such a way that the “petals” cover the joints and the perforation lines of the cornice tiles. Installation of the next row occurs so that the joints of the lower leaves are located in the center of the shingle of the average size of the mounted petal. The shingles in the shape of a labyrinth in each row are fixed to the base with 4 nails at a distance of 20-30 cm above the grooves of the tile. Hats of nails should be closed with "petals" of the next ordinary tile.
Ridge tile
The ridge tile is obtained by dividing into 3 parts of the cornice tiles in the places of perforation. It is installed on the ridge of the roof with the short side and placed parallel to the ridge, fixing with 4 nails, 2 pieces on each side. Nails should be under the next tile, which is laid with an overlap of 5 cm.
Roofing joining
At the points of contact of the tiles to the wall, it is absolutely necessary to make high-quality waterproofing. Isolation of ventilation outlets and passageways for antennas is done with rubber seals. The insulation of chimneys and other pipes that are subject to heat is as follows.
A triangular rail of 50 by 50 mm is nailed around the perimeter of the joints between the pipes and the roof. After that, a lining carpet is mounted around the chimney, and laps are fixed with glue. Then the flexible tile is placed on a vertical surface and glued with glue. Further along the perimeter of the pipe, an end carpet is installed. In this case, the pipe is closed from above with a strip of at least 30 cm, and on the ramp - at least 20 cm. It should be glued with glue. The abutment lines are closed with a metal apron using the abutment plate. Seams should be sealed with silicone sealant and mechanically fixed.

Alas, no comments yet. Be the first!