
Installing a canopy over the porch can be not only an interesting architectural solution, but also help protect against rain and snow from the main roof. Its design is not so complicated. You just need to stock up on the necessary tools, and the skills to work with them and instructions for making a canopy over the porch will help you do all the work yourself.
Content
general information
The canopy above the porch performs not only a practical function, but also a decorative one.. Its design can be divided into two main parts: frame and coating. The frame is a frame that can be made of various materials. It is installed on the wall of the house and fix the coating.
According to the method of fastening, the canopies are divided into supporting and suspended. In the first case, the visor's main weight falls on specially installed support poles, and in the second, it is fastened to the wall. Hanging canopies are best made from lightweight materials so that it is convenient to remove snow. Supporting canopies can support much more weight due to the fact that they redistribute the load. In addition, you can install fences or railings for them for greater protection.
In the form of canopies can be:
- single slope. In this case, the slope is placed against the wall of the house so that no snow deposits are formed. For this form of canopy, a gutter, pipe or gap is usually installed to drain water and snow;
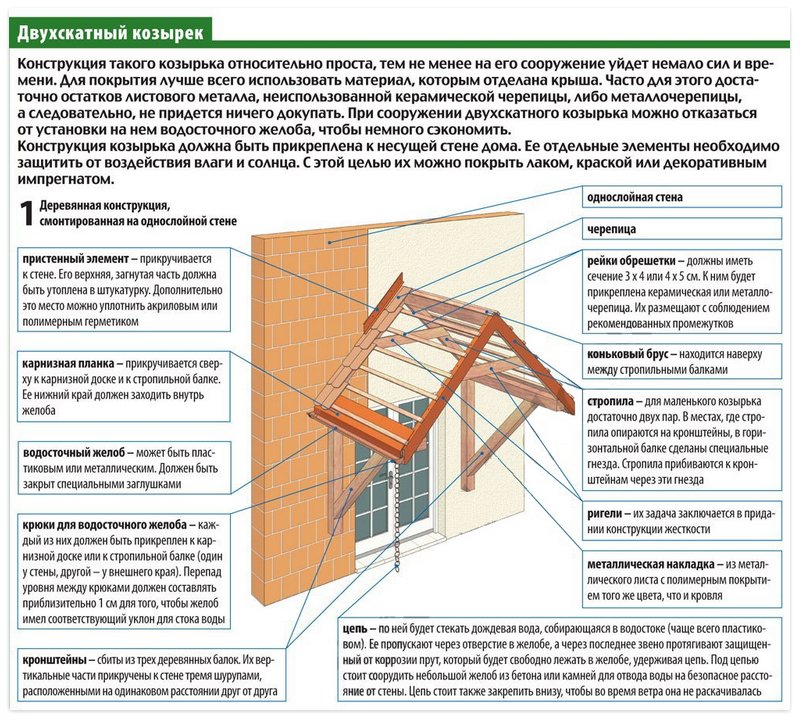
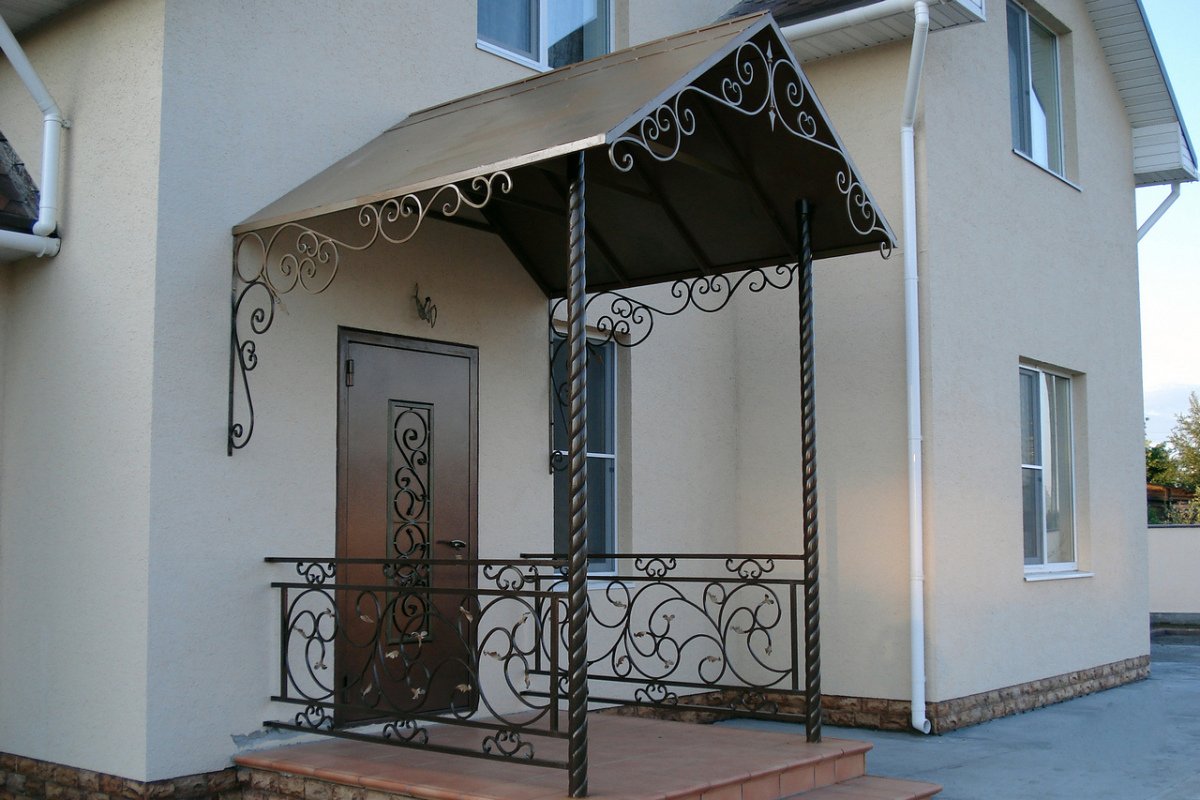
- gable. This form is perhaps the most common due to its convenience and simplicity of design. Stingrays are located on the sides of the porch;
- arched. Performed in the form of a semicircle in such a way as to protect the porch. This design looks interesting enough, but can be difficult for canopies made of metal;
- tented. The canopy is round or sectional, covers the porch from all sides.
Canopy Requirements
- The width of the canopy is made, as a rule, equal to 1.5 of the width of the door leaf. This will protect the front door and porch flooring from rain.
- Strength and wind resistance are irreplaceable characteristics for a peak.
- Snow load should not destroy the structure, so the slope of the slopes is taken equal to at least 20 degrees.
- Exterior. The visor is made in the same style as the whole house.
The choice of material depends on the design of the canopy. So, when coated with profiled metal use raftershaving the length of the slopes and the crate in increments of 30 centimeters. When using flexible tiles, the crate must be made solid.
Canopy made of wood
This option is suitable for houses made of wood or brick, but with a wooden roof, so as not to violate the overall composition.
The approximate cost of such a product is about two thousand rubles. This is an acceptable amount for any owner of a private house. And the external performance is sometimes not inferior to forged counterparts.
To make a visor from a tree with your own hands, you must purchase:
- wooden beam with a section of 5x5 centimeters with a total length of 15 meters .;
- boards with a section of 2x1.5 centimeters with a total length of about 50 meters.
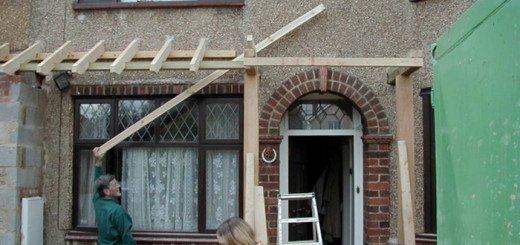
Work stages
- The beam is used for the manufacture of frames and props on the wall. As for the shape, the frame is made almost square, but the support must be made in the shape of a triangle.
- Next, we frame the square of the frame with the help of boards. They need to be placed tightly together, without the formation of gaps. They serve as a continuous crate.
- After crate installed, go to the resin and coating with roofing material. These measures will help make the visor durable.
- The next step is the installation of the roofing. As it can be used flexible tiles or metal.
For roofing, you can use euroroofing material, which is laid immediately on the tarred crate. This will reduce work and material costs, as well as simplify installation.
- We must not forget about the treatment of wood with anticorrosive mixtures and varnish. If this is not done, then soon moisture and insects will render the materials unusable.
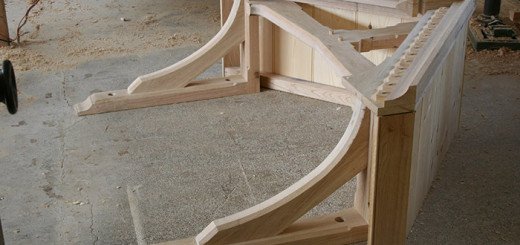
- If there is a desire and opportunity, it will be good to supplement the visor with decorative details from wood.
Polycarbonate Canopy
The use of polycarbonate for temporary structures or awnings has become very popular now.. All thanks to a number of its advantages:
- Ease. By its weight, it is lighter than other building materials used for the same purposes, so it can be installed without outside help.
- Durability. In the absence of serious mechanical damage, the material will last a very long time. In addition, it does not require additional processing, unlike wood.
- Appearance. This material is quite modern. Looks good both in color and in transparent. Sometimes outwardly wins against the background of iron structures.
- Plastic. Due to the fact that the material bends well, it is possible to make constructions of interesting form from it. To do this, polycarbonate must be bent and secured.
- Low cost. Its price starts at 80 rubles per square meter, which will allow spending 500-600 rubles on a canopy, of which 160-200 rubles on polycarbonate.
Work stages
- To make a canopy of polycarbonate, it is necessary to manufacture or purchase a metal corner.
- On it, using a drill, several holes are made for attaching polycarbonate with screws.
- For cutting polycarbonate, a metal file or a grinder is used. Due to its high density, the material does not crumble and does not crack.
The complexity of manufacturing such a canopy is only to weld a metal structure, which will be the basis of the shape of the canopy. To do this, you need to be able to properly use welding, so that the work is done accurately.
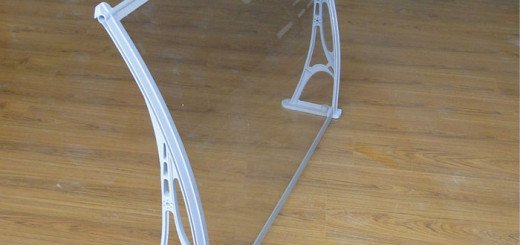
All-metal welded awnings
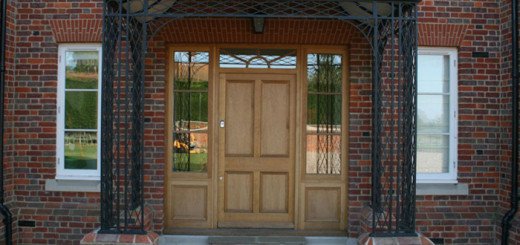
Such a canopy, of course, will cost a lot. But it is rightfully considered the most durable and durable.. A structure made entirely of metal is usually decorated with forged elements, which gives the heavy material an external elegance. In shape, it can also be any product, but when choosing in favor of an arched structure, you will have to work hard by bending the metal.
Work stages
- The main sheet will be a sheet of stainless metal with a thickness of 0.1 mm.
- It must be strengthened by attaching special stiffening ribs. For these purposes, a thin rail or a 1.5-cm channel is often used.
- Forging is welded on the side of the structure. She will give the appearance neatness, make it more interesting.
If you use ordinary iron for a canopy, which will cost less in cost, then it still needs to be covered with an anticorrosive composition. And such processing will have to be repeated from time to time.

Among their shortcomings are not only the high price, but also the great weight, the complexity of execution. One employee cannot cope with this task. Production takes place on the ground. A ready-made structure is mounted at the installation site, but you still have to use welding at a height that can be dangerous for an inexperienced person.
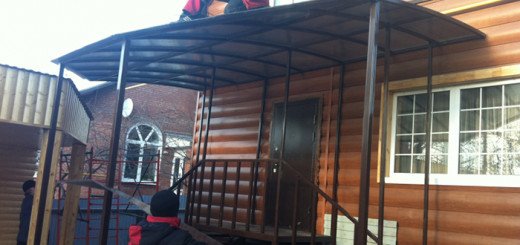
Steps for installing a canopy with metal supports
- Determine the location of the racks.
- Make a well with a depth of at least one and a half meters.
- Perform vertical installation of pillars.
- Pour wells with concrete. He needs to give time to harden - at least three days.
- The canopy frame is welded from metal and installed above the entrance so that the back is attached to the wall of the house, and the front rests on the installed racks.
- Mount the roof covering of the canopy.
Useful Tips
Before starting work, it is best to draw a small sketch to have an idea of what will be necessary for the work. And after taking measurements, the need for material is calculated.
The basic mistakes of beginners when designing a canopy are contained in incorrect calculations. Here are some helpful tips.:
- Insufficient width. The canopy should cover not only the porch, but also the door leaf. Provided rainfall is free of wind, such protection is easy to provide. But this rarely happens, so when calculating the area of the structure is increased by 20 percent.
- Insufficient strength. When calculating the loads on the structure, it is necessary to take into account not only its own weight, but also the possible snow load.
- Lack of anti-corrosion treatment. Regardless of what material you use to create the canopy, you need to varnish or paint it, or treat it with suspensions. Such preparation will eliminate the formation of rotting wood and rust on the metal.
- Incorrect mounting. First of all, your safety depends on it. It is worth using a high quality anchor with a long stroke. They will help to securely fasten even a heavy structure to the wall. Fasteners are calculated with a margin: 3-4 anchors on one side, 5-6 anchors on the top.
DIY video tutorial on how to make a canopy
//www.youtube.com/watch?v=vGw9l1C-BjY
Alas, no comments yet. Be the first!