How do you build a house roof with your own hands? The answer to this question will be considered in this article. You will learn how to install the frame, how to block the roof, and what coating options exist.
For the construction of the roof frame, it is desirable to use larch or pine wood. It is believed that these are the most durable materials.

Boards and boards should be free of defects: cracks and chips, with a moisture content of not more than 15%. It is advisable to pre-treat the material with antifungal and refractory substances. Particular attention should be paid to the processing of the elements of the eaves, since the details there are practically not protected.
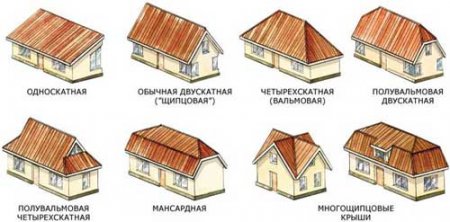
There are several options for roofs:
- Sling - is used to cover utility rooms, outbuildings and bathhouses.
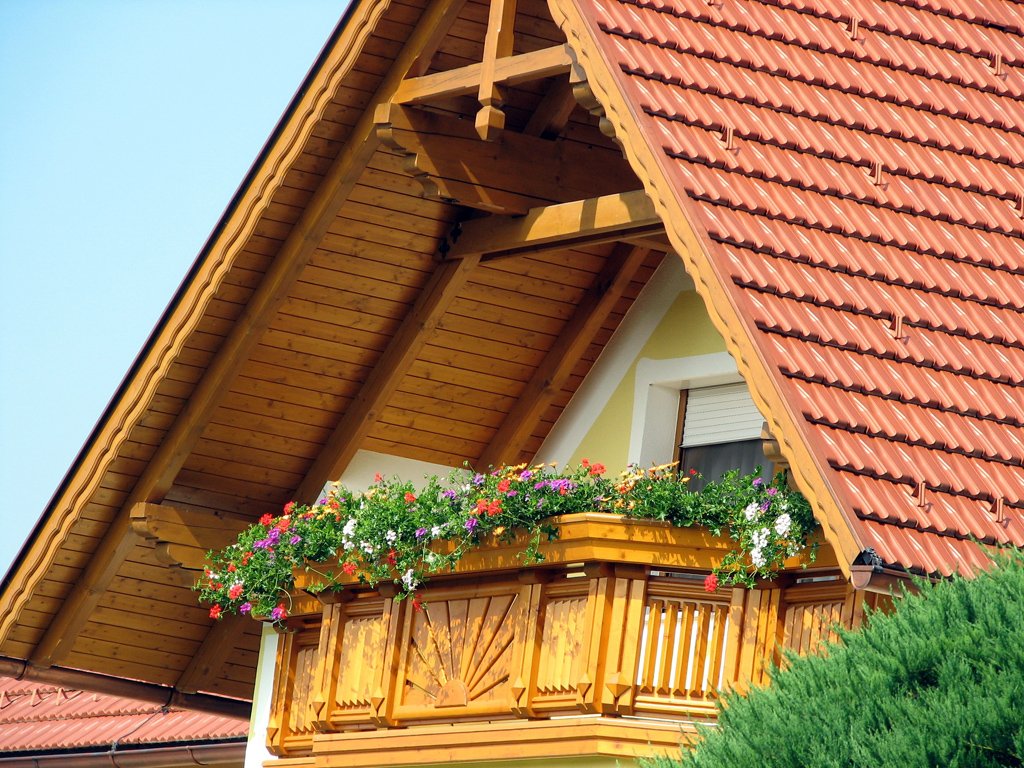
- Gable - consists of two slopes converging at one point. The most common option found in private homes.
- Four-sloped hip - consists of four slopes, two of which are triangular in shape, and the other two - trapezoid.
- Semi-hip - a hybrid of a four-pitched roof in the lower part, and a two-pitched roof in the upper part.
- Hipped - four identical slopes, in the form of isosceles triangles.
- A multi-gable pitched roof is a combination of a gable and hip roof.
Despite the variety of options, if you catch the essence of the construction of the roof of the simplest form, you can independently raise almost any option.
In general, the roof of the house with your own hands is built in several stages.
Content
Mauerlat Mount
The foundation on which the bulk of the structural load rests is called Mauerlat. Simply put, this is the foundation on which roof construction will take place. Beams should be used, the cross section of which is 15? 15 cm. They should be installed parallel to the roof ridge.
In order for the roof of the house to successfully resist winds and weather disasters, it is necessary to securely fix the Mauerlat beams. It is advisable to take care of this even at the stage of laying walls. To do this, starting from the upper 4th row of masonry, between the bricks (blocks), lay a thick wire. They call it - wire rod, it should be from each other at a distance of a meter.
The wire is fixed in the middle in masonry, and the loose-hanging ends should be left so long that they can subsequently be tied to a beam. If it is assumed that the house will not be plastered, then the outer edge of the wire should be mounted in the solution, so it will not be noticeable.
Please note that the minimum deviation of the Mauerlat from the edge of the wall is 10 cm. To protect the beams from decay, several layers of roofing felts are laid under them.
Frame mounting
When the construction of the roof is underway, it is absolutely certain that you cannot do without a solid frame.
The rafters attached to the Mauerlat are the frame. Remember that if the beams exceed 4.5m, then additional installation of runs will be required.
The optimal for the construction of a brick house are considered beams with a section of 7? 15cm.
The rafters are attached to the Mauerlat with a special neckline, which is fixed with nails of 20 cm. Nails should be hammered as follows:
- one is nailed through the rafters into the Mauerlat diagonally;
- one more is scored in the same way, but on the other hand;
- the third is from above, perpendicularly.
Thanks to this technology, the rafter does not move to the sides.
The upper ends of the beams are lapped to each other. The end of one beam should overlap the end of the parallel beam. They can also be fastened with either nails or a bolt.
How to make the roof more durable?
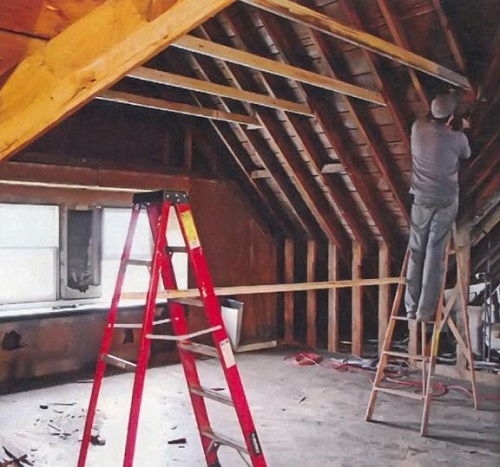
For structural strength and so that the spacer force acts less on the Mauerlat, the rafters should be fastened together with beams with a cross section of 5 × 15 cm. This structural element is called a crossbar. Thus, the length of the crossbar corresponds to the distance between the rafter beams that need to be connected. Fastening is done with nails.
Roof construction also involves attaching the filly to each of the rafters. In fact, this is a board with a section of 50 × 100 cm, which must be fixed with screws and metal brackets on one side of the rafter's leg. Its length should be calculated as follows: overhang length + 50 cm.
To make the roof of the house with your own hands built without unnecessary difficulties, it is recommended to pre-prepare the filly. To do this, on a board with a width of 15 cm, it is necessary to make a cutout with which it will be attached with a Mauerlat. It is necessary to make sure that all boards and rafters exactly converge with each other. Typically, these works are carried out before the construction of the rafters, so that subsequently the entire structure could be simply assembled.
At the stage of mounting the frame, the question often arises: how to build a roof at the right angle?
This moment must not be missed. The slope of the roof is selected taking into account the standards for the terrain. So, for cold regions with a large amount of precipitation, an inclination of 40-45 ° is considered optimal. Thus, snow will not be able to accumulate, thus avoiding pressure on the floors. At the same time, it is advisable to install the rafter legs at a distance of 1 m from each other.
In dry, hot areas, the smallest angle of inclination can be 3 °. In areas with strong winds, it is preferable to erect a roof with a slope of 20 °.
If we discuss in more detail: how to make a roof with the correct slope, then you need to refer to the rules that professional builders apply.
So. The angle of the roof can be measured using a special tool called the inclinometer. But before starting the measurements, it is necessary to calculate the required angle. Builders apply a special formula. Thus, the slope angle will be equal to the height of the ridge divided by the value obtained by dividing the length of the roof by two.
Crate
In order to block the roof, it is necessary to make a crate. For tiles, the crate is solid.
Boards with a thickness of about 25 cm, with maximum integrity, without chips and cracks will be required. Each length is about 2 m, i.e. equals two spans between the rafter legs.
Thus, the joints can only be on the supports, and the distance between them should not exceed 5 mm. The boards from which the ridge is formed should be located as close as possible to each other. Fastening is carried out with nails of 20 cm.
For each roofing material, its own version of the crate is selected. For soft, rolled roofs, the battens must be continuous. For slate, metal roofing - a discharged crate is suitable.
If necessary, you can make a double flooring. In this case, the first layer is laid as standard - parallel to the ridge. The second layer, respectively, is perpendicular, that is, along the descent.
Ventilation
In order to block the roof, only the crates are few. It is necessary to take care of its integrity during operation.
To ventilate the tiles, gaps should be left in the crate. Two to three ventilation ducts on each side. The beginning of the channels should be at the bottom of the overhang, and the end should be as high as possible. Width - about 5 cm. At the top, to exhaust the air, set the outlet under the hood.
Installation of droppers and lining
In order for the roof covering not to suffer from the effects of condensation, it is necessary to lay a lining layer on the crate. They mount it, as a rule, only at the edges where water can leak, that is, on the internal valleys, to the ridge, near the pipes.
The lining layer should be about 40 cm wide. The entire carpet is nailed or screwed at a distance of 25-30 cm. If you need to lay the second layer, then it is already placed on top of the first, nailed. The lap can be glued with bitumen glue.
The next step, before closing the roof, is the installation of droppers. These are metal plates that protect against moisture on the ledge. Planks should be nailed at a distance of 10 cm, overlap 5 cm. In the same way, drippers should be fixed on the ridge.
A flexible tile is attached to the plates, contributing not only to improving the functions of the dropper, but also improving its appearance. Self-adhesive plates. You must first remove the protective layer, and then stick to the ledge. For reliability, you can nail with nails.
Installation of tiles
As you know, there are several roof options. The self-built roof of the house involves an independent choice of tiles by the developer. But for each option - its own conditions and principles of installation. Consider the main ones.
Bituminous flexible tile
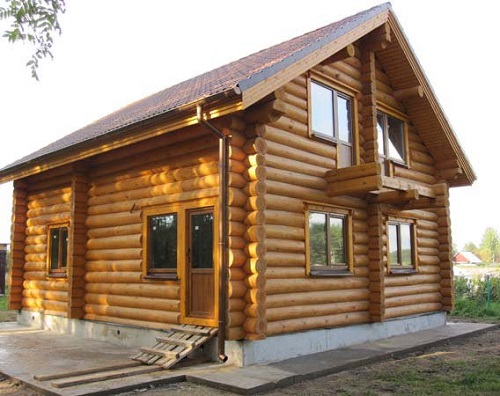
In order to make it easy to cover the roof, start laying it from the middle of the cornice, so that it can be evenly distributed. Remove the protective film from the shingle and stick to the base. Next, nail along the edges. It is advisable to use galvanized nails with wide hats. The protrusion should close the joints of the shingle.
If the architectural design assumes the presence of pipes, then special passage elements should be attached along the perimeter of the cut of the shingle.
At the site of the ridge, the tile is glued with an overlap.
If the pipe is brick and heats up, then a triangular bar will be right on the corner of the roof and pipe. The lining carpet is laid at a distance of 20 cm from the pipe, on which a special connector is worn. The cracks are sealed with sealant.
Metal tile
A discharged crate is laid under a metal tile.
The total amount of material required is calculated by adding the length of the ramp from the eaves to the ridge, overhang of the eaves and vertical overlap of the sheets.
The first sheet is laid and aligned on the ledge and end. The second is stacked on top. The third is on the side. Above the second is the fourth sheet. The whole structure is leveled and fastened with screws to the crate. According to this scheme, the entire roof is assembled.
The ridge strips and external corners are mounted with an overlap of 10 cm and are fastened with self-tapping screws. From the ends of the skate should be closed with caps.
We also recommend installing snow retainers. They are mounted parallel to the cornice, with self-tapping screws, directly on the roof covering. There are several options: plank, mesh, tubular. In regions with a lot of snow, it is advisable to install tubular snow retainers.
Ceramic tile
Covering the roof with metal tiles must begin from the bottom, moving up, and from left to right. The tile should be laid out in advance in small piles, five pieces each, which will be placed on the slopes. Thus, the load on the rafters will be distributed evenly. All tiles should be attached to the rafters with galvanized screws. Each sheet has special wells, that is, holes with which the sheets are attached to each other.
Cornice hem
Answering the question of how to build a roof of a house, one cannot miss the moment of hemming a roof.
The binder is carried out at the last stage. It is necessary that the walls have already been insulated, since the binder box is adjacent to them. Otherwise, you will either have to break the binder, or leave the wall section uninsulated.
It is advisable to make a binder of wood, so it is possible to avoid additional ventilation. The binder itself is a kind of box that attaches to the filly and the continuation of the rafters. The frame of the box consists of two boards. One goes from the edge of the overhang to the wall, and the second comes down from the rafters. It turns out that the boards are connected at right angles. The joints are fixed with screws or self-tapping screws, metal plates can also be used. Between the boards it is necessary to leave small gaps. The corners of the box are cut at an angle and fastened with metal brackets and screws.
Further, the bottom of the frame, along the entire length, is studded with boards. Since they are influenced by weather conditions, they should be firmly fixed, especially at the edges. Also note that the joints of the rows of adjacent beams should not coincide. Corners are filed at 45 °.
Roof insulation
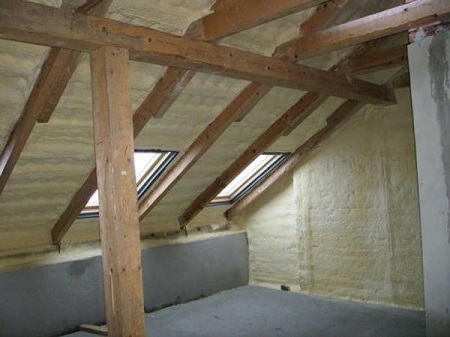
How to build a roof without worrying about insulation? This is a pretty important process.
There are several options: on top of the crate and inside.
If it is not intended to use the attic as a living area, then insulation can be carried out from the inside. In addition, this way you can hide the space between the rafters.
First of all, it is necessary to block the roof of the house with a waterproofing film around the entire perimeter. Since the rafters protrude on top of the crate, pulling the film with a cloth will not work. It is necessary that it densely covers all structural elements. Thus, in the corners between the crate and the rafters, on top of the film, wooden battens are nailed.
Further, between the rafters, mineral wool is nailed to the crate with layers. The plates of this insulation must be laid close to each other.
The next layer is a vapor barrier film, the lower edge of which must be attached to the rafters. Joints of vapor barrier and waterproofing films must overlap and be fixed with construction tape.
How to make the roof of the house warmer if you plan to use the attic?
In this case, the insulation and the film are laid on top of the crate and roof structures.
It is undesirable to use polyurethane foam boards, since this material is not able to fit tightly together.
It is safer to use mineral wool as one of the layers and be sure to use a waterproofing film. In fact, the principle of insulation works is not too different.
As you can see, the roof of the house with your own hands is not a long process, but painstaking. There are many nuances that must be observed for the long-term operation of the entire building.
We advise you not to save on building materials. Choose, perhaps, more expensive, but reliable design options. Take the board and board seriously. Pay attention to their integrity and quality. Study materials on how to properly build a house roof.

Alas, no comments yet. Be the first!