
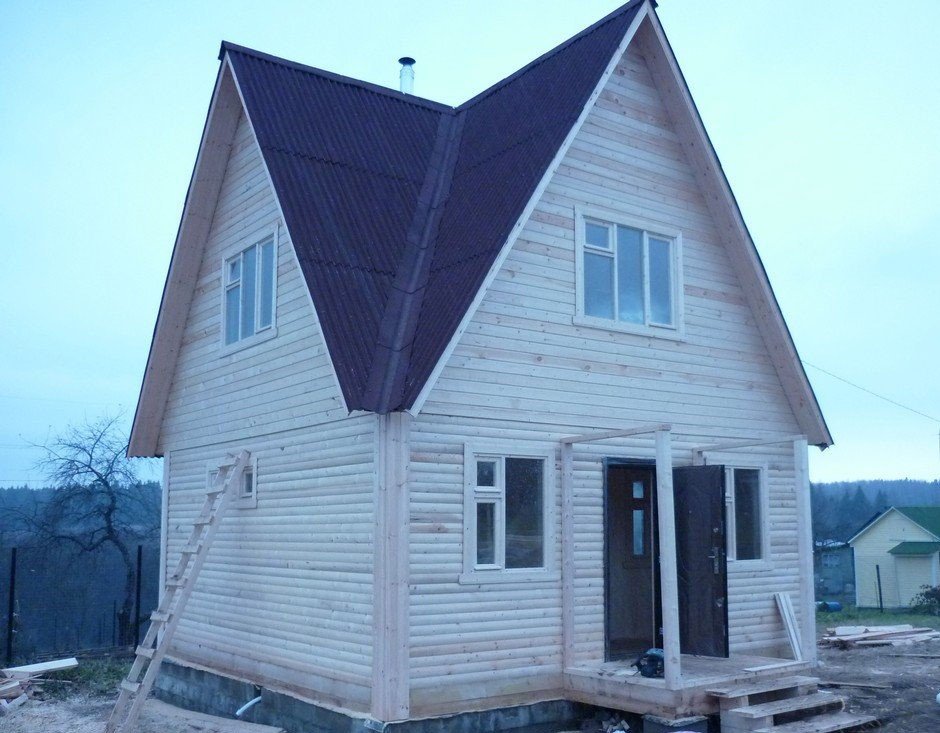
The more complex the roof structure, the more interesting it looks at the end of construction work and the more attention it attracts. Three-fronted roofs are perfect for such a description. The combination of two types of rafter system (the use of hanging and layered rafters) makes its installation difficult, requiring careful calculations. But having studied all the rules of the device, you can make a three-front roof with your own hands.
Content
general description
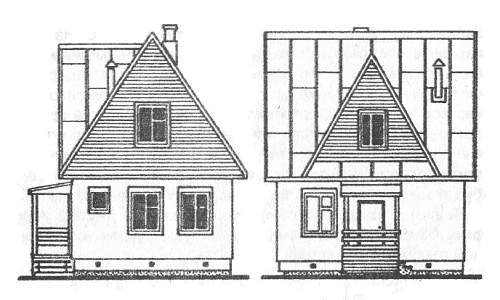
For a house with a square or polygon in plan, roofs with pediments are excellent, especially if there is an attic floor or outbuildings of different heights. Three-fronted roof will increase attic living space, providing her lighting from three sides of the world.
The complexity of organizing such a roof is that when designing, there is a main difference - the presence of endows. Other features include the presence of ribs, grooves, and pediments.
You can consider the three-front roof as a combination of hip and gable. As a roofing, you can choose any material. In particular, the use of a transparent roof is now becoming popular - this option is suitable for organizing lighting in the winter garden. But since the entire structure in this case is on a free review, it is important to correctly and beautifully process the material, it is possible to use colored coatings.
Design features
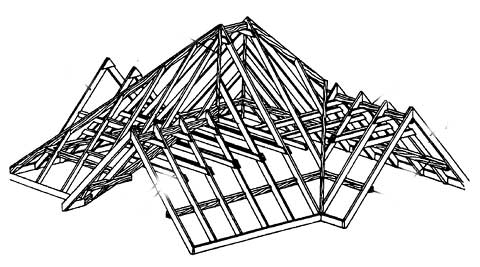
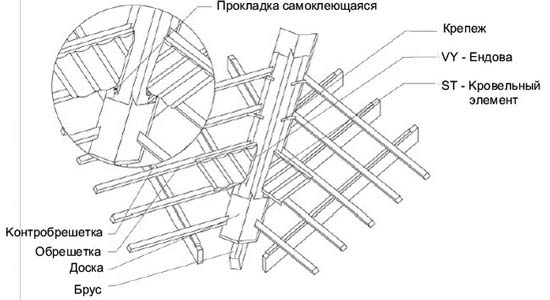
The supporting truss structure of a three-front roof can be made using the following elements:
- rafter legs;
- special ridge runs;
- puffs in large quantities;
- floor beams;
- racks;
- Mauerlat.
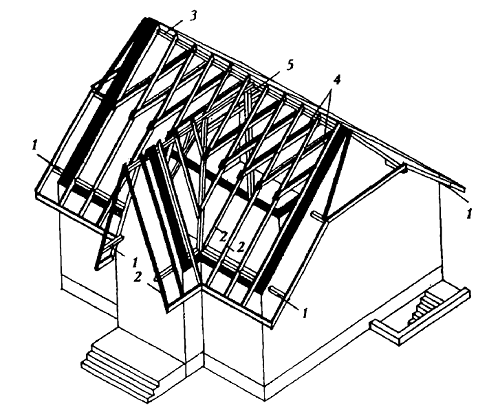
Mauerlat used to redistribute loads - this is an important component that can transfer pressure from the roof to the walls of the house. The rafters at the top should be joined using girders. They are made of bars, which also need to be interconnected. With heavy snow, wind or temporary loads, it may be necessary to use an additional intermediate run.
The calculation of the length of the rafters is affected by the fact that the length of the diagonal rafters is longer than that of the nasal rafters. With insufficient size, you can resort to building.
When installing the rafter system, the main difficulty may arise - the assembly of the node in which the junction of the oblique elements with one of the ends of the ridge, and the diagonal ones with the other. It turns out the simultaneous joint of the three rafters. An important condition for working with this node is to maintain perpendicularity between the central rafters of all slopes and the ridge beam.
When installing any roof, do not forget about the organization of hydro and vapor barrier. These measures will protect the tree from unpleasant influences, prevent the formation of fungus and mold. The insulation is laid so that its direction is perpendicular to the roof slopes. Film waterproofing stack, leaving a small overlap to exclude the possibility of leakage. But a big difficulty will appear with the device waterproofing valley. The installation of these places is complicated by the fact that there is a retention of snow, and hence the accumulation of moisture.
Among the important stages of installation of the rafter system can be called the device of the lathing, laying of thermal insulation and roofing material. In this case, the type of lathing is determined by the selected roofing.So, for a metal tile, a crate device from edged boards will be needed, unedged boards will be suitable for profiled metal sheets. But for bituminous tiles and other soft coatings, it is best to use a continuous crate of sheets of plywood or OSB-plates.
Design calculation
The design calculation is based on the preparation of a small roof plan in accordance with the measurements made. To do this, you need data on the length of the roof perimeter. It is measured by the existing walls. To determine the required length of the rafters, they are first determined with a bias. Moreover, the larger it is, the faster the snow will melt, but the greater the wind load will fall on the roofing system. Therefore, the optimal value is a slope of 30-45 degrees.
At the calculation of the length of the rafters take into account the overhang of the roof for the walls of the house. It should be at least 50 centimeters. Such an event will protect the walls of the house, the foundation and the blind area from precipitation coming down from the roof. After these parameters are selected, the rafters can be calculated using the Pythagorean theorem, where they will act as hypotenuses. And all the necessary legs for this can be found by measuring.
To determine the required cross-section of the rafter legs, as well as the need for additional stiffening ribs, loads are calculated - temporary, snow and wind. This can be done using the appropriate joint venture or using calculation programs that are freely available on the Internet.
Also, the cross section of the rafters can increase, provided that it is necessary to use several layers of insulation. This factor depends on the area of construction.
Mounting technology
After all the calculations are made, proceed to installation.
Stages of work:
- Mauerlat must be installed on the entire perimeter of the load-bearing walls. It is a beam with a section of 50x50 and will be the basis for supporting the rafter legs.
- To fasten the beam to the top of the walls, studs are used. They must be made of galvanized metal. The fixing of the studs is made in a reinforced belt.
- It is also recommended to strengthen the diagonal bars with the help of sprigs. Fastening to a Mauerlat bar occurs with preliminary special sawing. Instead, you can use the connection using metal plates, brackets and angles. The choice will depend on which option is more convenient for a particular case.
- The connection of the top of the rafters is made in the area of the ridge.
- For the installation of the ridge, a beam or the upper two boards of the crate are used.
- The hanging rafters are supported by the upper strapping element and the run. This process is reminiscent of wedging in a layered rafter.
- It is possible to use a rafter cutting, but this will lead to an increase in labor costs. As a replacement, it is allowed to use metal fasteners consisting of corners or plates. Strengthening the system stiffness is due to the fact that they provide a solid connection.
The use of notches, spike nests, and other groove mounts for installation can lead to a gradual weakening of the elements of the rafter system.
- Using metal fasteners, you can solve the problem associated with increasing the length of the rafters by building and joining them. This method will also help in crossing the beams, as well as solve other issues related to the conjugation of frame elements.
- When building a gadget, it is important to comply with all requirements.
Endov device
- For the internal endovye device, it is recommended to use metal for mounting the gutter. This will prevent improper laying of soft material and its damage.
- Installation of the gutter produced on the floor before the crate is laid. Before installing the valley, it is necessary to provide a flooring from an antiseptic board under the gutter. As a material, boards with a width of 30 centimeters are suitable, the thickness should be equal to the thickness of the counter-lattice.
- Next, the edges of the gutter are bent at a right angle.
- After that, it is necessary to bend the trench relative to the axis of the center. The angle should slightly exceed the value of the valley angle.
- The installation of the gutter is made, starting from above and moving down. Trimming occurs after laying on the surface.
- The overhang on the gutter is made equal to 8-10 centimeters to ensure reliable fastening of the edges. The flanges are bent inward.
- The gutter is mounted on the flooring using brackets or nails, the size of the latter should be 2.8x2.5 mm.
- To exclude the possibility of longitudinal displacement of the gutter, it is necessary to fix it on the floor with nails. The distance from the edge should be equal to two centimeters.
- When performing the next overlap, it is made at least ten centimeters. During installation, it is necessary to ensure that the transverse ribs are aligned.
- It is important to control the quality of the joints, in order to subsequently eliminate the possibility of leakage.
- The joints are treated with a primer. After that, the valleys are covered, protecting from atmospheric influences, to allow them to dry.
Alas, no comments yet. Be the first!