
A roof of this type differs in that it has slopes in place of the gables. Its design depends on their size, which can vary greatly in one direction or another. A hip roof with your own hands can only be created if you have special skills and enough experience in the field of construction. Of course, even a beginner will sooner or later comprehend all the intricacies of the construction of structures of this type, but it will take a lot of time and materials.
Content
Types of Hip Structures
Similar designs are of several types. The roof can be attributed to one of them based on the shape of the hips. Hips are small slopes that are located at the ends of the roof. Below are the most common types of roofs:
- Semi-hip roof. It differs in that the hips cover only part of the pediment, so their size is small.
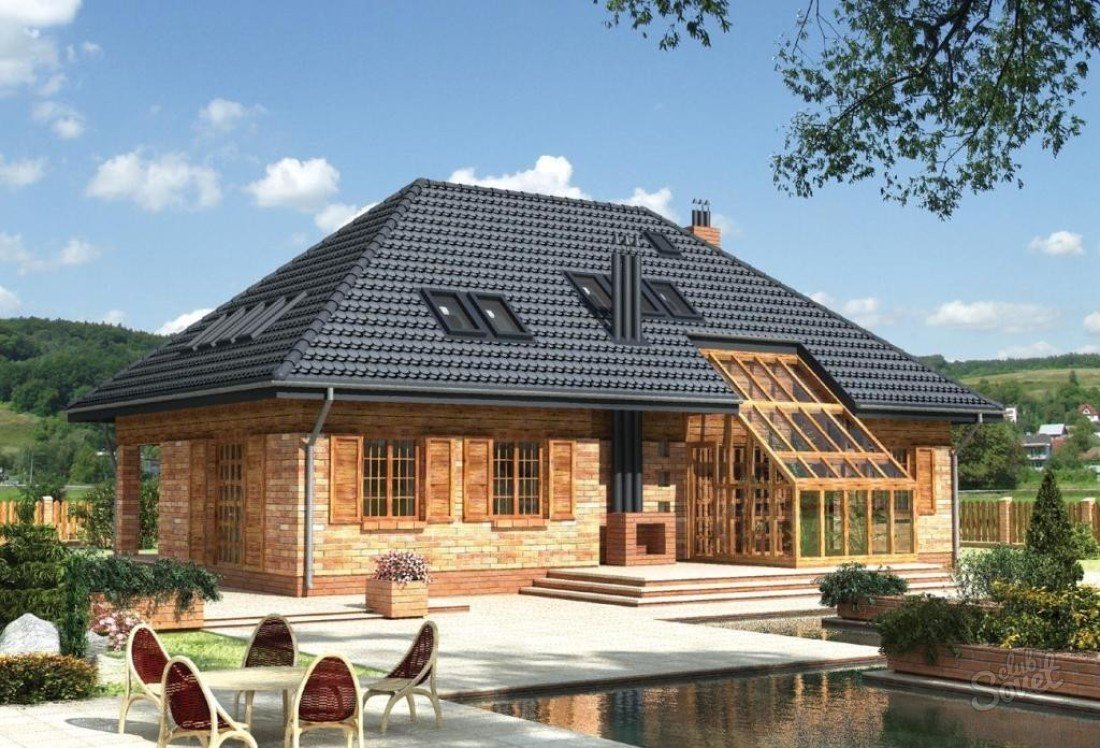
- Hipped roof. This is a special case of a hip roof, because its design consists of 4 equilateral triangles. Obviously, such a solution is ideal for square buildings.
- Broken roof. This design is most difficult for independent execution. The slopes here can be of various sizes and shapes, so the preliminary calculation is already a difficult task, and the practical implementation is available only to specialists.
Roof Marking

The main difficulty in creating a design of this type is the rafter system. If in the usual case it is assembled from the same rafter legs that rest on the ridge beam, then for a hip roof it is not so simple. The lengths of the rafters are different, because the side slopes are smaller, and rely on diagonal structural elements.
Before starting work, you need to prepare all the materials and mark out the main components, which include:
- Little horse. This element is represented by a ridge beam, which should be located in the center of the building, and is necessary for fastening all other wooden elements. The ends of all rafters rest on it, so the beam should be strong enough (Fig. 2, element 3). In the figure, the skate is depicted short, but in general it can be long or absent.
- Corner rafters (element 1). They are also called nasal. These elements are fixed to the ridge beam, and the second end of the rafter will go beyond the construction. Usually for the manufacture of such rafters they take the same beam as for the ridge.
- Central rafters. They rest on the ridge and on the Mauerlat, forming side slopes of the roof. On the hips, such rafters are not used or one is used (element 4).
- The intermediate rafters are mounted to the ridge and go down the slopes (element 2).
- Short rafters (element 5) can have different lengths, which depends on their location. They rely on corner rafters and Mauerlat.
The exact calculation should precede the markup, since only on the basis of it it makes sense to create a drawing of the future design. First note the center line running along the top of the walls. Then, the thickness of the bar for the ridge is calculated and the relative position of the parts of the rafter system is noted. This can be seen in the figure below.

If the rafter system is created from identical boards, for example 15x5 cm, then the resulting structure will have a small air gap between the roof material and the rafters. This is achieved due to the fact that the upper parts of the rafters will be higher than the angular ones.

The upper roof trim is made of timber, the thickness of which is equal to half that of the ridge beam. After that, the measuring rail is applied to the previously marked line at one end, and the other is located along the side wall, which will allow you to get the installation site of the intermediate rafters.
The length of the roof overhang is calculated simply. First of all, it is necessary to install the rail so that its one end is on the external contour of the wall, and the second - on the formed overhang. Then the measuring rail is moved to the side wall, where the rafters are also marked. Exactly the same actions are performed at the other corners to get the location of the central rafters, as well as the ends of the ridge.
Knowing the location of all the roof elements in the horizontal section of the structure, it will be easy to carry out the calculation. In this case, the Pythagorean theorem is used. It applies to right-angled triangles, which are formed by rafters and the normal from the place of their attachment to the floor of the attic, i.e. height above the Mauerlat plane.
Using a metering rail
Measurement rail is a home-made measuring device, which in case of installation of a hip roof can seriously compete with various roulettes and other tools. This element is best made from thin strips or plywood, the thickness of which is selected at least 5 cm.
Since the length of the rail is large enough, you should not choose a thick blank for its manufacture. This will lead to the fact that the weight of such a tool will be large, which means that working with it will be inconvenient. In this case, it makes sense only the width exceeding the above value, since from a large distance the markings on the rail will be poorly visible if you make it thinner.

In the process, all dimensions measured to install the roof elements are applied to the rail, so roulette is required only a few times. In the future, the same distances will be laid off already with the help of measurements. As a rule, when performing such work, they are guided by the following table of coefficients of the ratio of the location of the rafters and their length.
Knowing that the length of the leg of the rafter node is chosen equal to the product of the coefficient by the projection of the leg, all operations can be performed much faster.
For clarity, an example of calculation will be given below. First you need to measure the horizontal projection of the rafters. In the table, the desired angle of inclination of the structural element is selected and multiplied by the measured value. Then, the rafter length is calculated from the sample on the ridge to the sample at the attachment point, after which the overhang is calculated. The latter is equal to the product of the horizontal projection of this element by the correction factor. You can also use the Pythagorean theorem, where the lengths of the legs are the vertical and horizontal projections.
Trim elements
The position of the roof corner elements and the intermediate rafters is marked after the previous stage has been completed. The figure below shows an angled rafter (top view). It must be remembered that the rafters on the one hand have an oblique cut, which allows them to be securely fixed to the ridge. The beam itself has a double undercut, designed to install corner elements.
You can calculate the rafter rafter in two stages. First, the length of the element is measured from the angle of construction, then, using the Pythagorean theorem, we obtain the desired value, which is multiplied by the correction factor.
Hip Roof Features

When creating a half-hip roof with your own hands, you need to remember that the ridge and the rafters must be made from the same timber or board. Those. they cannot have a different section, since this will only complicate the design. The thickness of the remaining rafters is also selected taking into account this moment, because otherwise there is a certain risk that in the future there may be a skew of the supporting structures, which means that even with the ideal state of the roofing cake, it will be necessary to carry out major repairs.
Fastening of short rafters is made to the slant, and not to the ridge beam, which is another difference from conventional roofs. It is necessary to observe the inclination angles of all elements. For inclined rafters, this parameter is exactly the same as for other types of roofs. When comparing with other types of structures, another difference is revealed. It consists in the fact that the height of the hip roof should not be too low.
A low hip roof can also be built, however, in this case, additional support elements that will support heavy structural elements will be required. Obviously, you will need to use additional materials, and the amount of work will not be much less.
The fourth important point is that only dried coniferous wood can be used to create the base of such a roof. To increase the service life of the future design, special formulations can be used. For example, impregnation with flame retardants can make a tree non-combustible, which means that the roof will not cause a fire, because exposure to open fire will only char the material. The second type of impregnation is antiseptics, which turn attractive wood for beetles into an inedible product for insects. Moreover, even a fungus will not be able to "master" the soaked timber.
Installation of the rafter system
In general, the design is 4 slopes. Two of them are usually trapezoidal, and the other two are triangular. The first stage in the construction of roofs of this type is the installation of roof trusses. Here, a lay surprise awaits non-specialists: the ridge and the diagonal rafters are made from the same board as the rest, but paired. The load on these elements is much higher than on conventional rafters, therefore, reinforcement was required.
Double rafters are not only a tribute to the increased load, but also a tough need. Only in this way can an inexpensive element of the desired length be obtained. On the other hand, using the same material to create all the elements greatly simplifies the installation of the roof.

Under the long rafter leg, supports can be installed, which are a brace or a rack of timber. Paired boards can also be used, which will rest directly on the floor layer. Of course, do not forget about the need to create a wooden lining for such a rack and a layer of waterproofing material.
As a rule, the strut is installed at an angle of 45 to 55 degrees. One part of it holds the rafter structure, and the other rests against the bed. The angle of installation of the strut does not play a special role if it is in the specified range, and the only requirement is the ability to support the rafters in the place where the greatest load is concentrated.
Rafter mount
The main problem of many home-made roofs is reliability, since non-specialists make stupid mistakes, from which we will try to protect you by talking about the technology of fastening the rafters.
In general, structural elements can be connected using nails, special pads, bolts and studs, however, their exact number, type and location must be checked by calculations, because otherwise heavy snowfall or wind can very tactlessly indicate to you the mistakes made.
The rafters are fastened to the Mauerlat using a support bar or due to the presence of a special cut that allows you to hold the element in place.
Even securely fixed rafters are not a guarantee of the durability of the roof, if the Mauerlat is not fixed correctly, therefore this point also needs to be controlled.
Mauerlat Mount
In fact, a Mauerlat is a wooden beam, the task of which is similar to the task of the foundation of a building, only the scale in this case is different. We are talking about the distribution of the load from the roof over the upper part of the walls of the building so that there is no overvoltage. Mauerlat also works to compensate for outward impacts.
The type of Mauerlat depends on the type of house. If we are talking about a wooden log house, then the upper crown is selected for the role of this element. In other cases, a Mauerlat is a beam that can have a section from 100x150 to 150x150 or connected boards 50x150.
The first thing to do before installing this element is to waterproof it. In this case, several layers of lining ruberoid are sufficient, which has shown itself well in such situations.
The second important point is the creation of a reliable mount for the Mauerlat, which can be obtained in several ways:
- A few rows to the place of installation of the timber, a group of wooden blocks is embedded in the masonry. Their number depends on the perimeter of the roof and the expected load on the Mauerlat. These small elements and the beam base are connected using brackets, forming a reliable mount.
- At the final stage of wall construction, studs with a diameter of up to 15 mm are mounted in the masonry. They are used as clamps for Mauerlat. The distance between the studs should be from 1.5 m, and the depth of their laying - several rows of masonry.
- A steel wire is embedded in the wall, the ends of which must then be tied around the Mauerlat. The number of such tabs should be no less than the number of rafter legs.
- If we are talking about buildings made of gas silicate or foam concrete blocks, it is best to make a reinforced concrete armo-belt. During its installation, threaded rods are also installed.
In this article, we covered almost all obscure points, leaving behind the scenes only the technology of connecting rafters. This was done intentionally, because different options can be used in different situations, and their advisability should be decided by the specialist who develops the roof structure.
Alas, no comments yet. Be the first!