
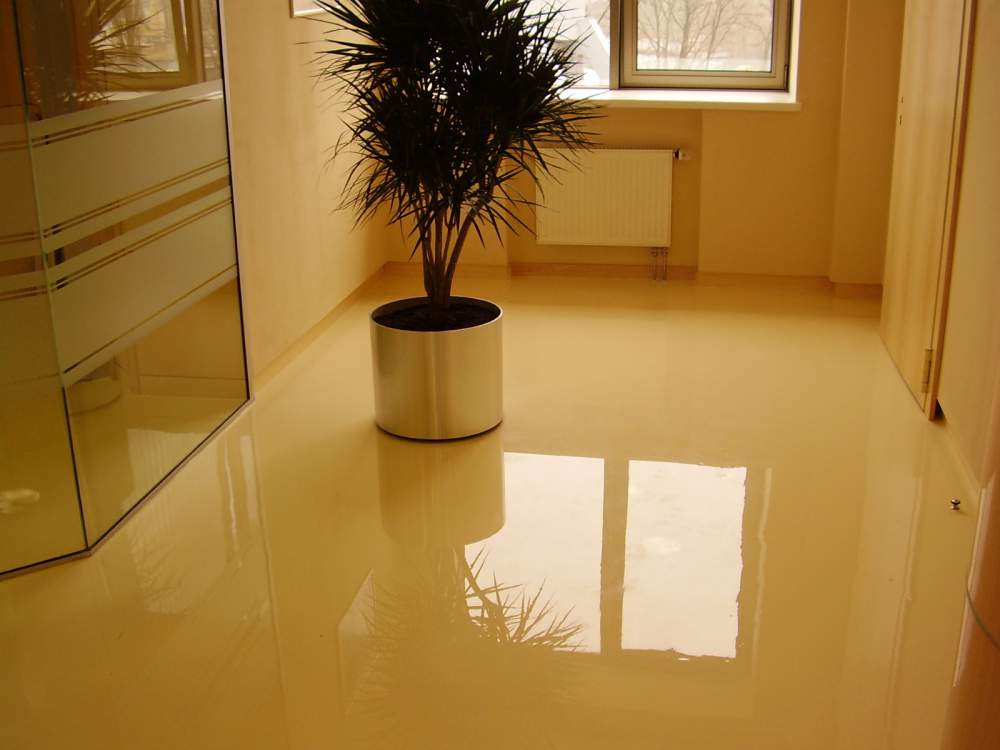
The floor in the house should not only provide thermal insulation, but also serve as an additional element of the decor, be smooth, without indentations or waves. The best option that meets these standards is bulk floor. With your own hands, it is quite possible to complete the filling work. Before starting, you should study the features of the materials, the nuances of the preparatory work and other points.
Main varieties
Bulk flooring is done simply if you know the characteristics of the composition, varieties and principles of working with different mixtures. There are two main types of materials for such floors: mineral and polymer. The first are a classic material, which mainly includes cement and a small amount of auxiliary components. Additional substances give it plasticity and allow you to easily smooth the surface before finishing with decorative materials.
The mineral mixture can be draft and finish. The first is used to eliminate minor flaws. The layer thickness should not exceed 2 cm. Often, roughing is used to level the floor after an unsuccessful screed. Finishing can be used as the final option before decorative finishes.
Mineral compositions are easy to use, inexpensive, and during installation they provide an opportunity to correct minor flaws. Polymer mixtures contain various polymers, provide a good result.
There may be several types:
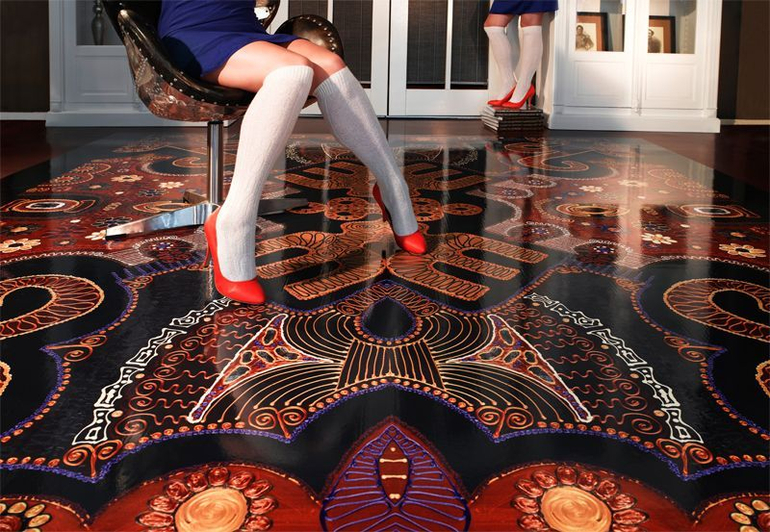
- Epoxy are used for residential buildings, apartments, less often for industrial premises. Due to transparency, they are very popular because they allow you to create an unusual floor by coloring the inner or outer layer.
- Polyurethane mixtures are considered the most durable because they can withstand the load, as well as exposure to chemicals.
- It is rather difficult to use methyl methacrylate materials without experience.
The choice of composition is carried out taking into account the initial state of the sexes, material capabilities and skills of the person who will perform the work.
Preparing for pouring
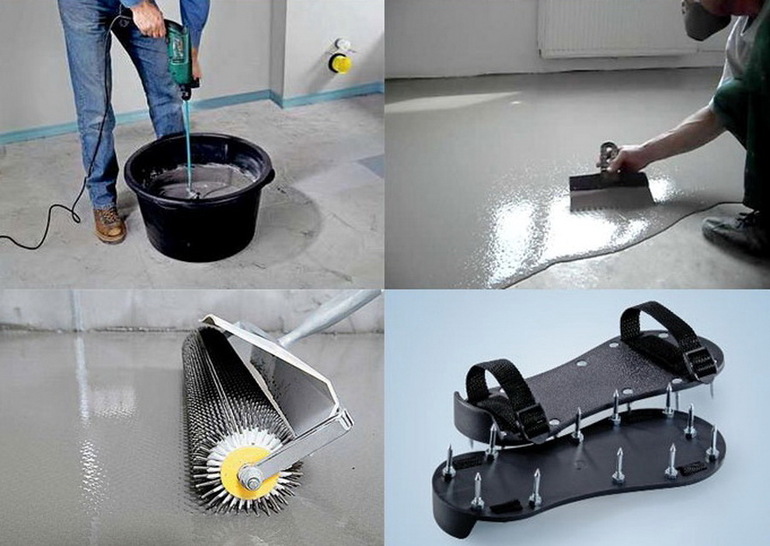
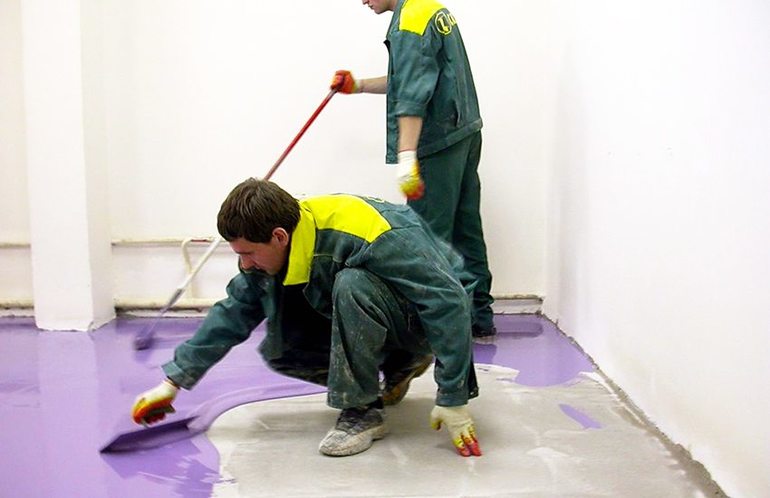
It is not difficult to make a bulk floor on your own, provided that you know the process and the nuances of preparation. You will need the following tools: plastic or galvanized container for the preparation of mortar, a device for leveling after pouring, a construction mixer for thorough mixing, a laser level, point beacons, a needle roller and special shoes for moving around the floor, called spray guns.
The next step is to prepare the surface for pouring. The base must be completely dry, but a little moisture is allowed, not exceeding 2%. In addition, the base must be tight so that the solution does not pass into any gaps or gaps. Do not pour the floor on a newly laid screed, cement or concrete. Coverage must be at least a month.
After this step, thoroughly sweep the floor, remove any grease or oil stains with the solvent. These deficiencies can adversely affect the strength of future coatings.
Do it yourself
The advice of professionals will help to make the bulk floor correctly. A beginner should make a step-by-step instruction for himself, which will facilitate the work and will not allow you to confuse the stages. The following sequence is recommended:

- Take in advance a prepared container for kneading, wear gloves.They are especially necessary for working with compositions containing cement, since alkali forms when mixed with water. The substance may cause allergies and irritation of the skin.
- Carefully read the instructions for packaging with dry composition. Each manufacturer indicates the temperature of the water and the amount needed for kneading.
- After that, pour the required amount of water into the container and gradually add the dry mixture.
- Mix everything with a construction mixer until a homogeneous mass is obtained.
- The time during which it is necessary to use the mixture ranges from 40-60 minutes, depending on the manufacturer. During this period, work must be completed.
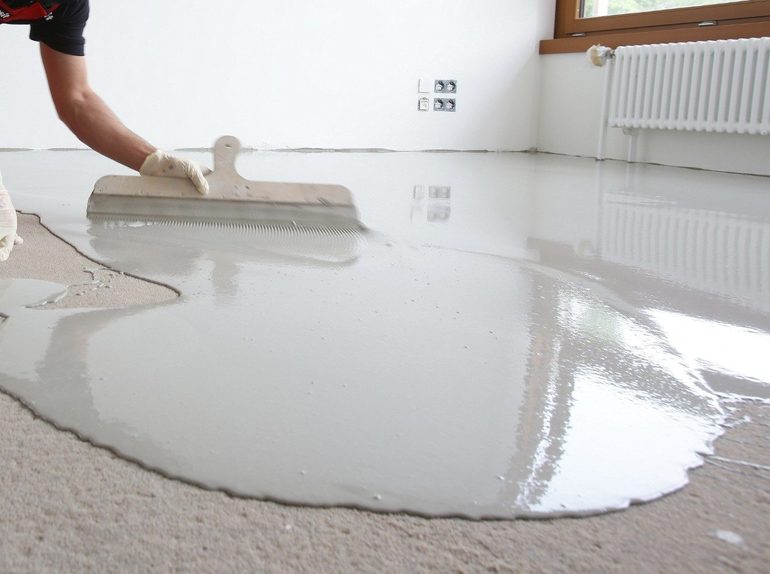
- Next, fill the floor using a laser level to determine the thickness of the required layer.
- After distributing the composition, it is necessary to put on special shoes and use a needle roller to level the mixture more carefully, as well as to expel air bubbles that have fallen during kneading.
The maximum drying time of the coating is 10 days. This time is enough.
It is worth remembering that there should be no drafts in the roomas this may cause delamination of the bulk floor. After drying, the surface is ready for decorative finish.
Alas, no comments yet. Be the first!