

Finishing apartment renovation, many, as a rule, start decorating. Installing baguettes on the ceiling is one such point. But not everyone knows how to glue the ceiling baseboard correctly. This article proposes to consider step by step the entire process of decorating joints between the ceiling and walls. You can do this yourself and without outside help.
Content
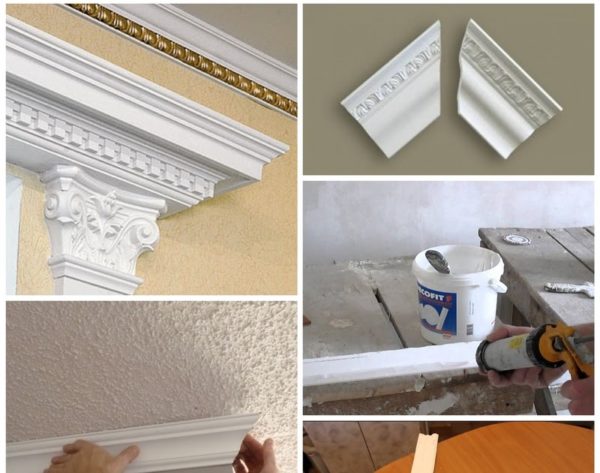
Choosing a ceiling baguette
First you need to determine the material of the fillets, they are of several types:
- from extruded polystyrene foam,
- polyurethane
- from injection foam
- flexible, used on curved walls,
- plastic
- gypsum
- wooden.
Read more: How to arrange a sofa and chairs (40 photos)
In appearance, fillets come with or without a decorative pattern. The pattern is quite difficult to adjust at the joints. The most common option is polystyrene baseboards without a decorative pattern. They are most often mounted independently.
Necessary tools
To carry out the work, the following tools and materials will be needed:
- a construction knife or a separate hacksaw blade for metal,
- long rule
- sharp metal trowel,
- soft spatula
- water based acrylic adhesive,
- acrylic putty.
A miter saw is ideal for trimming fillets. Those who do not have it will have to use a construction knife or hacksaw blade.
Marking of attachment points
Walls and ceiling must be pre-aligned. The section of the wall on which the baguette will be glued must be prepared. It must be wiped off dust and must be primed.

The next step will be the marking of the walls and ceiling. It is made very simply. The baguette is precisely applied to the place of its future fastening. Along both edges, straight lines are drawn with a pencil along the wall and ceiling.
Read more: Beautiful bedrooms - 70 modern photo ideas
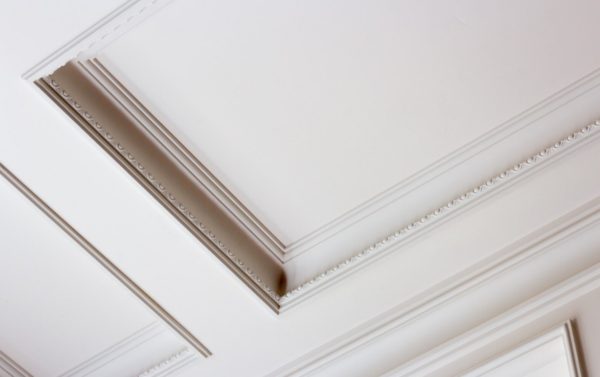
This is done around the perimeter of the room. Lines on adjacent walls in the corners will connect and intersect on the ceiling.
End trimming
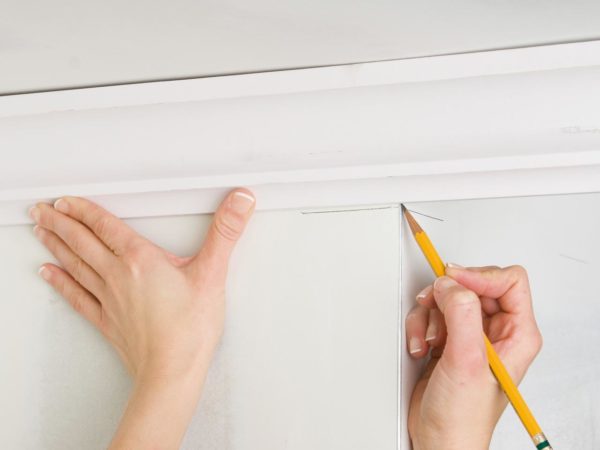
The points of connection and intersection of lines are of great importance. It is on them that you need to trim the fillets to connect them in the corners. To do this, the fillet is applied to its future mounting location, right next to the opposite wall.
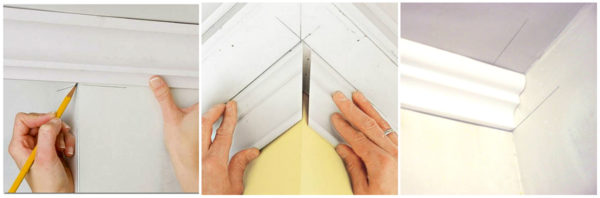
At the top edge, a point is marked at the intersection with the perpendicular line on the ceiling. The second point of the cut line will be the edge of the lower edge.
There is a certain difficulty in that the cut is not done parallel to the end, but at an angle of about 45 degrees. Moreover, its direction depends on the angle between the walls.
For the interior, as between the walls of one room, the cut should be such that the back of the baguette is longer than the outside, and vice versa, if the angle is convex, as between the room and the corridor, or on a square column, then the outside should be longer than the back.
Read more: How to visually make a low ceiling higher
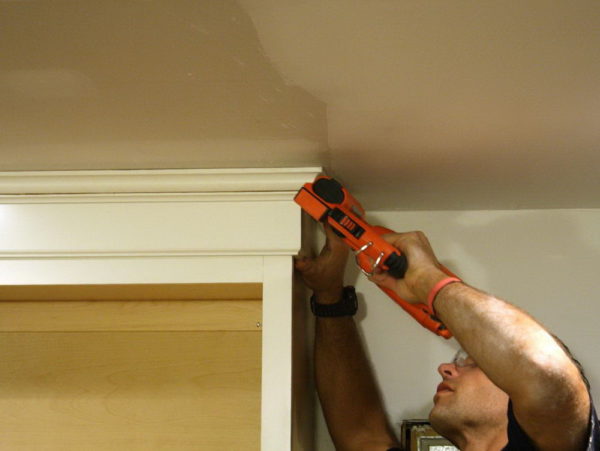
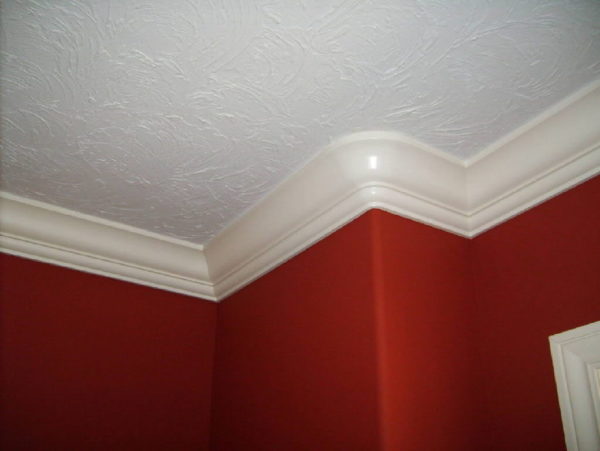
Mounting
Installation is best to start from the corners. Glue is applied to the contact planes of the skirting board. After that, he is pressed against the wall and ceiling strictly along the marking lines.
It is important not to put in much effort first. Using the rule, it is checked how exactly everything is installed. If there are slight distortions, they need to be aligned.
Only when the baseboard fits in its place absolutely evenly, is it already pressed firmly. The glue which has come out at the same time is removed with a metal spatula. The baseboard is rubbed off the glue with a damp sponge.
There is one secret to connecting butt joints. After measuring the length of the fillet, you need to cut it off about one millimeter longer. In this case, the inner corner of the end face of the knife is cut almost flush with the front surface.
The width of the remaining end should be about one millimeter. So the fillet will fall into place with a slight tightness and the gap between the strips will be completely invisible.
Read more: Fashionable chandeliers for the bedroom - 70 photo ideas
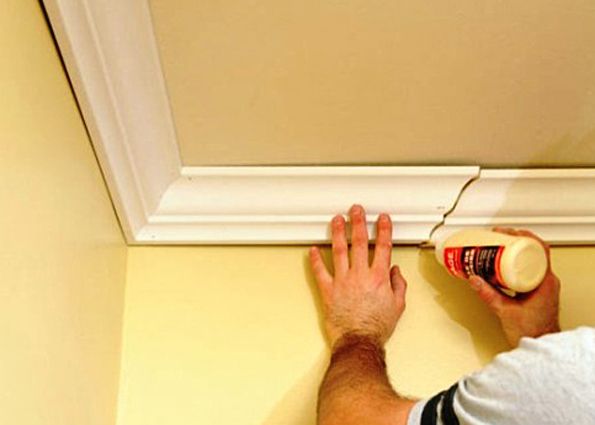
Sealing cracks
If small gaps remain between the profile and the ceiling or wall along the profile, they are filled with acrylic sealant. They also do with gaps at the joints of individual fillets. Such places before painting should be carefully puttied and sanded. After painting, nothing will be noticeable.
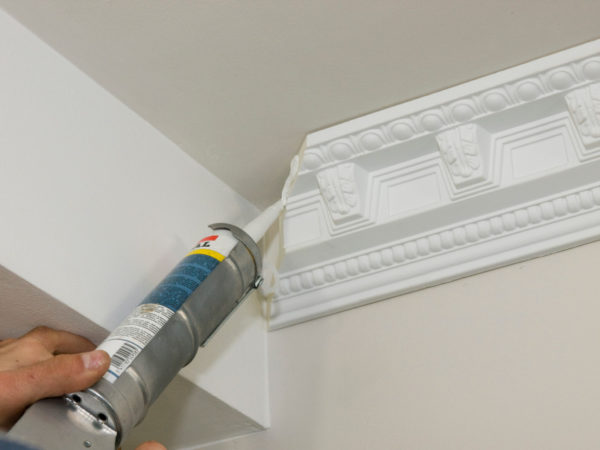
It is convenient to putty cracks with the help of rubber grouting trowels for tiles. They are soft enough and will not damage the surface. You can use any ready-made acrylic putty.
How to glue a ceiling plinth on suspended ceilings
Pasting with a plinth of stretch ceilings differs in that you need to glue the profile to the wall, and to the ceiling, it just fits snugly. This feature can be effectively used when painting.
In order not to stain the ceiling with paint, between it and the baguette around the entire perimeter, overlapping, double-folded ordinary A4 sheets of paper are inserted.
After a meter or a half has been painted, you must remember to pull the paper out a little, so that the contact between the paint on the baguette and the paper breaks.
If you do not do this on time and let the paint dry, pulling the paper, you can either tear off the baguette or break the paint layer on the skirting board. After applying the second coat of paint, which will be the last, the paper is completely removed.
The baseboard remains perfectly painted and the ceiling is completely clean.
Alas, no comments yet. Be the first!