
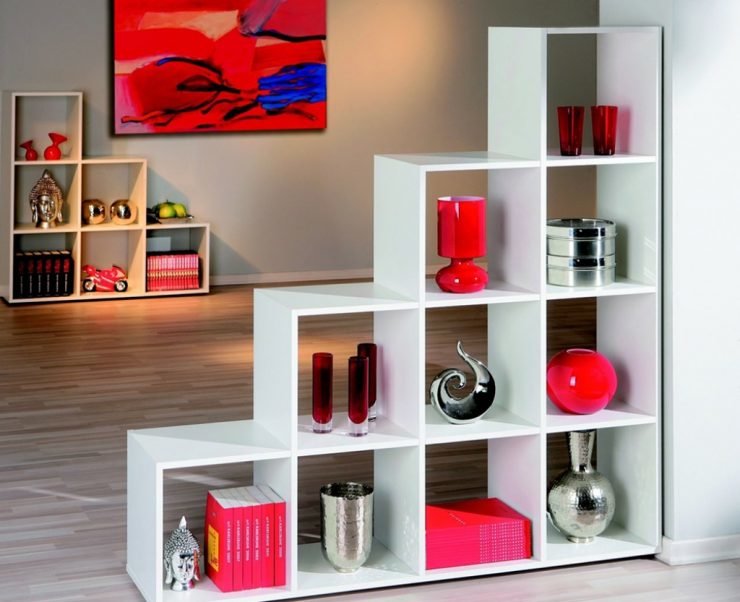
The freshness of the idea, the cleanliness and simplicity of the lines, the robust construction and design that can transform any room - these characteristics perfectly describe the rack that can be made with your own hands from plywood. How to make a rack with your own hands, as advised by furniture collector Vladimir Nikiforov.
Content
Design features and material required
Stable comfortable shelves are supported by simple reliable racks, no decorations, extra details, not even a backrest, so as not to spoil the ideal geometry - this is a feature and highlight of the proposed rack. Such products are surprisingly simple and functional: long and reliable fasteners are hidden inside and reliably connect the entire bookcase in a single design.
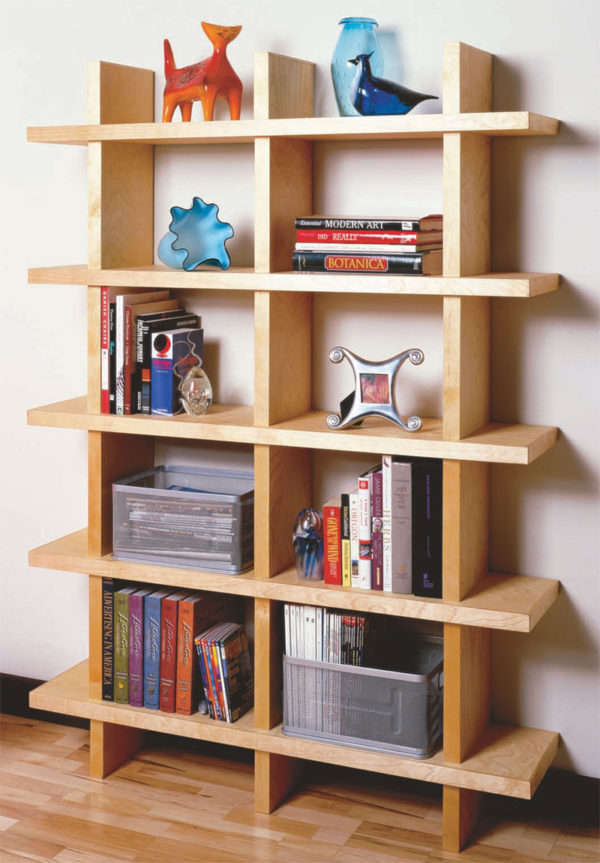 In this model there are no complicated figures for cutting, pastes, as in traditional carpentry. The finish is simple, as all the parts are sanded before they come together. Wood and trimmings are available in specialized stores.
For work you will need:
- Table saw.
- Saw blade dado.
- Jigsaw.
- Sliding miter saw.
- Planing machine.
- Jointing machine.
- Drilling machine.
- Hand drill.
- Milling machine and table for him.
If there is no sliding miter saw for wide transverse sections, you can use a slide for a table saw instead.
Read more: 12 ingenious solutions for storing shoes in the interior
Plywood Processing - Lamination
The base of this bookcase is laminated plywood parts. They make the shelves strong and stiff and give them the appearance of solid wood. This treatment also provides easy penetration and secure fit inside for threaded rods that connect parts together. You need to do this:
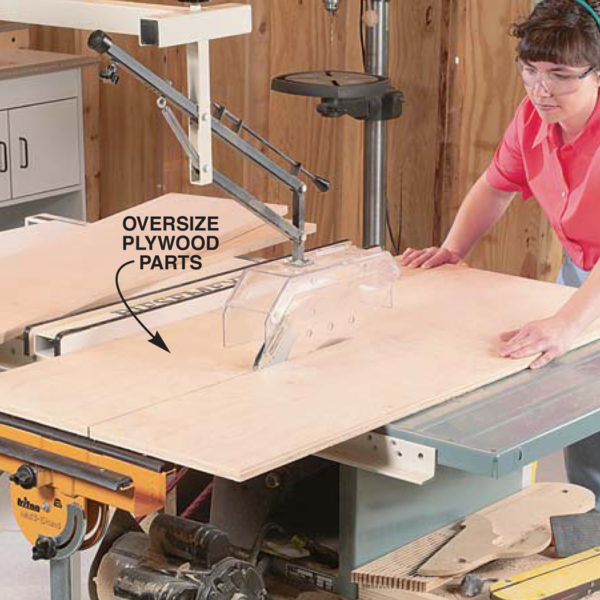
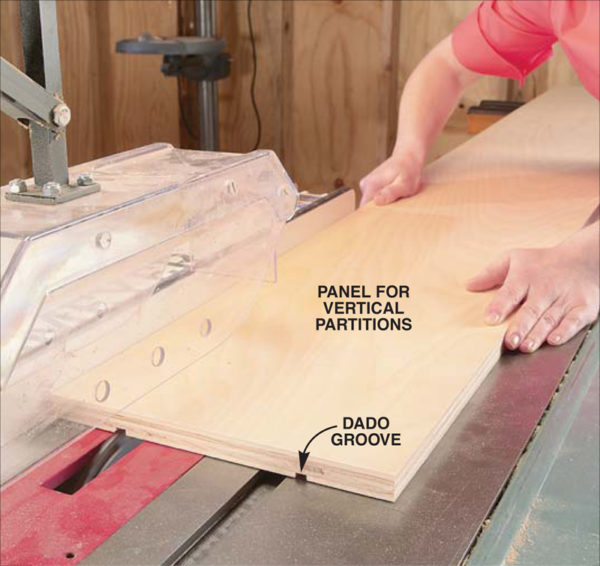
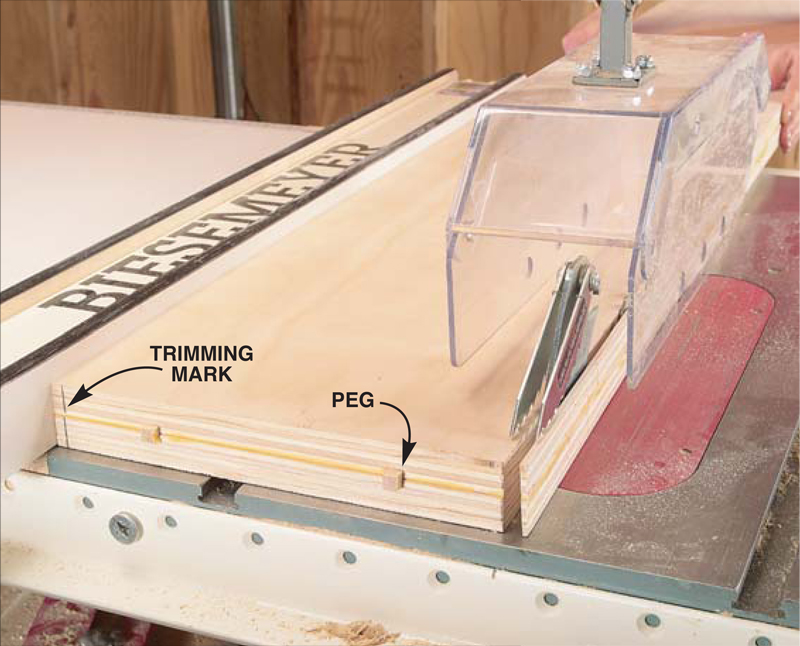
- Cut all plywood short parts. Leave the plywood for the vertical partitions (parts L, M and R) as long panels. Separate vertical partitions of the final desired width and length to cut later. Add 5 centimeters to the width and length of the shelves (Part A), which are also cut to the final size later.
- Make grooves from the end of each part. When 2 parts are joined together, these grooves form a hole for fasteners. Make as shown.
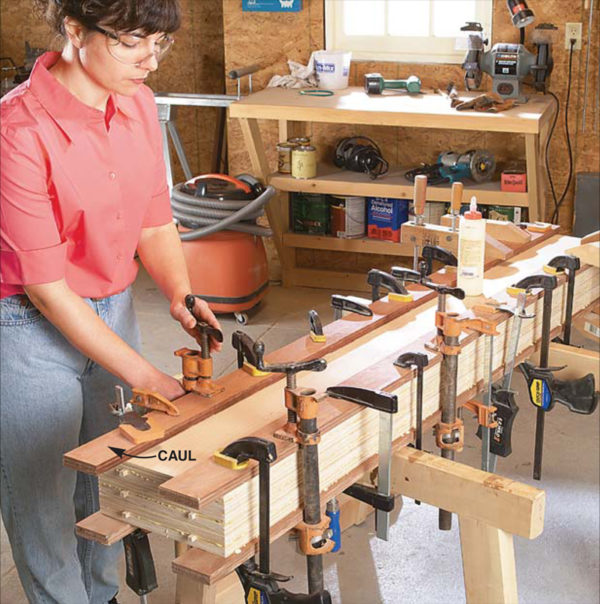
- Glue 2 panels together. For alignment, you can use pegs, which are then taken out or drilled.
Read more:The chic house of Enrique Iglesias and Anna Kournikova
You can immediately glue several panels by stacking them on top of each other. To dry, leave the panels under the press. You can use a special glue for wood that dries quickly. Leave to dry completely at the time indicated on the packaging of the adhesive.
Marking and cutting parts
It is necessary to measure and trim all the details:
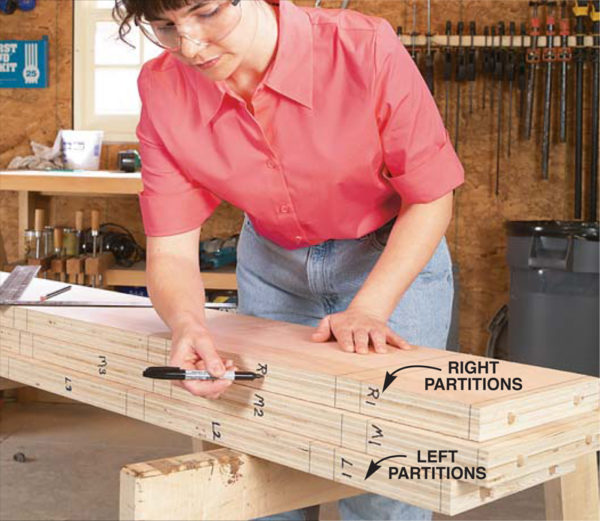
- Mark the desired length and width on the shelves. Crop. Scrape off glue from the ends of the shelves.
- Mark on the long side parts of the place where the shelves will be mounted. You can use the markings as shown.
- Cut the long panels in half, leaving gaps to the desired size.

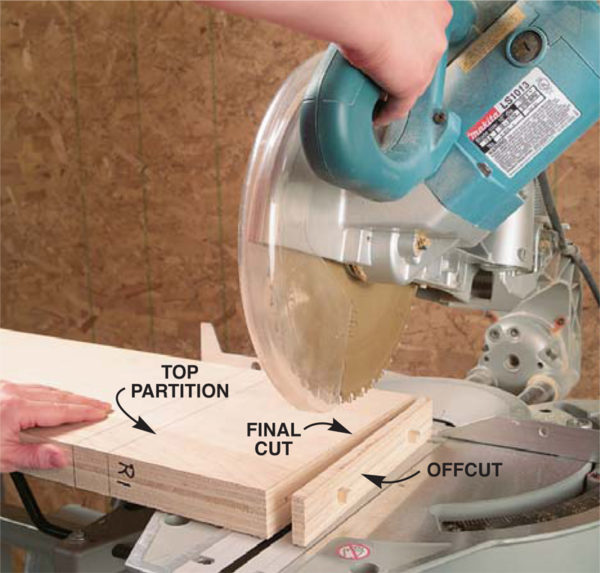
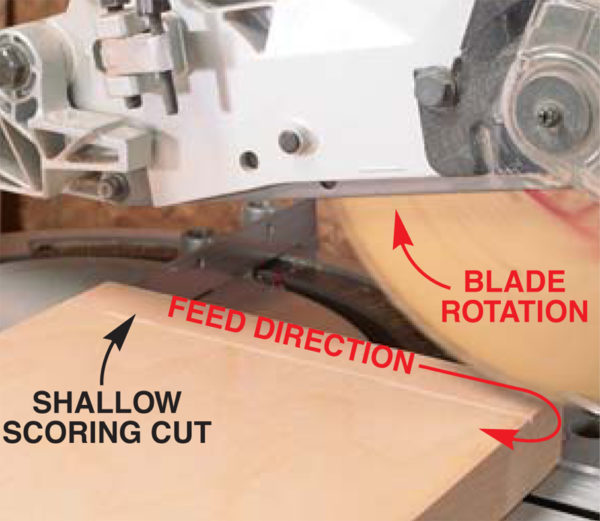
- With a sliding end saw, trim the parts to the desired length.
Read more:Where does Boris Korchevnikov live (photo)
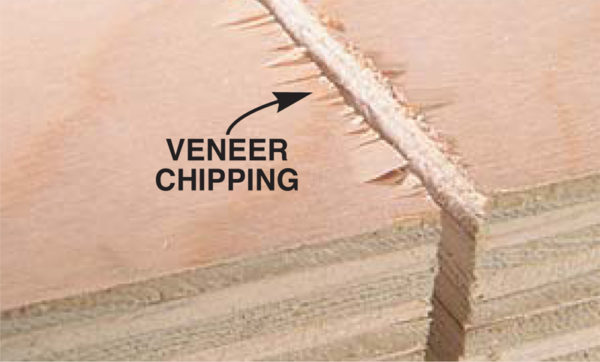
To prevent chips, parts must be pre-treated. It should be cut every 3-4 cm in depth, then cut in the desired direction in parts.
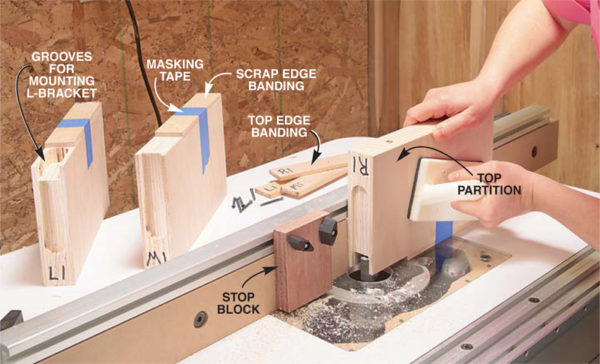
Facing parts
To make plywood panels look like pieces of wood, you need to make the facing of the ends.To do this, cut a thin, long edge a little wider than the width of the parts.
- Attach the edge of the desired length and width to the ends. Use sealant for protection.
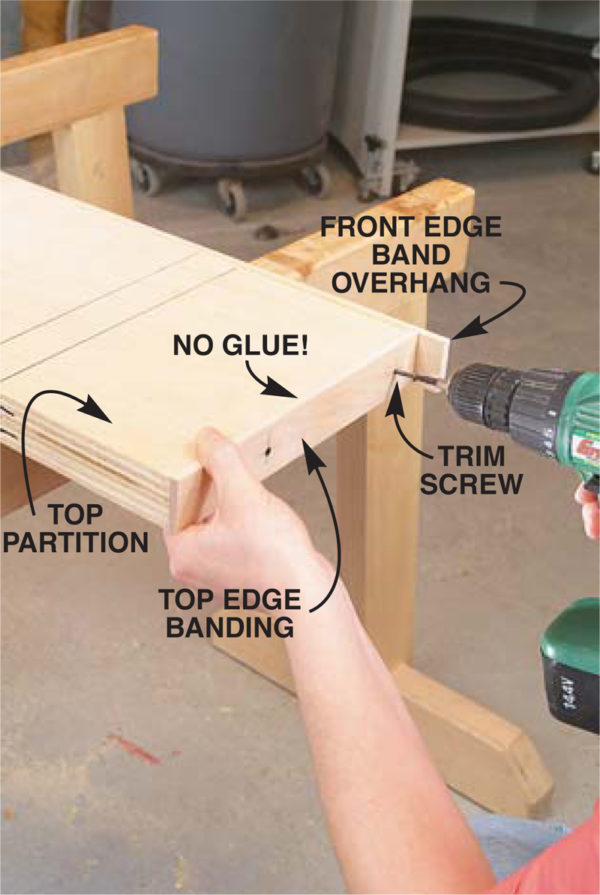
- Attach the upper edge tape (do not glue it), trim the edges with a hand saw.
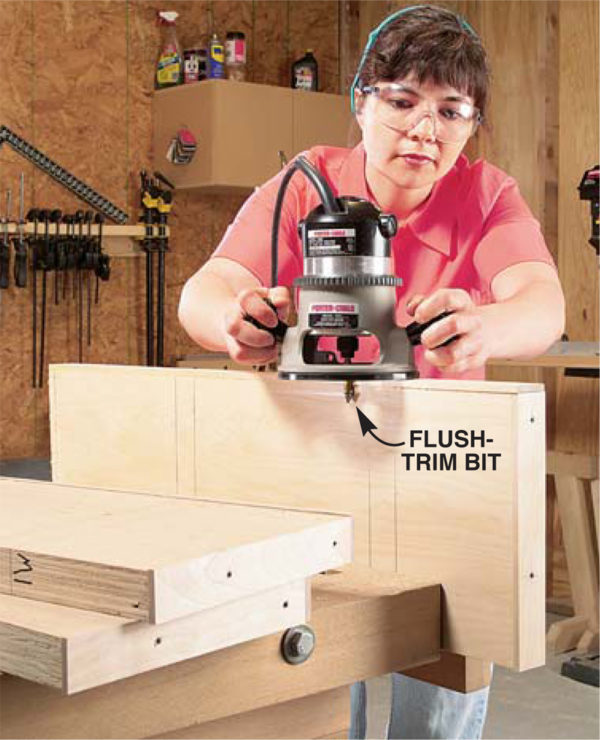
- Flush the top and side edges right on the parts.
So you need to trim all the vertical partitions.
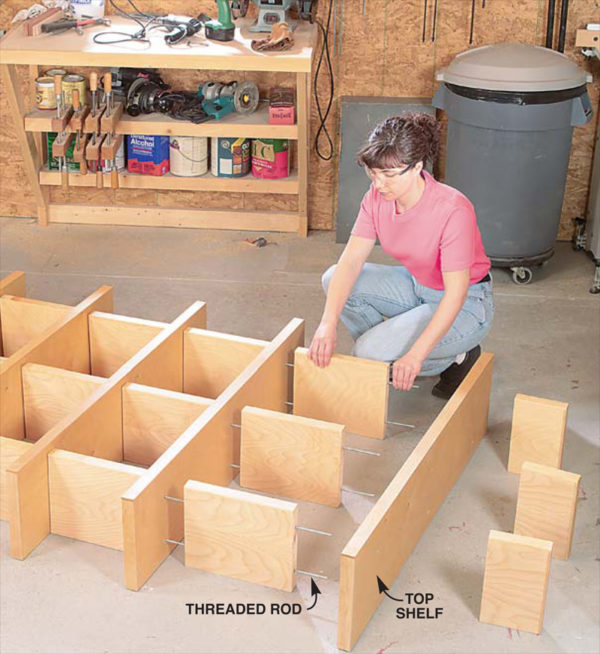
Assembly parts
The assembly is quite simple, you need to connect all the parts together using screws. But there are subtleties that need to be considered:
- On the lower sidewalls, cut small skirting openings so that the rack stands close to the wall.
- Cut grooves for wall mounting in 2 sets.
- Make holes for fasteners in the shelves by removing or drilling the pegs that were laid in the groove before gluing.
- Make and clean holes in vertical partitions.
Read more:8 perfectly organized dressing rooms
- Trim edges and overhangs.
- Trim L-shaped fasteners.
It remains to assemble the finished cabinet on the floor. First, bait all the parts, then align and make the final tightening, when everything is evenly baited.
Wall mount
To ensure that the structure is reliable and does not fall forward from the wall, it must be bolted to the wall:
- Drill L-shaped fasteners, having previously outlined with a pencil.
- Bolt the structure to the fasteners.

The rack is ready. According to this scheme, you can make a cabinet large or small, with a different number of shelves and partitions.
Alas, no comments yet. Be the first!