

Among the products for the bathroom, a wide variety of showers are gaining popularity. They are very functional and easy to use compared to cast iron products. The acquisition and connection of such a device will increase the usable space, in addition, you can carry out the assembly of a shower cabin with your own hands. A washing machine or furniture can easily fit in the vacant space.

Necessary materials and tools
Before purchasing a product, you need to make sure the availability and quality of all components of the mechanism. If damaged or defective parts are found, it is worthwhile to require their replacement or completely abandon the purchase.
To assemble a shower room, such tools and materials will be needed:
- cordless screwdriver or electric drill;
- special bit and set of drills;
- quality level;
- several screwdrivers;
- tow or specialized tape;
- sealant;
- adjustable wrenches.
For installation and the correct assembly order of the shower cabin, it is worth preparing a free space. If complete with a shower there are no hoses for connecting cold and hot water, then you need to purchase them in advance at a hardware store.
Assembly order
First you need to choose a convenient platform for work, on which the assembly of the product will take place. It is worth noting that most models have considerable dimensions. For this reason, individual parts should be collected in another room.
Materials and tools should always be near so that they can be reached freely with your hand. You can assemble an angular shower cabin yourself, but it is better to do it together, because some parts require accurate matching. The walls and floor near the product must be flat.
Next, you must perform the following types of work:
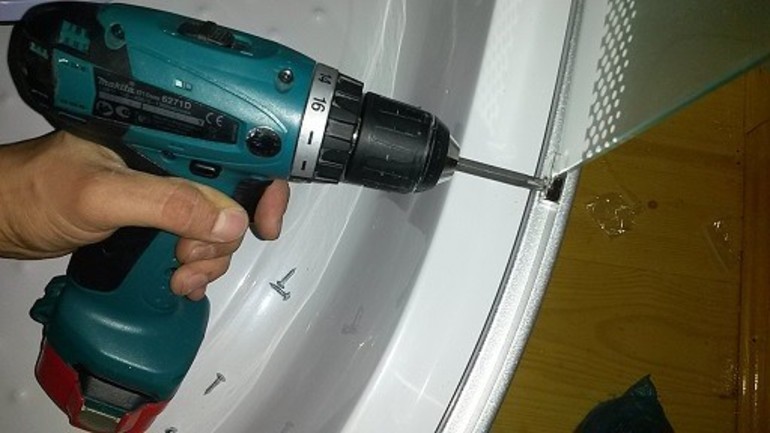
- Drain installation. For acrylic pallets, all joints must be treated with transparent silicone.
- Assembly of a structure from a metal profile to the bottom. It is necessary for fastening special studs for the legs of the product.
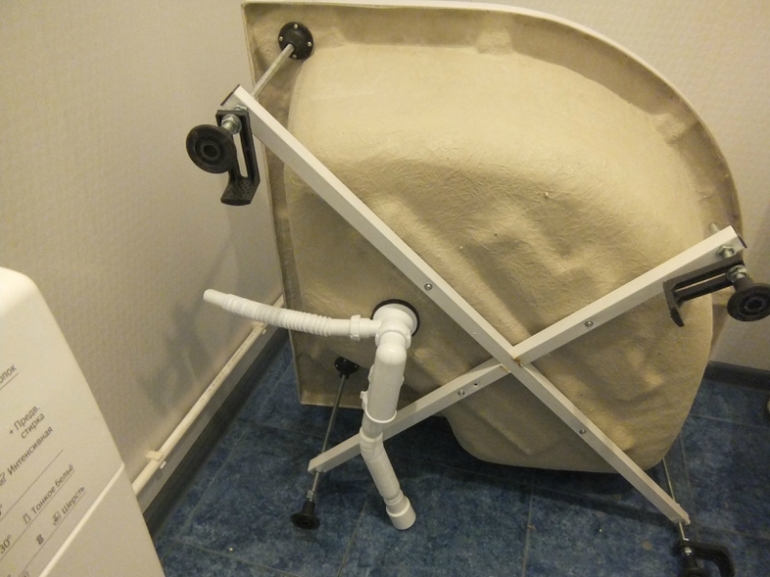
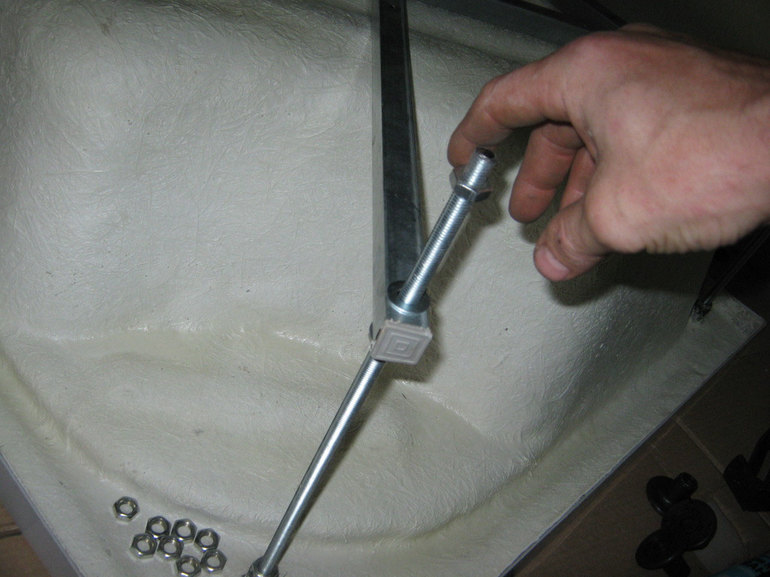
- Stud mounting. They are threaded through the through holes of the frame and tightly twisted in the grooves of the pallet.
The lower part of the structure is equipped with a specialized rigidly welded nut necessary for fastening the central leg of the product. After its installation, a lock washer and several more control nuts are put. Next, you need to install the remaining legs on the studs. Now the pallet should be moved to the bathroom and, using the building level, set it evenly.
Large showers do not need to be accurately set, but small showers with a size of 120x80 centimeters require very careful adjustment. Tilt angles should be taken from the factory instructions.
Then the siphon is carefully checked for leaks and tightness. To do this, cover the drain hole with your hand and draw a little water into the pan. After an hour, he carefully inspects the absence of microcracks and leaks. Then all the nuts are tightened securely and locked in position, and the product is connected to the drain system using a flexible hose.
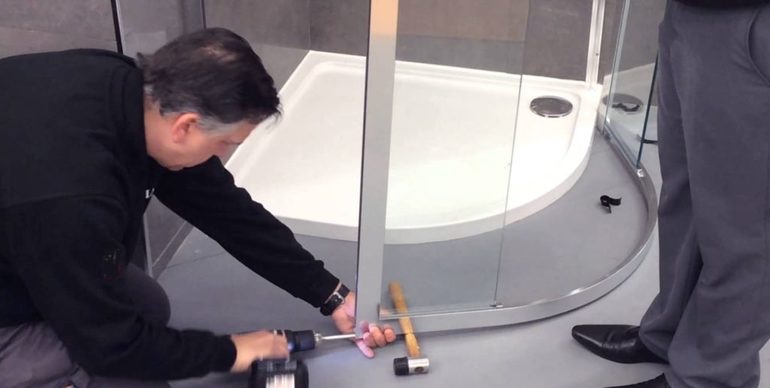
Next step is assembly of curtains, walls, frame and installation of additional devices. To prevent the shower cabin from corroding, its elements are made of high-quality aluminum alloy. The sides of the frame must be assembled separately, and the joints between them must be processed with special sanitary silicone.
Almost all fastenings in modern cabs are carried out using self-tapping screws, but experts recommend replacing them with galvanized bolts and nuts. This will increase the durability and strength of the product.
Fasteners do not immediately clamp as much as possible, it is better to do this after checking all the functions of the shower. After that, all the joints are sealed and mounted frame profiles. The assembly of the shower cabin is completed.
Alas, no comments yet. Be the first!