
Sometimes owners of private homes think about how to protect themselves and their home from a lightning strike. After all, there are regions where the intensity of thunderstorms is from 80 hours per year. Therefore, there is a need to install a lightning rod. And this may require additional costs. But you can always make a lightning rod in the country or in a private house with your own hands.
Protection zone
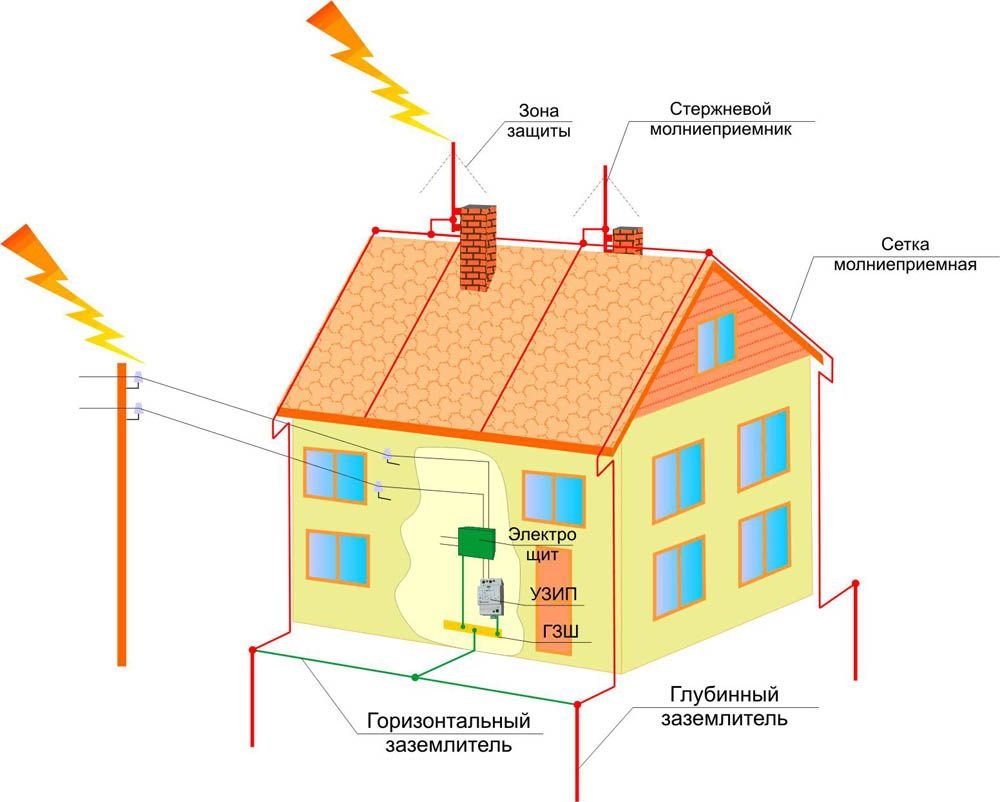
It must be understood that any lightning rod will act only at a certain distance and protect only the space around it. It is necessary to install it in such a way that all the buildings located on the site enter this zone, thereby ensuring their protection against lightning.
Distinguish the degree of reliability of the lightning rod - type A and type B. In this case we are talking about the protection zone. The first type protects by 99.55% and is defined as the most reliable, the second - by 95%. There is the term “conditional border of the zone" - here the reliability will be the weakest.
Zone protection can be calculated. The parameters will depend on the type and height of the lightning rod. Suppose on roof top mounted a single lightning rod-rod having a height (h) of 150 meters. If you imagine this with the help of a circuit, the lightning rod protection zone looks like a cone. Consider the formulas and calculation example:
Knowing the height of the lightning rod, we can calculate the values of Rx, Roand Ho.
For zoneA the calculation will look like this: ho= 0.85h; Ro= (1.1-0.02) h; Rx= (1.1-0.02) * (h-hx/0,85).
For zoneB: ho = 0.92h; Ro = 1.5h; Rx = 1.5 (h - hx/0,092).
Where ho - cone height, Ro - radius at ground level, hx - building height, Rx - radius at the height of the building.
This formula can also be used to calculate other unknowns. For example, we need to know the height of the lightning rod, but we know the values hx and Rx, then for type B the calculation will look like this:
h = Rx + 1.63hx/1,5.
To carry out such a calculation is not at all difficult, but it will be a guarantee that your home is reliably protected from lightning storms.
Device
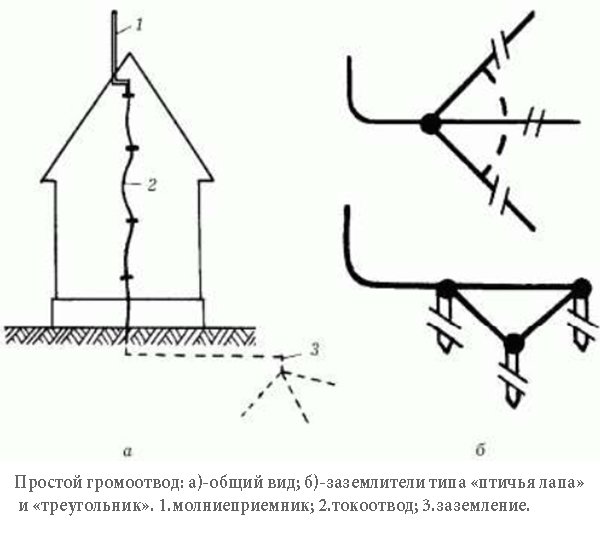
In order to build a lightning rod, the following elements are required:
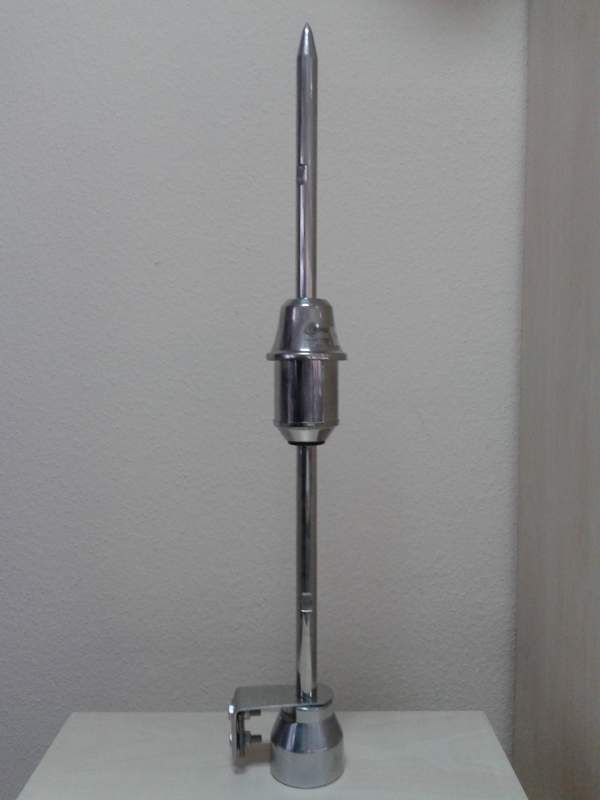
- lightning rod
- down conductor
- earthing switch.
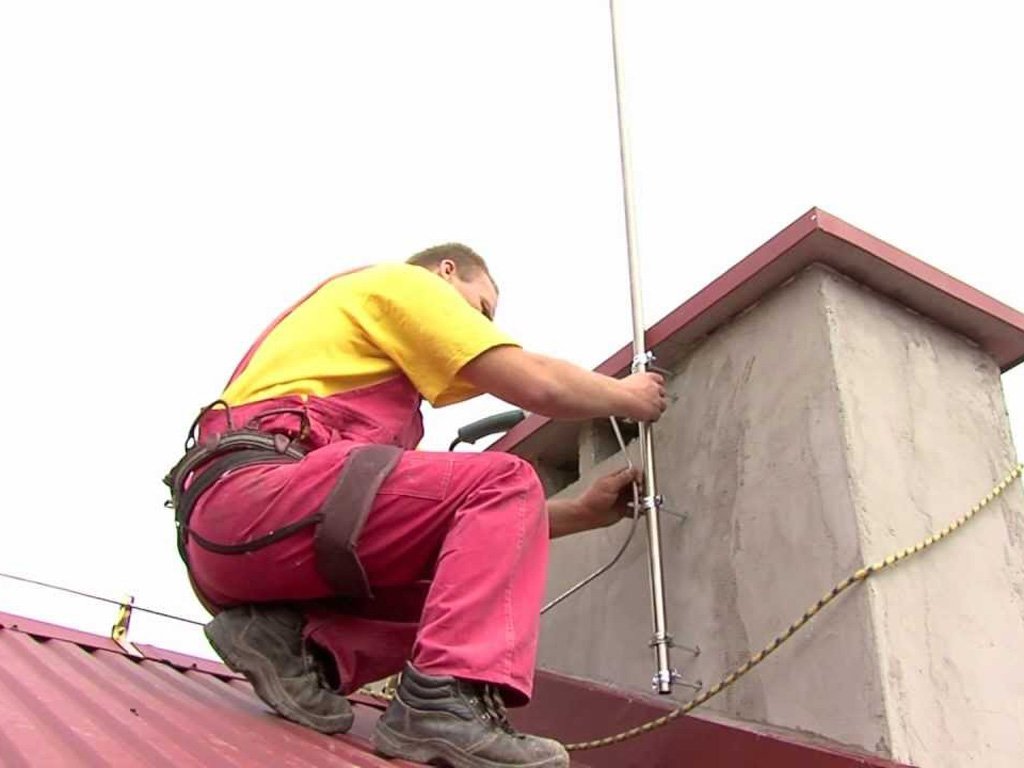
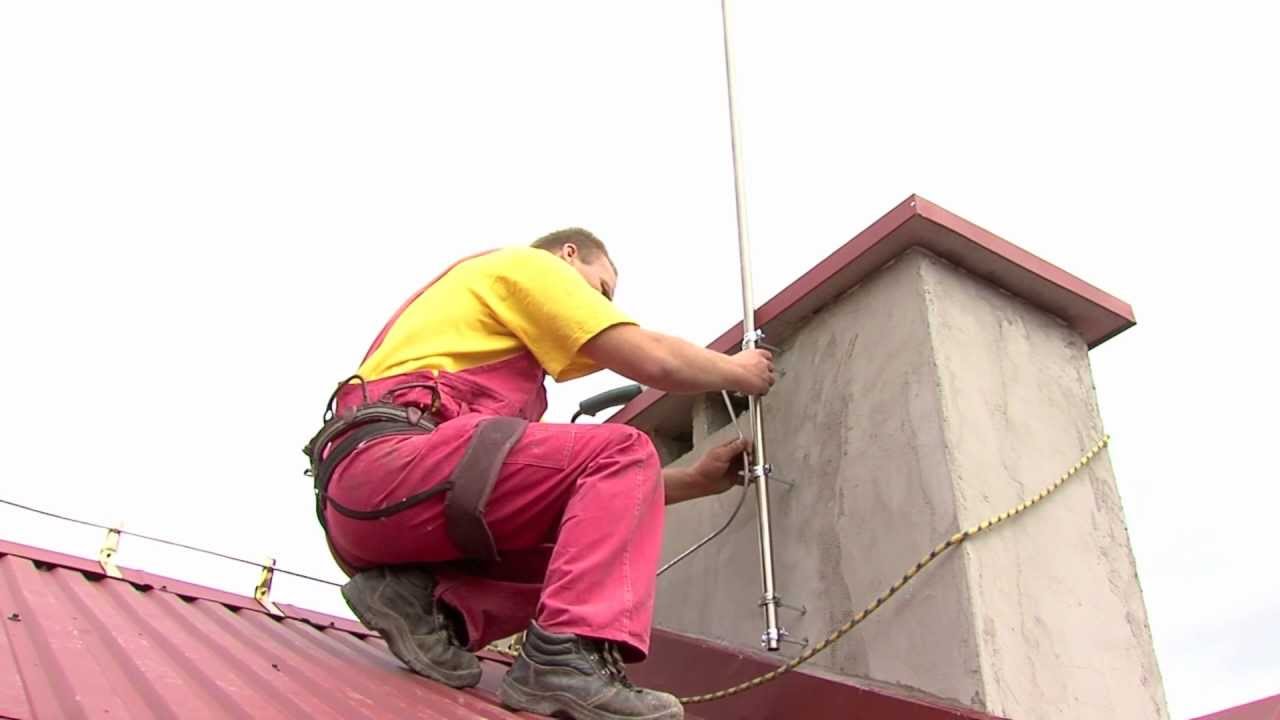
Lightning rod Looks like a metal rod. It will rise above the roof and take direct lightning strikes, providing home protection and withstanding high voltage loads. It is best to use strip or round steel with a cross-sectional area of at least 60 square mm as the material. There are also requirements for the length of such an air terminal - the rod must be greater than or equal to 20 cm. It is placed exclusively in an upright position. As a place, it is best to choose the highest point of the building.
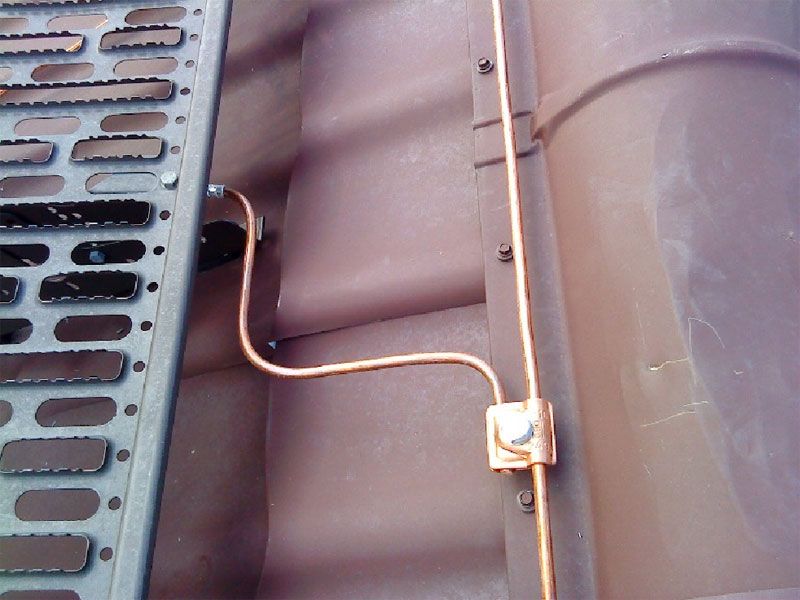
Down conductor It is a thick wire with a diameter of 5-6 mm. Galvanized steel will be a good material. A down conductor is located in a place where lightning is supposed to strike. For example, a skate or the edge of a pediment can become such a place. The down conductor is attached not quite close to the building. It is necessary to step back a distance of 15-20 cm. If we are talking about a roof made of flammable materials, then you need to be especially careful and be sure to leave a gap. As fasteners, you can use staples, nails or clamps.
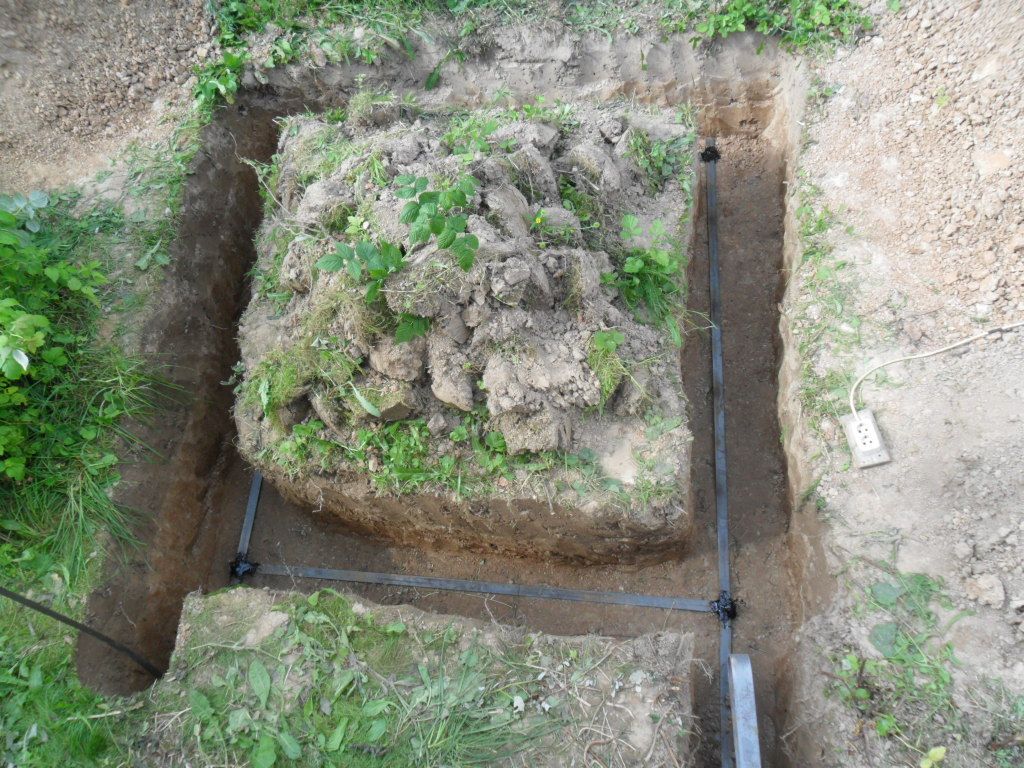
Earthing switch necessary to deflect current shock into the ground. When choosing a material, it should be borne in mind that this element should easily conduct an electric charge, so choose the material that will have a minimum resistance value.They place it at a certain distance from the porch of the house - at least five. Also, do not place it near paths and other places where people can often be. To finally make sure that he will not harm anyone, he can be fenced. It is necessary to depart from the ground electrode system at least 4 meters, positioning the fence along the radius. In good weather, there is no harm in it, but during a thunderstorm it can be dangerous to be near it. As already mentioned, the ground electrode is installed in the ground. But here it is necessary to make a decision how deeply to put it, for each case individually. The criteria by which this is done are as follows: type of soil and the presence of groundwater.
For example, for dry soil with a low level of groundwater, it is usually mounted from two rods, the length of which is 2-3 meters. These rods must be fixed on a jumper with a cross-sectional area of 100 square mm. Next, the workpiece is fixed by welding on the down conductor and immersed in the ground at least half a meter.
If the soil is wet or peat, and the groundwater is close enough to the surface and there is no way to clog the ground electrode by half a meter, then it should be made of metal corners that are immersed in the ground horizontally with a depth of 80 cm.
DIY lightning conductor
If we are talking about multi-story construction, then the installation of the lightning rod is carried out by specialists. Such structures also have a radius of the protection zone, which allows them to be placed on each building. Before installation, they check whether the building falls under the protection of existing lightning rods or whether it is necessary to install a new one.
In the country or in a private house, such issues are decided solely by the owners themselves. There are factors in the location of the building, which can to some extent protect you from lightning. For example, if the house is located on the relief in the lowest place. In addition, a building located next to your building, which has a large height, can take a hit. And the lightning rod located on the neighbor’s house may protect you from trouble. Therefore, one cannot firmly be sure that a house without him is in danger.
If you examined your and neighboring areas and did not find such protection, it is best to worry about creating it yourself. A great danger is at home, in which the roofing is used metal tile or steel sheets. An attractive appearance hides the problem of lack of grounding. As a rule, such a roofing is mounted on a wooden crate or roofing material, which contributes to the accumulation of electric charge from the atmosphere. Such a device can be discharged after a thunderstorm during normal contact with a person, passing a current of several thousand volts. Do not forget that lightning can give a spark, from which the tree is so easily ignited.
To protect yourself from fire and deaths, grounding must be provided every 20 m. In the case of a metal roof, you can do without a lightning rod. The roofing material itself will be an excellent lightning rod.
Tree as a lightning rod
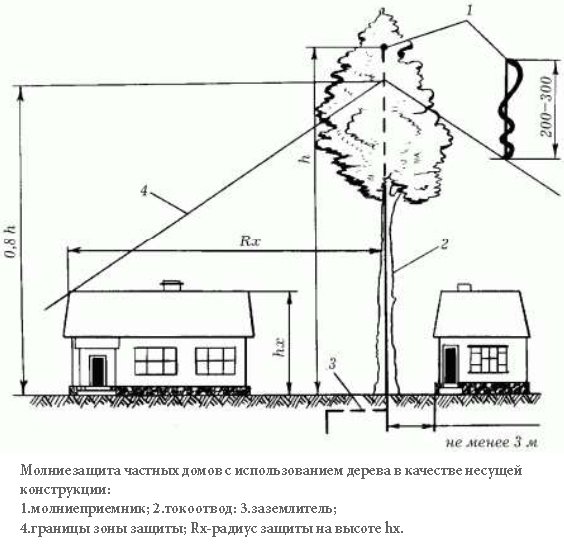
You can save the building from lightning charges not only by installing a lightning rod on the roof. Installing it on a tall tree will also help, provided that it is at least 3 m from your house and 2.5 times higher than it.
For the construction of this design, you will need a wire with a diameter of 5 mm. One end must be buried in the ground, previously welded to the ground electrode. The other end of the wire will be an air terminal. It is placed on top of a tree.
If there is no tall tree on the site, then a mast with a lightning rod and two metal rods that are installed at opposite ends of the roof can help. In this case, a drain is used as a down conductor. It is important that it is made of metal.But here do not forget about the grounding device.
Important: When installing the ground electrode, its resistance to electric current should be no more than ten ohms.
Whichever way you choose to install a lightning rod, it is worth remembering that its high-quality installation will ensure you a comfortable stay only if you periodically check its condition. For proper operation, make sure that all connections are not broken.
Alas, no comments yet. Be the first!