
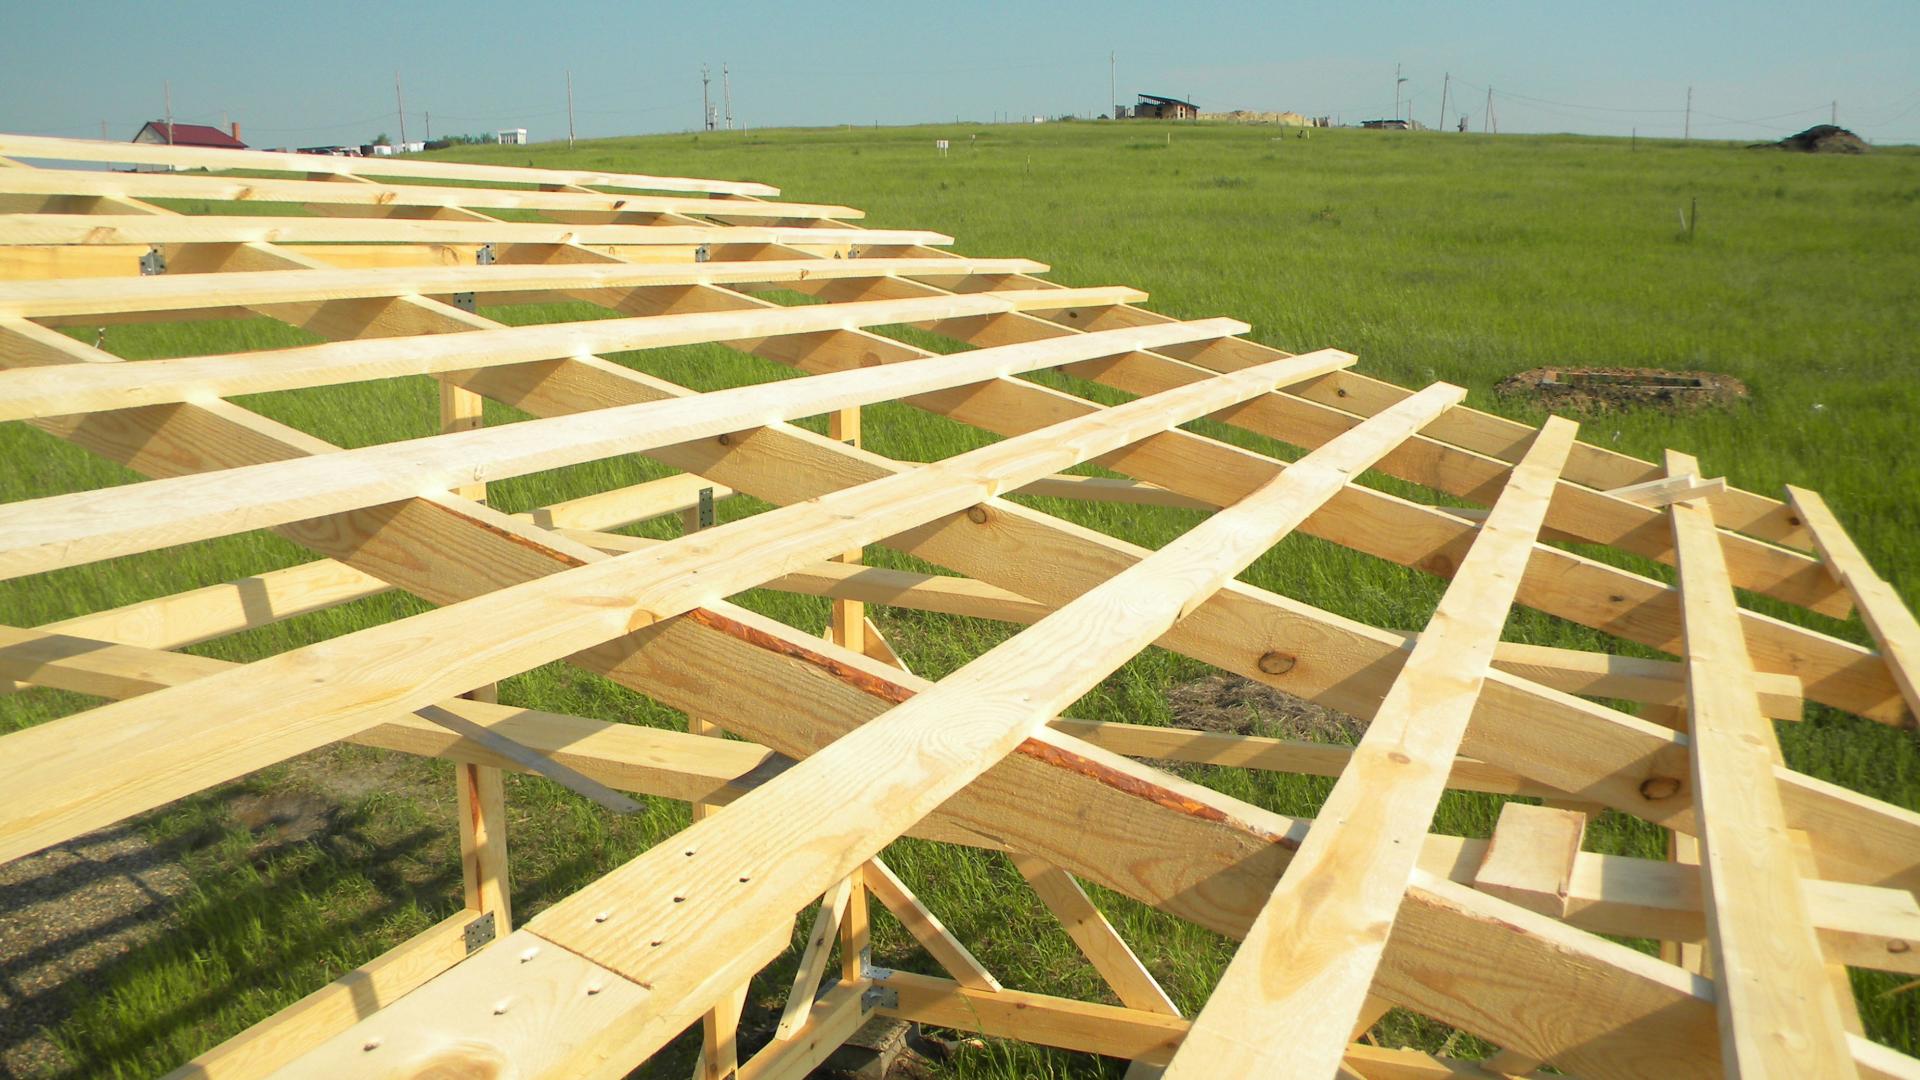
The structural basis of the roofing is the crate. The strength and durability of the roof directly depend on its quality. Subject to the installation technology of the crate, any roofing material will last twice as long as its manufacturer claims. For example, a 12-year guarantee for asbestos-cement colored corrugated slate. Having performed the crate strictly according to the instructions, you will provide the roof with a 25-year trouble-free service. And if you clean the roof in a timely manner from debris, foliage, moss, then 40-50 years will become a very real operational period.
Content
Slate lathing device
For residential low-rise buildings, the crate is made of 2 grades of wood, and for household buildings and utility rooms - 3 grades. When calculating its power, one should proceed from the weight of the selected roofing material. It looks lightweight, wave slate actually weighs 10-14 kg / m². For comparison: a metal tile with a similar profile weighs about 5 kg.
A sparse crate for slate is mounted from a dry (not more than 12% humidity) wooden beam, edged or unedged board. Slate is a durable roofing material. For its laying, three support bars under the edges and the middle of the sheet are enough.
In rare cases, flat slate is used as roofing material. A continuous crate of moisture-proof plywood 12 mm or OSB-3 9-11 mm is mounted under it.
Materials and Tools
To equip the frame for roofing material you will need:
- a wooden beam with a section from 50x50 to 75x75 mm or a board of 25-40 mm wide 130-150 mm;
- 3x50 mm rail;
- galvanized steel nails 90 or 100 mm;
- joiner's hammer;
- hacksaw or sawmill;
- roulette;
- pencil or chalk;
- goniometer;
- level;
- antiseptic;
- flame retardant.
The bar of the above section is the optimal solution for slate roofing. Lumber of a smaller profile will not withstand snow and wind loads, and thicker lumber on the "cold" roof is saturated with moisture and deformed over time.
Choose the cross-section of the beam according to the principle: the higher the wave of slate, the thicker the beam.
The best wood for roofing is coniferous (pine, spruce, fir). It is the cheapest and quite moisture resistant due to the natural resin present in the fibers. To prevent premature decay, it is additionally treated with an antiseptic, and for fire safety - with a flame retardant.
Crates are nailed to the rafters with steel galvanized nails with a length twice the thickness of the beam. A pair of nails is driven into each attachment point. If you are not making a temporary roof, it is better to take twisted nails that are difficult to tear out of the body of wood.
Some home craftsmen use galvanized or anodized self-tapping screws for maximum reliability. They really fix the crate better, but complicate and slow down the work. If you consider it necessary to use self-tapping screws, the best option is a pair of self-tapping screws plus a nail.
Design requirements
The even crossbars, which will be located under the middle of the sheets, should be 3 cm higher than the odd ones. This is necessary to prevent slate deformation. On the odd bars there is an overlap. If you fill the same bars, the middle of the sheet will not lie on the frame, it will sag and will burst over time. To raise even battens, reiki is used.
On roofs with a slope of up to 22 ° under each slate sheet, 4 cross members are packed. In this case, it is necessary to raise by 3 mm every 2 out of 3 battens.
Timber calculation
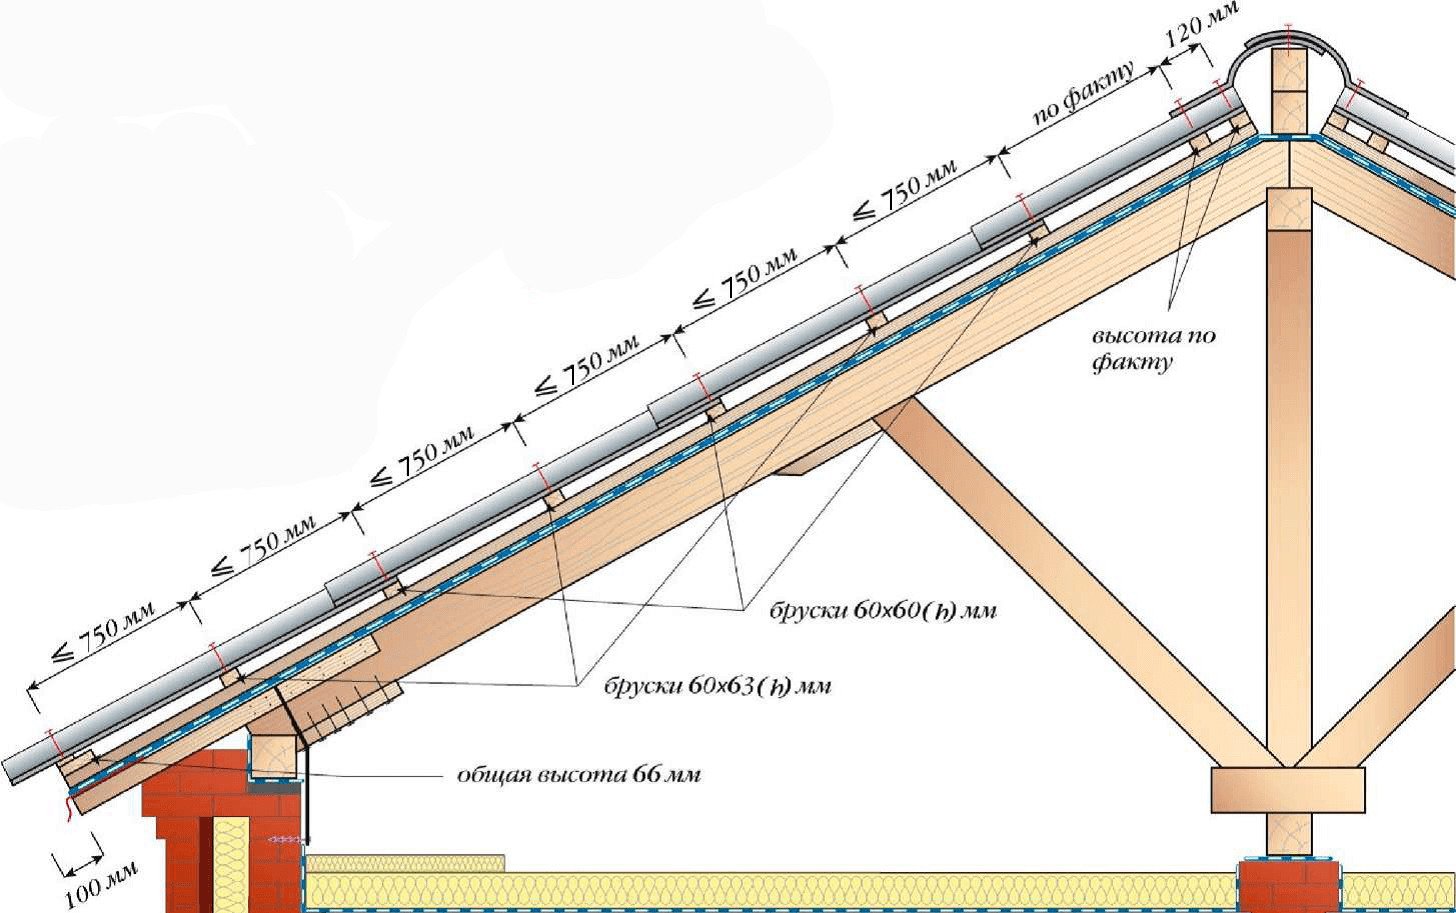
- The length of the standard slate sheets is 175 cm. The size of the overlap when laying is 20–25 cm. Therefore, the pitch of the crate should be 750 mm. If you divide the slope height by this number and add 1, you get the number of rows of crates. If you received not an integer, round it up.
- On low slopes, where 4 battens are used for each sheet, the pitch is 450 mm.
- Multiplying the number of rows by the width of two slopes, you will get the number of required linear meters of timber for the crate.
- Add four slope widths. These crossbars strengthen the crate at the ridge and at the eaves.
- Add 10% to the crate around the chimney and to the waste.
- When the roof is not gable, but complex, an accurate calculation by the formulas can be done by a professional roofer. If you decide to do without his services, the calculation is based on the length of the peaks, but you do not need to add a percentage to the waste.
Multiplying the number of rows by the number of rafter legs and doubling the resulting number, you will calculate how many nails you need. Add 10% to the waste.
Sawn timber is treated with antiseptic and flame retardant at least two days before the start of installation. Processing can be repeated on the finished crate for better preservation of the wooden structure.
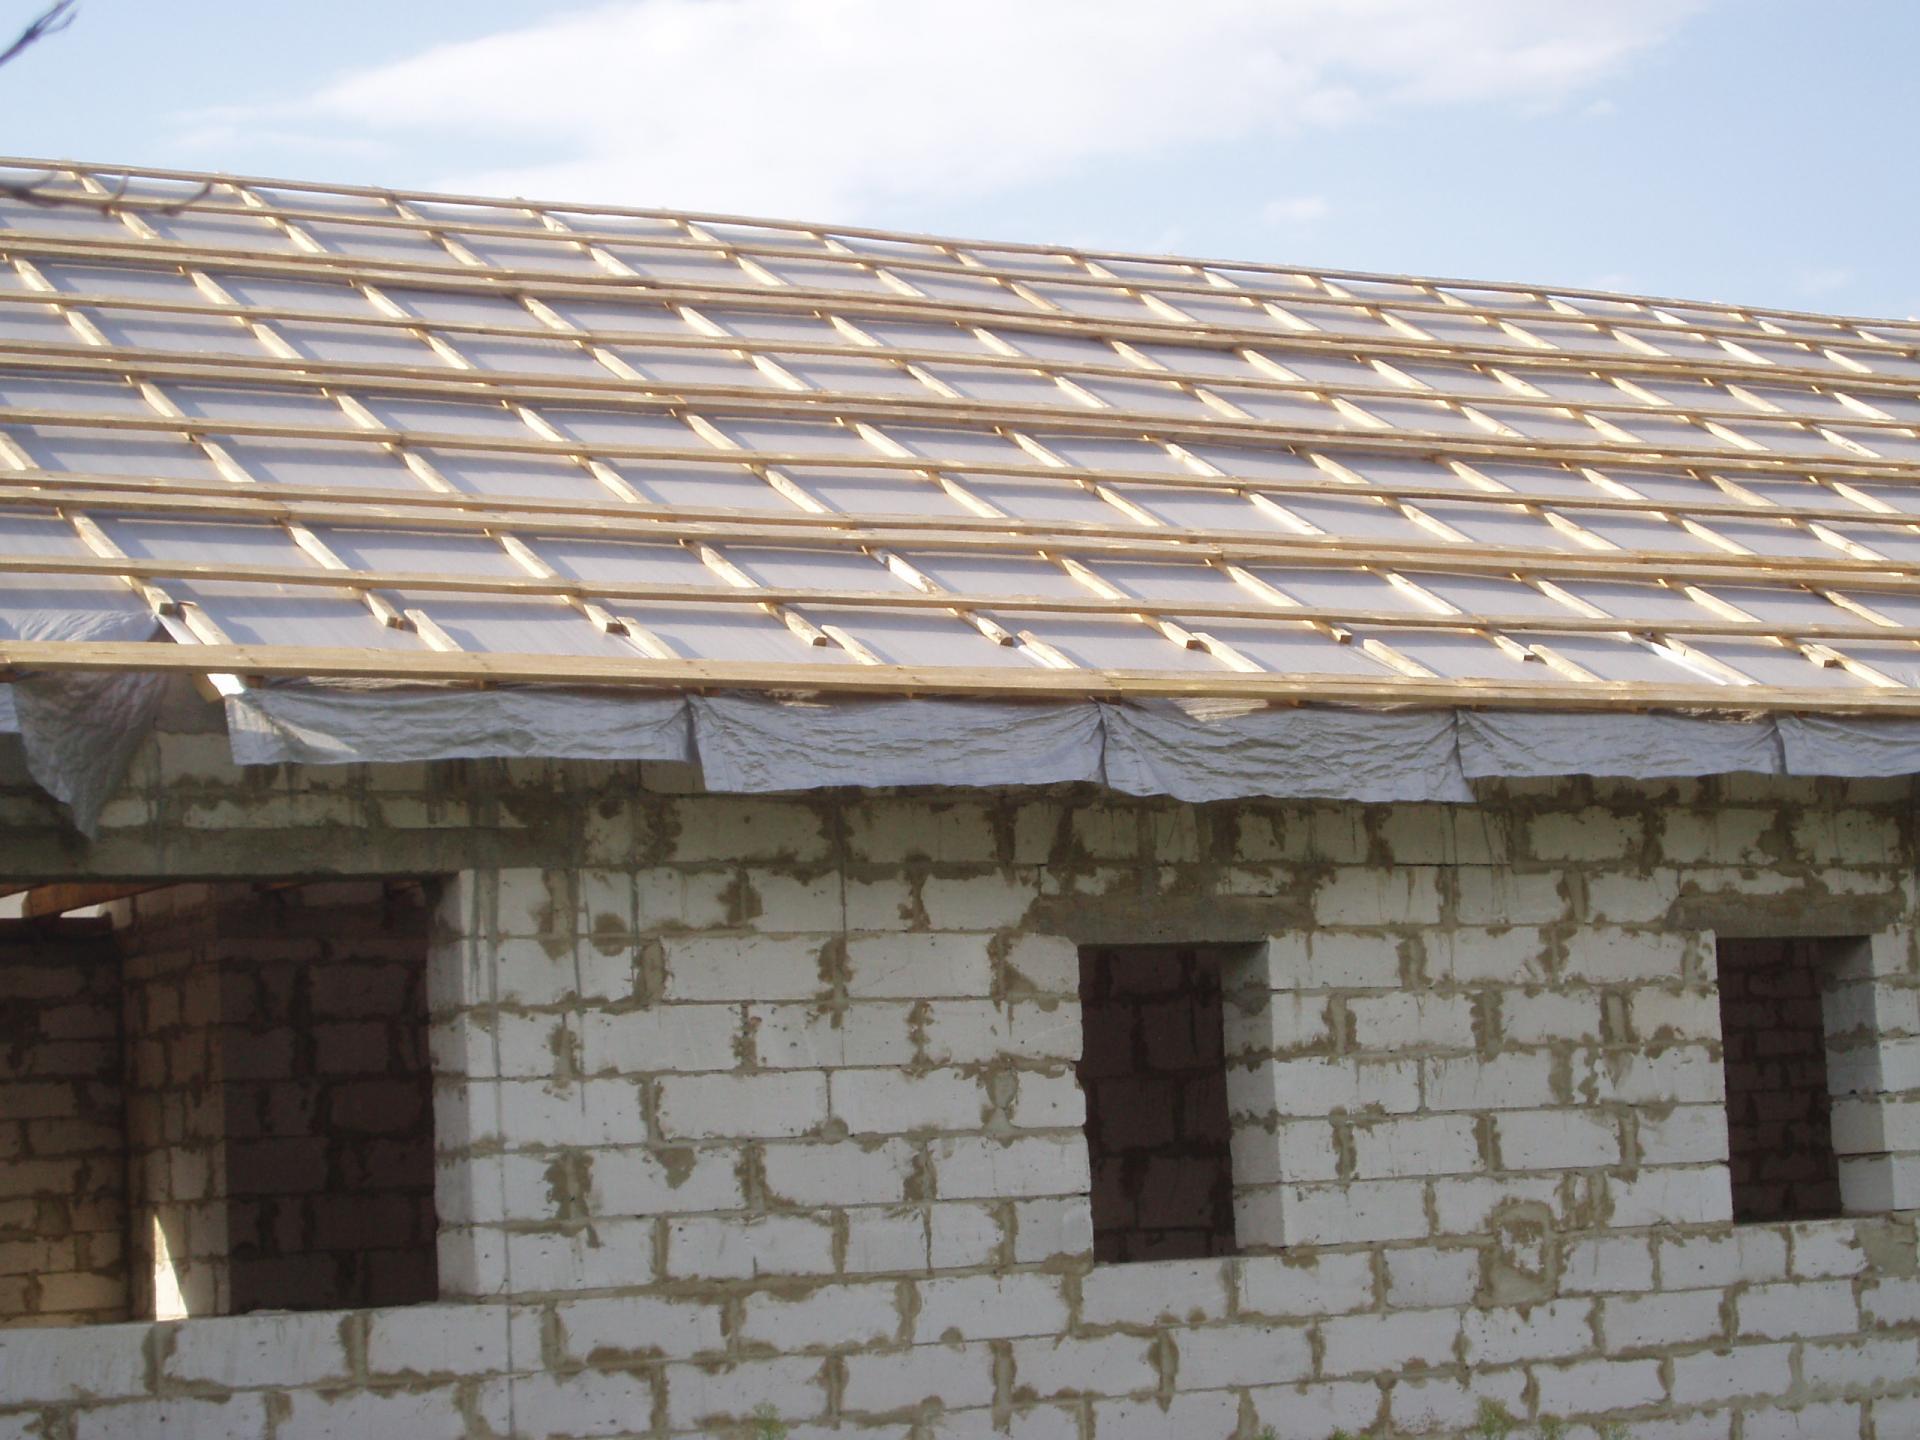
Installation procedure
So, the materials have been imported and processed, the tools are prepared, the waterproofing is nailed with a counter-lattice, the weather is dry - you can start building the battens.
- On the edge of the eaves overhang, fill two beams side by side. You can use one beam doubled width). Increase their height with lath rails. The joints of the timber should be on the central axis of the counter-lattice. Excess timber protruding beyond the front overhang line. When the crate is ready, these "tails" cut "under the ruler."
- Fix the cross-members at each point of their intersection with the rafter leg. Hammer two nails closer to the edges of the beam with a slight slope. Nails should enter the beam at different angles. Hats should be pressed against the wood, but not pressed into it. If you use self-tapping screws, heat the hats only slightly, flush so that there is no tension in the metal. For reliability, use a screwdriver tension adjustment.
- At a height of 750 mm from the first sheathing, fill the second and subsequent ones with joints apart.
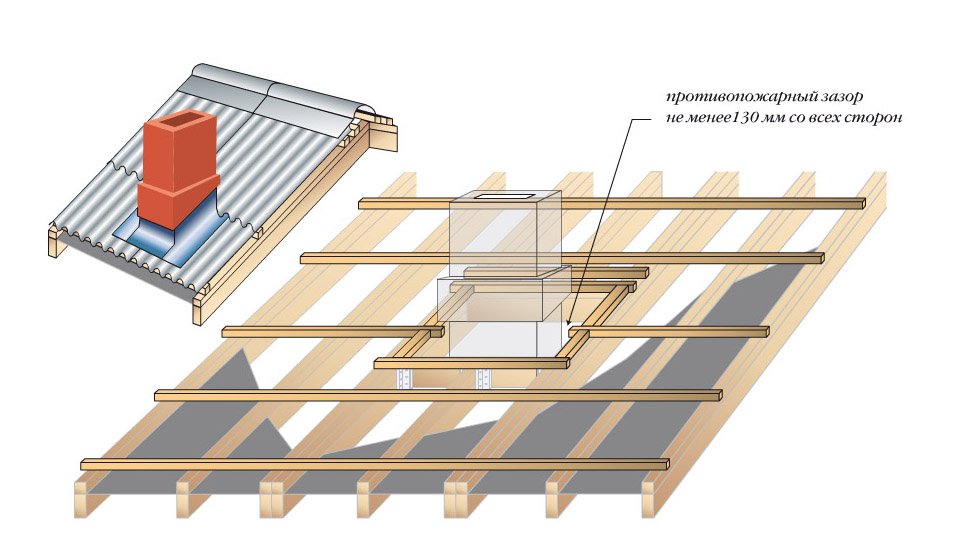
- Around the chimney, fill the crate around the perimeter at a distance of 130–140 mm.
- At the ridge, fill two battens with an interval of 120 mm. Not only roofing material, but also ridge elements will be fixed on the bottom.
After installing the crate, fill the front boards before laying the slate. When the roofing material is already laid, this is difficult to do.
Observe safety precautions during installation: work in protective clothing, use personal protective equipment. Always wear a safety belt on steep slopes.
Compliance with the rules of installation of the crate will help you create a strong base for slate. Smooth, well-constructed construction will facilitate the installation of roofing material, extend the life of the roof, save from unjustified expenses for premature repairs.
Alas, no comments yet. Be the first!