

A quality roof is not only a reliable protection against the cold, but also a barrier that protects the attic from moisture. Water is the most terrible enemy of most structures, since it is precisely it that causes various problems. If the adjoining of the roof to the wall was not performed correctly, then any material will sooner or later become worthless. Of course, the service life of some of them allows us to neglect the influence of water, but below we still give examples of what can happen over time:
- Tree. This is a strong and reliable material, but only if the operating conditions are observed. There are some types of wood that are not afraid of water, but using them to build the roof of a country house is too wasteful due to the fact that they are not widespread in our country. There is another way to make the material more resistant to moisture, but it is also not cheap. In this case, a special impregnation is used to ensure the durability of the wood, but impregnation will not protect the other components of the roofing pie.
- Insulation. It is a weak point of pitched roofs, which are used to create an attic. The protection of most materials used for this purpose is based on the porous structure of the insulating mat or sheet. Inside it there is a huge amount of air micro-layers, which play the role of an excellent heat insulator, since they are separated by layers of insulation. If water seeps in through an improper adjacency, then it falls on the waterproofing, and more often under it, therefore, the impregnation of the mineral wool sheet begins. Here, an ally of a person in the struggle for heat becomes an adversary, since his own structure, which, in its dry form, holds heat well, after sufficient moisture, conducts this heat ideally, increasing the cost of heating the room.

Drying the insulation is also not easy. Moreover, in any case, some work will be required to dismantle the individual elements and replace the wet sheet, however, in addition to them, it will be necessary to repair the most problematic place.
- If the node connecting the roof to the wall is made incorrectly, then due to the high humidity, a fungus will begin to develop under the ramps. Structures that are not protected from large amounts of water will quickly wear out. The first crate will lose its position, which will lead to damage to the roof structure, which means that overhaul will not be far off.
The joints of the roof and walls, adjoining chimneys and other elements are an area of increased risk. It is here that leaks often occur, leading to water entering the subroofing space. Various debris can accumulate here, which even in dry weather will remain wet, and water will gradually undermine the structure.
Another problem of adjoining is snow, which also accumulates here in large quantities. Knowing this, it is impossible to approach the device of a similar roof element after the sleeve. Moreover, it is necessary to create not only a reliable design from various aprons and waterproofing layers, but also to pay some attention to the crate. Usually in these places it is performed intensified, but sometimes other options are possible. On our site there are articles devoted to certain varieties of coatings, in which you will certainly find information regarding the device of the crate and counter-crate in each case. In this article, we will dwell in more detail on the abutment design itself, as well as various technologies for its construction.
Such areas are sealed in various ways, which take into account both the technology by which the roof was created and the structural features of the wall or pipe. Usually they are thought over even at the stage of creating the project, therefore, special solutions can be used. For example, for a brick wall, it is enough to provide a small ledge, which is half the brick, which will greatly simplify the creation of the abutment, and also make it very reliable. Small recesses in the wall are also used, designed to perform the same task as the visors.
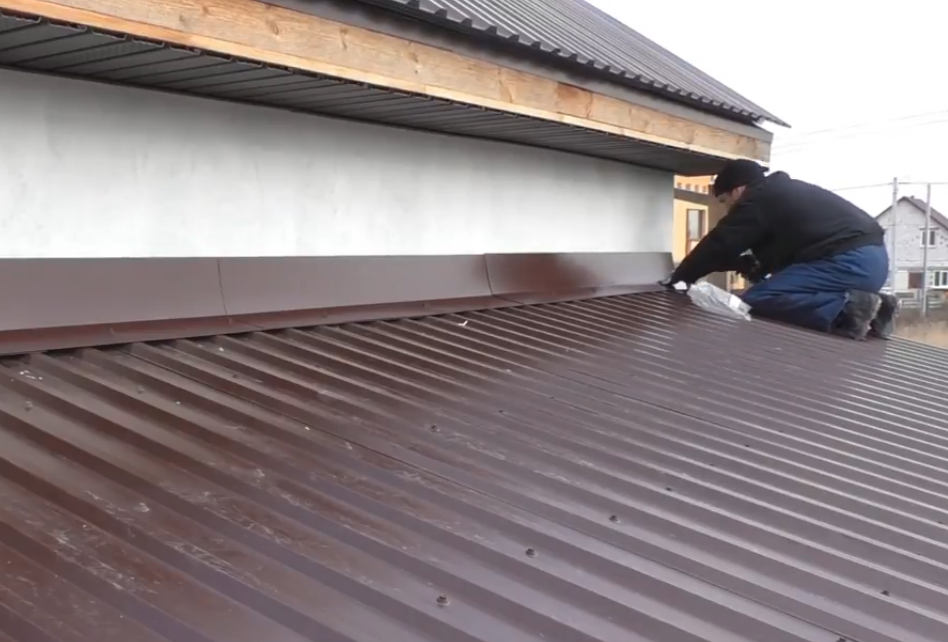
Metal Roofing
Such material cannot be placed close to the wall, since it has a relief surface, which means that the gap will be large enough to require the use of additional elements.
In most cases, an abutment is created using a metal apron or abutment strip. It can consist of one or several layers, and can also be created using various technologies. For simplicity, we present here two of the most popular methods, which are widely used today to create a reliable connection to the wall, and when it is required to ensure the adjoining of the roof to the chimney.

The first method involves the use of special equipment to make a groove in the wall into which the bent end of the metal apron will be inserted. This technology has proven itself when used with masonry or concrete. In this case, gating is required. Like many other jobs, these can be done in several ways.
The first involves marking along which several holes need to be drilled. After that, the puncher switches to normal drill mode and is sent to the first hole at a slight angle. The depth of the recesses is selected a little more than is required for the installation of the apron. Usually, a special nozzle is used, which greatly simplifies the performance of these works.
It is worth saying that this work, which is simple at first glance, is actually complicated by the fact that some experience with the use of special equipment is required. Of course, most people used a punch in one way or another, but you should not confuse drilling a pair of holes for a shelf and ditching a recess on the roof. The complexity of the last operation is also supported by the fact that various third-party factors must be taken into account. Weather, slippery roofing, the need to keep all tools at hand so that they do not slide down, insurance, etc. This list can be continued for a long enough time, but it is already clear that a trifling job for a specialist turns into a difficult task for someone who picks up a drill at best once a year.
The second version of the strobing involves the use of not only a hammer drill, but also a grinder, also known as a grinder. In this case, the usual markup is performed first, i.e. those lines that will become the center of the future horizontal excavation. After this, it is necessary to draw two more, located at a distance of 20-30 mm from each other and equidistant from the first. Then strictly on them cuts are carried out by the grinder, and their depth should correspond to that which is necessary for installation of an apron.
During gating, it is best to use special glasses that will reliably protect the eyes, and the mask from dust will not be superfluous. Of course, indoors you can often get by with fairly simple construction glasses, but on the roof the dust will fly away under the influence of wind, falling into your eyes and respiratory tract. We don’t need to talk about what an attempt to sneeze when standing on a slippery slope with a working grinder in hand will turn out, therefore, the choice of personal protective equipment should be approached with due attention.
When the cuts are finished, you will need to use a puncher with a nozzle in the form of a blade, included in shock mode. It will allow you to clear the gap between the channels, connecting them into a wide recess. There is still a number of subtleties that many forget about. If you are not joining the roof to the pipe, but are working with a strong concrete wall, then several more factors should be taken into account. For example, the use of a spray gun, since it will significantly reduce the amount of dust that occurs during the preparation of the excavation. You need to be careful with water here, since a large amount of it will greatly complicate the work.
An apron treated with silicone sealant is inserted into the prepared recess, the depth of which is not more than 3 cm. There are many special compounds today, so there is plenty to choose from. The apron itself is best selected taking into account that it matches the color of the roof covering. A similar element can be made of sheet steel, but for simplicity it is better to purchase a ready-made variety.
An alternative to strobing also exists. It involves the use of a double apron. In this case, the first part is mounted under the roofing layer and is very tight against the wall. Fixing is done with dowels. The upper bar, on the contrary, is above the roofing. Its lower end is tightly pressed to the roof, and a small gap is eliminated through the use of a special seal. The upper part is pressed against the wall or pipe, so it is best to use sealant here.
Adjoining soft roof
There are also several ways, and even without the use of a protective apron is often not enough, but the device technology will be more complicated.
There is also a very simple option, which suggests that the rolled material will be pressed by a wooden rail fixed with self-tapping screws, but this method is not the best for a residential building.

In most cases, a relatively small approach of the roll material to the wall is used. The exception is only adjoining low parapets, which we examined in great detail in one of our articles. In other cases, only 150-200 mm is sufficient. The wall or pipe itself is smeared with glue, for example, K-36.
The soft roof at the junction with the wall is reinforced by a triangular block of wood or special material, and has several layers. Usually it is a lining carpet, the main material and reinforcement, which begins a few tens of centimeters to the wall. When the node connecting the roof to the ventilation shaft is performed, a protective apron is also required. It is fixed with dowels and is located above the upper edge of the valley carpet. Typically, this technology is used to create an insulated roof.
There is another method called flash. Its essence is that a reinforcing layer is used, represented by geotextiles, and bitumen mastic, applied on top and under it. This method is suitable for different surfaces and can be used even by a lay person. It is only necessary to remove all debris before starting work, and to clean the protective dust from the roofing material falling under the geotextile layer. Various membrane materials are cleaned of dust, then degreasing is performed, and the brickwork is plastered.
This article provides detailed recommendations to help you understand how work is done when connecting devices, and there are a number of practical recommendations. Moreover, we even considered the most dangerous process from the point of view of performing it on a pitched roof - gating. If you have certain skills and using the information provided on our website, you can even independently solve most of the problems that arise when installing a roof.If you do not have skills, then the best way is to turn to specialists, since the costs in this case will be less, and they will achieve the result in a much shorter period of time.
Alas, no comments yet. Be the first!