
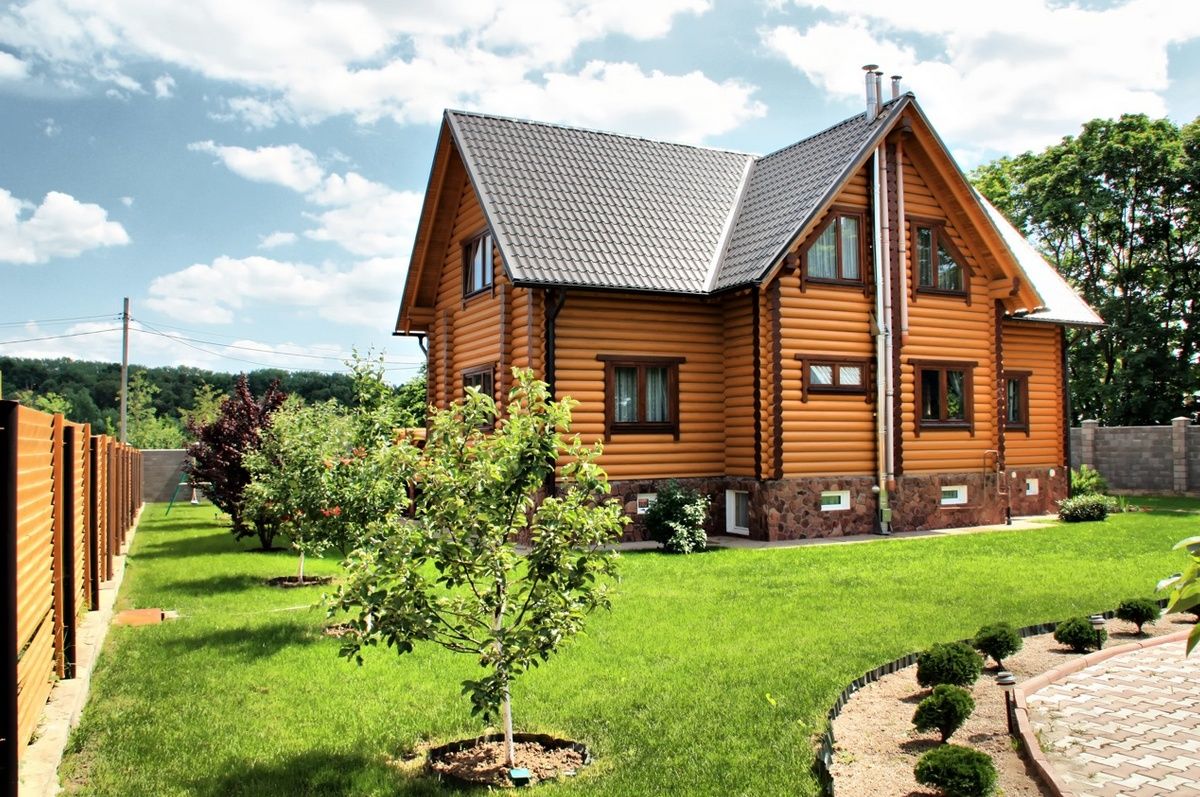
Perhaps the most complex and most beautiful among all types of roofs is the cross. The painstakingness of its manufacture is based on the formation of intersections of slopes. You can make a cross roof with your own hands, but you should study in detail information about its design features before starting work.
Content
Pros and cons
The cross roof is usually installed on houses, which in plan are a square or rectangle.. Consider the main advantages and disadvantages of such a roof.
Among the advantages include:
- Aesthetic appeal of appearance. Initially, this type of roof was used in the west, gaining popularity with us.
- Practicality. Due to its multi-slope and large slope, as well as the presence of valleys, precipitation easily leaves it, almost without delay.
- The rafter system is balanced, which allows the roof to take heavy loads. This design is strong and durable.
- The formation of free space under the roof, which can be effectively used by arranging new rooms.
Now let's determine the disadvantages:
- First of all, it is its complexity. You can start manufacturing a cross roof only with extensive experience, because mistakes that can be made during installation will lead to a decrease in the roof's performance, leakage and damage to the material.
- Material consumption. In addition to the fact that the cross roof has many rafter legs, which are spent on a tree, so more waste is generated. This is due to multiple bends and slopes. Roofing material will also need more. All this will lead to a significant increase in the cost of the roof.
Basic structural elements
- Mauerlat. It is a support beam with a section of 10x10 or 15x10 centimeters. Mauerlat is installed on the entire perimeter of the house, fixing on the walls. Subsequently, the entire rafter system is based on it.
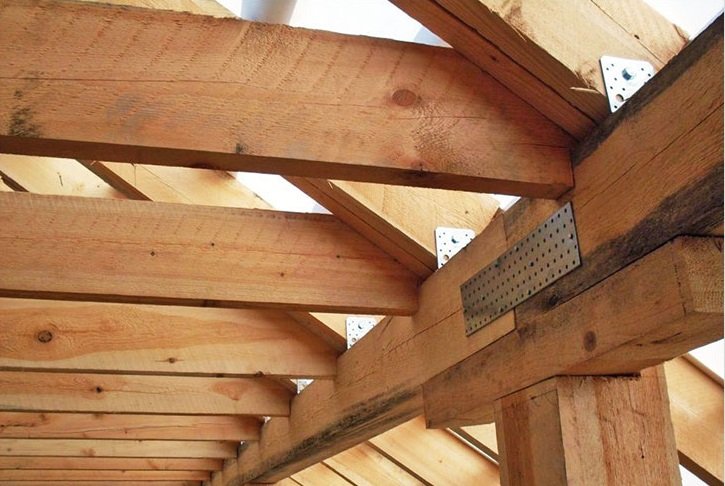
- Rafters. They are made of boards, the length of which will depend on the slope of the roof, its release, as well as the total coverage area. The cross section of the rafters is selected, taking into account the thickness of the insulation used. The junction of the two roofs is called sloping rafters. You can also meet another name - diagonal. Shortened rafters are called sprouts.
- Crate. It helps to evenly distribute loads from the weight of the roof. The crate is arranged continuous or with a certain step. The material can be edged and unedged boards, sheets of plywood or OSB boards. It depends on the roofing used.
- Skate. It is made of timber, which is located on the top of the roof.
For mounting the ridge, you can also use boards knocked together.
- Endovs. They form in places where two slopes connect. Such internal angles require increased attention during installation. Under them, a continuous crate device is required.
- Overhang of the roof. It is necessary to protect the walls and foundation from rainfall that flows from the roof. Their length should be at least 50 centimeters. Some styles may require a half meter overhang.
- Gutters. Their device is sometimes neglected, but they can increase the service life of the roofing, and also allow you to organize the flow of water.
- Snow retention. On the cross roof, their installation is optional, unless the entrance is located under the ramp - then they can become a guarantee of your safety.
Features of the rafter system
The angle of inclination is made equal to 10 to 40 degrees. For areas with strong winds, it is better to use more gentle roofs. And if precipitation prevails, then a larger slope angle will be more useful.
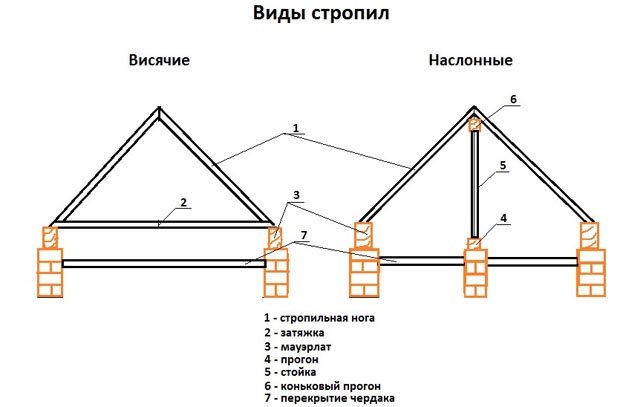
Rafters are of two types - hanging and layered. Both types of application are possible. The choice will depend on whether additional supports are used.
Hanging rafters are the installation of layered beams on supports having different heights. External and internal walls act as a support. Rafters can be stacked alternately on the ridge. This will make it possible to create a truss truss. All the details of such a rafter system are connected, forming a rigid structure.
If the rafters rely only on the outer walls, the formation of strong horizontal pressure is possible. With a large span and improper installation technology, this can lead to the destruction of the rafter system. To avoid such a situation, use a spreader.
Mounting rafters is a little easier to install due to the lack of special mechanisms and devices, but they are assembled on the spot, unlike hanging ones that can be assembled on the ground.
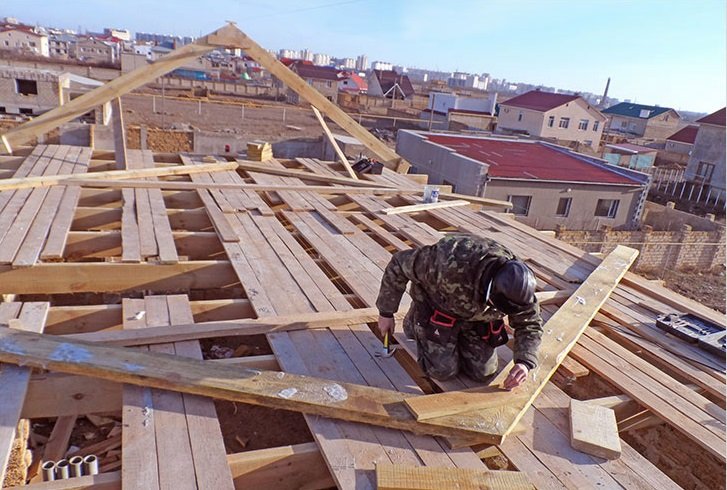
Cross Roof Installation Instructions
- We take measurements at home. It is best to make a small drawing of the house plan, on which you should then apply the arrangement of the elements of the rafter system.
- We have stops, skates and valleys.
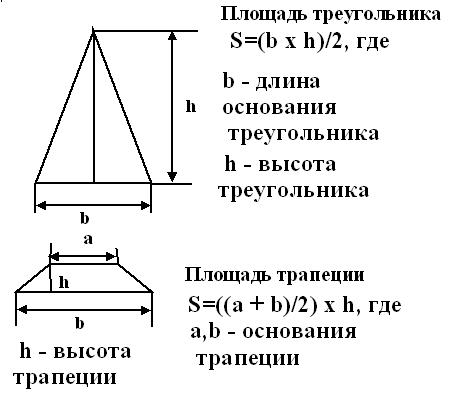
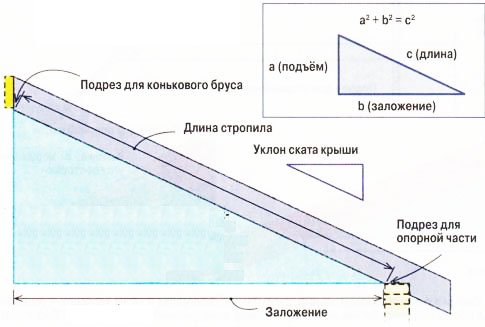
- After that, we determine the length and cross-section of the rafter legs. It is important to consider the overhang of the roof. These calculations can be made according to the Pythagorean theorem, representing the rafters as a hypotenuse.
- When the calculations are completed, you can proceed to the installation, which begins with mounting the Mauerlat on the perimeter of the walls. The bars must be placed strictly perpendicular to each other. Roofing material in two layers is pre-laid on the walls. This will provide the necessary waterproofing.
- On the Mauerlat, it is necessary to make special cutouts for the rafter legs, which will be equal to 1/3 of their width. The distance between such cuts should correspond to the step of the rafter legs. It usually ranges from 60 to 120 centimeters. The more often the step, the greater the load the roof will be able to withstand.

- The skate is formed at the junction of the rafter legs. It can be attached using a metal gear plate or bolts, or wooden linings.
- The triangles obtained during installation are connected using a ridge run. The condition for its installation is parallel to Mauerlat.
To give greater stability to the structure, cuttings can be made under the run in the rafter legs.
- In the lower part of the rafters strengthen with horizontal ties.
- With a large width of the house - more than nine meters, and also subject to the presence of a central load-bearing wall, racks and struts are installed on it, which transfers loads from the ridge to the wall. They will help to further strengthen the structure. Lean the rack on the bed, which is an additional horizontal beam, laid on the wall.
- If there is no load-bearing wall in the center of the house, then special puffs, called crossbars, are used.
- Next, proceed to the installation of the crate. It is mounted on the rafters at a right angle. For a soft roof, a continuous crate is used, but for a hard roof - in increments of 25-30 cm.
A continuous crate is laid on top of the discharged one.
- A vapor barrier is attached to the crate on the inside, and a heater is laid on the outside, which is covered with a layer of waterproofing.
When laying the insulation layer, do not forget about leaving holes for ventilation.
- After installing the insulation, they proceed to the fastening of the roofing material.
Endov device
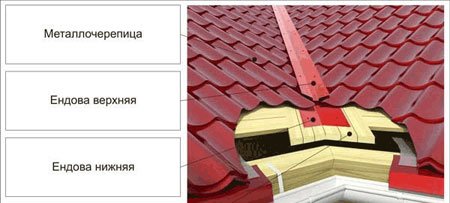
This process is the most difficult in the entire installation of the roof, so we describe its device separately. You can also meet another name for this element - groove.
Endova is divided into:
- Top. It performs decorative functions, giving the joints a pleasant appearance and forming the final design of the roofing. Fastening the upper endova is done after the installation of the roofing material is completed.
- Lower. Its purpose is to protect the under-roof space from the formation of moisture in places where the slopes connect. Installation of the lower valley is made before the laying of the material.

The type of valley depends on the roofing used. By the nature of the installation, the following types are distinguished: open, closed and interwoven.
Work stages
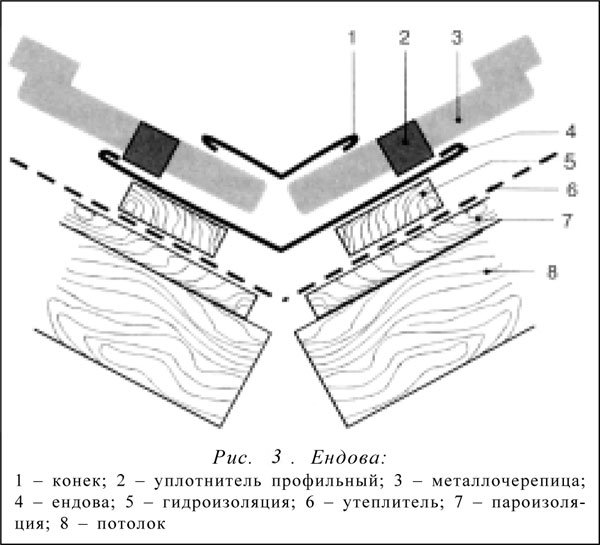
- The endowment crate should be solid.
- A layer of waterproofing is laid on it, placing it along a wooden gutter. This will help protect the space under the roof from moisture.
- In the presence of horizontal joints on the valley, the material overlaps at least 10 centimeters.
If the angle is quite flat, then it is necessary to provide for the laying of an additional waterproofing layer.
- Screws must be screwed in, retreating 25 centimeters from the axis of the valley. The error will be damage to the roofing strips.
Alas, no comments yet. Be the first!