

The final stage in the construction of the bath is the construction of the roof. It is the roof of the bathhouse that is the main protection of the entire structure from various weather elements: wind, rain, snow, hail.
In order to build a roof yourself, you need to understand many nuances, such as: rafter system, roofing materials, strengthening the structure and others. The roof must be very strong, no mistakes can be made during its construction, since it will take a lot of time and money to fix them. However, if you carefully study the material on the construction, the construction of the roof will not be difficult. At the same time, having basic ideas about construction, the builder can always control the workers, recognize errors for their timely correction.
Content
The design of the roof of the bath
First of all, you need to figure out what the roof of the bath is. In fact, this element of the building consists of a supporting frame to which roofing material is attached.
The design consists of the following elements:
- truss farm;
- Mauerlat;
- crate;
- roof.
DIY bathhouse roof - phased construction
The first step in building a roof is to install a Mauerlat. This design is placed on top of the finished wall, it serves to secure the roof truss system. Its purpose is to hold the load created by the roof structure and transfer it to the walls. Mauerlat is made of wooden beams with a cross section of 10 by 15 cm, or boards with a cross section of 5 by 15 cm. Mauerlat is attached to the wall with the help of long screws and wire, which must be mounted in the wall masonry even at the stage of its construction.
Please note that before installing the Mauerlat elements, all wooden structures must be coated with anti-corrosion and fire-resistant substances. It is especially important not to miss this stage if the house is completely built of wood. In this case, not only Mauerlat, but also the walls must be processed.
Also, if the house is built of timber, the Mauerlat may be the last log in which to make special notches, or nests, for installing rafters. Fastening in this case is carried out with screws and nails on several sides of each element in the connection. In this case, it is necessary to pay attention to the strength of the masonry and log fastenings. It is considered ideal to lay a ceiling for attaching the Mauerlat between the logs even at the stage of walling.
We also draw your attention to the fact that it is necessary to control the level of the horizontal position of the Mauerlat. The reason is that only a perfectly horizontal Mauerlat can provide high strength characteristics of the entire roof structure.

The second step is the installation of the truss truss. The truss truss is a structure consisting of inclined rafter beams, or as professionals say - “legs”, vertical racks, roof rafters and inclined struts. The rafter system is designed to transfer the load from the roof to the Mauerlat and walls. For the manufacture of rafters, bars are used, with a section of 15 by 15 cm.
Despite the fact that there are two options for roofs: flat and pitched, the roof of the bath is most often performed in the second version. The reason for this is the accumulation of snow in the winter months of the year. In addition, the pitched roof allows you to organize an attic or attic space.
Thus, the lower parts of the rafters are attached to the Mauerlat, and the upper ones at the intersection form a horizontal ridge. In addition, it should be borne in mind that it is necessary to leave the edges of the rafter legs, which should hang over the building, for better protection.
The left edges represent a certain peak. From above, it is also covered with roofing material, and from the inside the device will fit with any cladding. It can be boards, up to 15 cm wide, processed and painted. You can use metal or plastic. However, remember that all plastic roof elements are quite combustible. If there is a risk of fire, it is best not to use them. The risk of fire may be in the following cases. A working light bulb without a protective lampshade hangs under a plastic canopy. Also a risk is electrical wiring, located on the outside or inside of the plastic panels. Also a risk factor is the use of any inflammable objects under a canopy. Thus, machined wood panels or metal sheets remain the best options.
The third stage is the arrangement of the crate. The crate is called a wooden structure consisting of beams located across the rafter system. The crate is attached to the rafter legs using screws or nails. Structural elements must be treated with protective materials: from the occurrence of corrosion and the appearance of fungus.
The pitch of the lathing elements depends on the selected roofing material. As a rule, on the packaging of the roof, the manufacturer reports on the technical characteristics and the necessary truss structure.
One thing is certain: for soft roofing materials, such as roofing material, shingles, a continuous crate is required. It is carried out not from the bars, but from the boards, which are laid out close to each other.
For lightweight materials, such as corrugated board, the crate is packed at intervals of 50 cm.
The fourth stage is the insulation of the structure. Regardless of how you intend to use the attic, the roof of the bath should be insulated. This is necessary so that the premises: the steam room and the sink - do not cool down during operation.
Regardless of what type of roof you have chosen, insulation takes place according to a single scheme.
Please note that if the attic is not intended to be used as a living room, it is possible to insulate not the roof, but the attic floor.

So, for high-quality thermal insulation, which will last for many decades, you must first put waterproofing material - this is the first layer. Stacked inside the crate. The next layer is the heat insulator itself. The third layer is waterproofing. Why is such a “cake” necessary? If leaks appear in the roof, waterproofing will protect the insulation from getting wet. Also, the lower layer of waterproofing will protect the insulation if, for some reason, condensation or frost appears on the structure. In order to prevent condensation from accumulating, it is necessary to arrange ventilation gaps or so-called wind windows in the attic.
In no case should you allow the insulation to get wet. In a confined space, the material will not be able to dry, it will begin to deteriorate and rot. As a result, mold will switch to the rafter structure and roofing material, which threatens with serious consequences. Up to a partial destruction of the structure.
As for fixing in a certain position the whole "pie", then it is made using thin rails, which are nailed to the crate.
The fifth step is the installation of the roof to the crate. In order to properly mount the roof, it is necessary to carefully study the technical characteristics of the material. In some cases, the material is overlapped, it may be necessary to use a certain type of self-tapping screw: with galvanization or with a rubber gasket. Do not neglect the conditions of installation and operation of the roofing material prescribed by the manufacturers. The life of the structure depends on how well the installation is done.
The final, sixth, stage is the interior decoration of the roof. You can use any material: decorative chipboard, plastic, metal, wood. The design can be plastered, painted or glued wallpaper. In this case, it all depends on your personal preferences.
The most popular roofing materials
As a rule, when choosing a roofing material, they are guided by the harmonious combination of baths with the nearest buildings: a house, a garage, and so on. It is not necessary to use the same material. You can combine different textures and colors. The main thing is to harmonize the architectural ensemble as a whole.
The choice of the roof is also affected by the angle of the roof. Consider the main roofing materials and their technical indicators:
Roofing material can be used on the roof with a minimum slope of 5 °. Moreover, the service life will be no more than 15 years.

For slate, the minimum slope is 20 °. Service life - up to 40 years.
Profiled metal sheet is used for roofs with a slope of 8 °. Service life - at least 50 years.
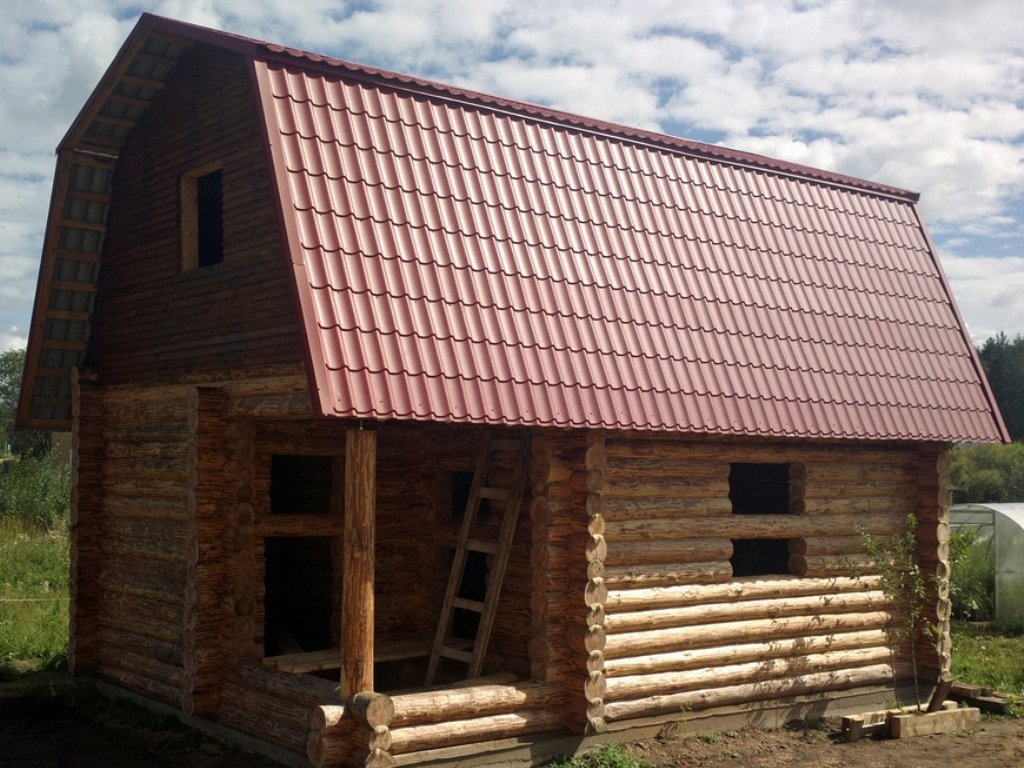
The metal tile can only be used on those roofs where the angle of inclination is at least 30 °. Service life - at least 40 years.
The folded roof is laid on the roof, with an angle of inclination of 18 °. The service life is also quite large - up to 50 years.
Thus, it becomes clear that the choice of roofing material follows from the indicators of longevity, technical characteristics and decorative appearance.
How to build a roof of a bath strong and reliable
Use only quality materials. Check all wooden structures for cracks and knots. Choose a heater and waterproofing with high technical indicators. Check all beam mounts for strength. Get a roofing material that is suitable specifically for your operating conditions. Also use protective substances designed to prevent mold and mildew. Cover with these substances absolutely all structural elements that are prone to rot. It will also be useful to use refractory materials for roof treatment.
Shed roof for a bath
The most convenient, and therefore popular, is the option of a shed roof for a bath. This type of roof has its own characteristics:
- it is easy to erect a rafter system;
- no large cash investments are required;
- original appearance that can fit into any architectural ensemble.
So, what does a pent roof for a bath look like? This design consists of only one slope, which mono to position at any angle, starting from 15 °. Below is an almost flat roof, which does not fit the weather conditions of the regions of our country.
The do-it-yourself roof of the bathhouse is erected as follows:
Rafter legs of a single-slope structure are also attached to the Mauerlat, which is located on top of the wall. However, the walls should be located at different levels: one is lower, the other is higher. The greater the difference in the height of the walls, the steeper the slope of the ramp. In construction, to calculate the angle of the roof, the following formula is used: the tangent of the angle is equal to the quotient between the difference in the height of the walls and the distance between them.
How to build a roof for a bath more economically?
The smaller the angle of inclination of the roof, the less materials will be used, which means construction will be cheaper.
Note that the optimum angle of inclination of the roof is considered to be an angle of 20 ° -30 °. In regions where there is a large amount of snowfall, a slope of 45 ° to 60 ° is recommended. Despite the fact that this will increase the consumption of building materials, however, the structure will be more durable and protected from environmental influences. It will also not be superfluous to install snow retainers and drainpipes on the roof of the bathhouse.

In general, the construction of a shed roof proceeds according to the standard plan. If the distance between the two walls is less than 4.5 meters, then the rafters are installed to the Mauerlat without additional supports. The step between the rafters is 60-70 cm. More precisely, the step is calculated depending on the type of roof. You may also need a continuous crate. In order for the rafters to hold firmly, they are fixed with Mauerlat with iron brackets, self-tapping screws and a wire mounted in the walls. It is also necessary to cut special grooves in the rafters - grooves, at the junction with the Mauerlat. This is necessary for closer contact. However, note that the notches should not be too deep, not more than 15% of the thickness of the cut of the rafters. If the recess is deep, it can lead to imbalance and destruction of the structure. Also remember about protecting the outside of the wall. To do this, it is necessary that the rafters protrude at least 40 cm.
After installing the rafters, the crate is mounted. In the case of a shed roof, for the convenience of installation work, insulation and waterproofing work is carried out before laying the roofing material. It is necessary to lay all three layers: waterproofing - insulation - waterproofing. After the “cake” is fixed, the roof is laid.
We remind you that all wooden elements of the roof structure must be covered with heat-resistant and anticorrosive substances.
How to build a roof of a bath with a chimney
The construction of the bath involves the construction of a chimney, which is an element of the roof structure. As a rule, the location is determined by the location of the furnace itself indoors, as the chimney should be straight, without bends and deviations.
Since the presence of a chimney can cause condensation, it is necessary to properly carry out waterproofing in places of its contact with the heater. It is necessary to carefully wrap the waterproofing film: push the edge of the upper layer under the insulation, put the edge of the bottom on top. Tape the seams carefully with tape to prevent them from diverging. Also, voids between the pipe and the roofing material must not be allowed. As a rule, complete with profiled metal sheet offers special corner elements that are suitable in texture and color.
For other roofing materials, corner elements can be purchased separately. Today a wide selection is presented.
As for the inner part of the pipe, which is located in the rafter part, a number of measures should be taken to ensure its safe use.
- There must be a gap between the rafters and the chimney. Thus, the pipe should be located in the center of the square of the crate.
- It is necessary to lay the distance between the rafters and the pipe with a special fire-resistant heat-insulating material.
- Between the "pie" should also be located fire-resistant material.
- Moisture must not get inside the structure, as this may damage the refractory material.
- On the inner lining of the roof, in the place of passage of the pipe, it is desirable to install an internal metal apron. This will protect the structure from moisture from inside the room, and will also become an additional refractory protection.
Summarizing
With a competent and responsible approach, the roof of the bathhouse with your own hands is built quite simply. It is only necessary to observe the basic rules for installing the rafter system, insulation and roofing.Even a novice builder can cope with this work.
Alas, no comments yet. Be the first!