
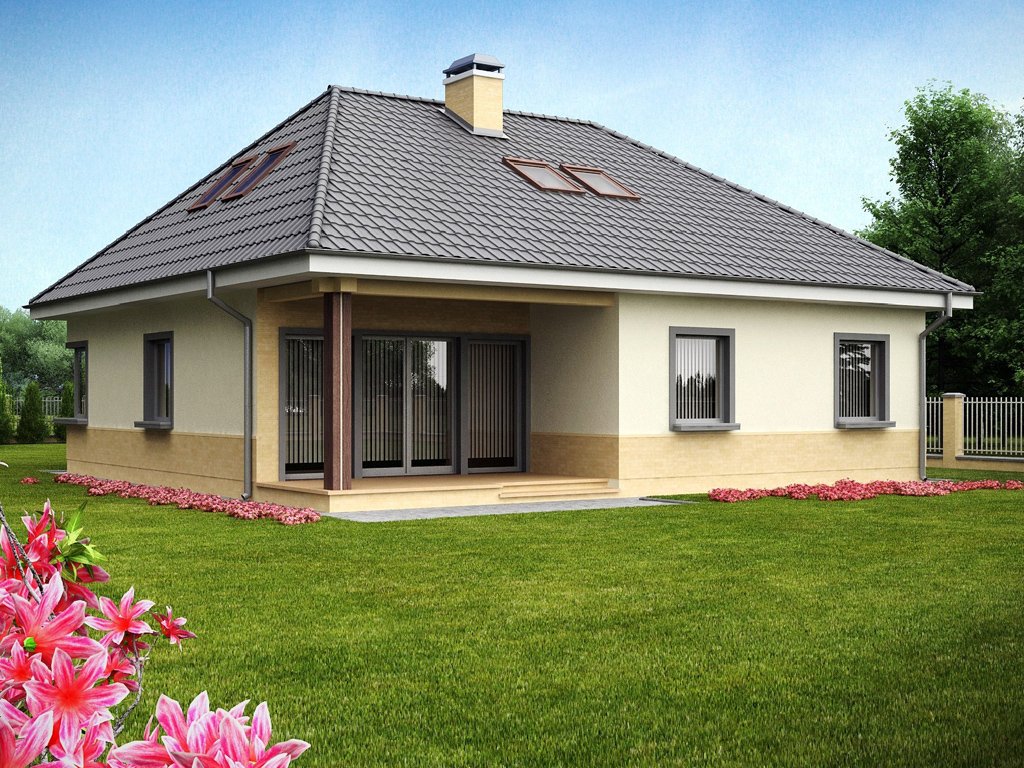
A hip roof is a roof that has four slopes, two of which (end) have a triangle shape. They are called hips and range from the ridge to the eaves. Two more slopes are trapezoidal. If the end slopes break off before reaching the cornice, then this design is called a half-hip roof or a Dutch one.
A four-sloped hip roof is often erected on private homes in a city or village. Thus, the owner has a spacious and comfortable attic, and his house gets an attractive, attractive appearance.

Making a hip roof with your own hands is not so difficult as it might seem at first glance, especially to a person without sufficient knowledge and experience in the field of construction. The process, of course, is not simple, but it’s quite possible for a person whose hands grow as they should. There is nothing supernatural, especially if you use our advice.
Those who are interested in the hip roof can find videos and instructions on the Internet for building it. But without the correct layout and layout, it will not be possible to carry out work. A competent approach will avoid various troubles and difficulties that often arise directly in the process of work.
Before embarking on the construction, it is first necessary to find out all the nuances regarding this roof structure, especially the roof truss systems. In addition, you need to carefully make all the necessary measurements and make the appropriate markup.
Drawings of the hip roof are made using the usual scribe rail and the Pythagorean theorem, known since school times. The main thing in this process is not to rush and do everything thoughtfully.
A correctly made hip roof project with the correct layout will allow you to independently perform all the incisions on the structure that will be required during the construction process.
The main part of measurements for the construction of a hip roof is made, starting from the lower rib.
Content
Basic rules for the construction of a hip roof structure
It must be remembered that the intermediate parts of the rafters are always steeper than the corner parts, so the size of the boards and logs that are used in the manufacture of the rafter system should be at least 50x150 mm.
Unlike a conventional pitched roof, the short structural elements of the rafters must not be attached to the ridge board, but to the corner parts of the rafter system. The slope of the intermediate parts of this system should be the same as the slope of its short elements.
During the construction of the hip roof, the same material is used to make the rafter system and the ridge board.
The hip roof is erected using an intermediate central type of rafters, which are fastened along the two edges of the ridge board.
In addition to the ridge board, the intermediate rafters must also be abutted to the upper level of the harness.

When measuring, instead of the usual roulette it is better to use a marking rail. This will make it possible to complete all the marking more efficiently, respectively, the hip roof drawing will be more accurate than if you used standard roulette for measurements.
Making the hip roof markings
Before building a hip roof, you must first make its markup.First, you should mark the center line, which is located at the upper level in the strapping of the wall that is located at the end of the building.

Next, an accurate measurement is made of half the thickness of the ridge board. After this, the location of the first part of the rafter system is made.
Next, one end of the marking rail is applied to the previously marked line for the first rafter element. At its other end, it is necessary to transfer the line of the side inner wall, which marks the location of the intermediate element of the entire rafter system.
To clarify the exact length of the overhang of the rafters, it is necessary to transfer the marking rail to a line that corresponds to the external contour of this wall. The second end of the rail must be installed on the formed overhang of the roof.
After that, we mark the place where the second element of the rafters of the central intermediate type will be located. To do this, we need to position the rail on the edge of the side wall. On it, we note the exact position of the rafter element, which we have planned to place between the upper edge of the strapping and the side wall. That is exactly what the hip roof scheme provides for.
In the remaining corners of the building, you must perform the same sequence of actions. This will allow us to make accurate and competent markup of all parts of the center of the rafter system, in addition to remove the correct dimensions of the ridge board.
The huge advantage of this marking procedure is that we designed the hip roof, its design and device without hypotheses, assumptions and guesses about whether it is necessary to lower the rafter angular elements, since the entire rafter system will be made of material that has the same width and cross section.
The design of the hip roof is designed in such a way that due to the use of the same rafters of the same size 150x50 mm throughout the system, it can sometimes happen that the uppermost parts of the rafters are slightly higher than the upper parts of the corner elements. As a result, a gap can form between the roofing material and the rafters, due to which additional air circulation occurs in the attic.
Since all parts of the rafter system that are used in the construction of a hip roof have the shape of rectangular triangles, a more accurate calculation can be done using the Pythagorean theorem, which we have already mentioned above.
Rail used for measurements
Before you start taking measurements and marking, you first need to study in detail all the elements that make up the roof: hip, slopes, and so on. Having studied its structure, it is also necessary to foresee a method for connecting parts of the rafter system to each other.

After we figured out how the hip roof is arranged, we can begin to manufacture the rail, which will be used for measurements.
For greater convenience, marking the roof when finding the mark that is on the rail, at a great distance from the eyes of the builder, the width of this rail should be more than 5 centimeters.
In order to mark the location of the intermediate elements of the rafter system, it is necessary to attach the rail to the Mauerlat side walls.
It is also necessary to directly measure the thickness of the wall, which will make it possible to make the correct selection for the supporting element of the rafters and the roof overhang.
In order not to take all measurements several times, it is necessary to put on the rail all the dimensions that are used for marking.
This will save time, and also, unlike measuring with a tape measure, you will avoid errors of a few millimeters.

Such seemingly minor errors can result in inconsistencies of the entire rafter system, and this will require correction and additional work.
In addition, you need to prepare in advance a complete list of all the coefficients that are used when marking the rafter system. This will allow the most accurate and correct construction of the roof.
Such factors include indicators such as: the ratio of the length of the rafter elements used to their location, as well as various proportions, characteristics of various slopes and slopes, and so on.
Mark the corner elements
The marking of the corner elements of the rafter system for hip roofs is carried out in several stages:
- We mark the junction of the marking circuit with the upper inner part of the strapping;
- We measure the distance from the intended place to the marking contour, as well as the distance to the nearest intermediate element of the rafters, which will allow us to calculate the horizontal projection. This will help us calculate the truss length of the corner element of the system;
- The marking rail will greatly simplify the work on the marking. With its help, the marking of the side walls, which has already been completed, can be transferred to the end walls of the house. In addition to saving time, this will also allow for accurate distances between the central elements of the rafter system.
Useful: for greater convenience in measuring and marking, it is desirable to make a special template, for example, from an unnecessary sheet of plywood, which has right angles.
For example, if we have a slope value of 612, we need to mark the template like this: mark 30 cm from one end of the corner and 60 cm from the other. After that, by connecting the marks we get the required triangle, the plywood sheet is cut off along its outline.
After that, it should be attached to the larger side of the figure, which turned out, a beam measuring 50x50 mm. In addition, we note the slope coefficient of slopes on it.
Semi-hip roof
In some cases, instead of the attic, the owners decide to arrange a second floor. In such cases, the classic model of the hip roof is not suitable, since you need to install windows on the walls. Therefore, a slightly different design is needed.

The semi-hip roof is an ordinary gable structure at the top, and a trapezoid at the bottom (between the first and second floors). This roof structure gives the entire structure a very original and interesting appearance, and also clearly emphasizes the line between the floors. This design is most often used for small houses.
The semi-hip roof (four-pitched) has the form of an attic structure with a broken ramp. Often it is used in cases where the area of the desired premises is not possible to fit into a triangular shape. The fact is that under the roof there is a lot of free space, and it can be used at your discretion. So that the space under the roof does not disappear, it can be used as residential.
Semi-hip roofs are recommended to be installed on buildings and houses located in the zone of strong winds. Lower slopes protect the gables of the house very well from wind and moisture.
By design, these roofs are something in between a conventional hip roof and a conventional gable roof.
Where do you need to start construction? Like a hip roof, this design also requires detailed and accurate calculations. If the knowledge in this area is not deep enough, it is better to order a detailed calculation - half-hip roof + drawing + table from specialists.
After that, in accordance with the obtained indicators, it is necessary to purchase material. When buying, special attention should be paid to the quality of the material. The wood must be dry, without cracks and knots. Before starting work, it is necessary to carefully treat all wooden elements with a protective solution.
The roof must be reliable and strong, therefore, accurate calculation and high-quality performance of all construction work is very important.
Specialists do not advise beginners to take on such complex structures, since one not significant error can lead to unforeseen consequences.
If you really want to build a roof with your own hands, then it is better to entrust the roof system to professionals, and you can do the subsequent installation and insulation of the roof.
Peaked hip roof
This roof structure has the appearance of a spire and rises high. Houses with such roofs resemble ancient castles of the Gothic style. This model looks especially beautiful on small houses.
Hip L-shaped roof

As you know, not all houses have the shape of a square or rectangle, respectively, l-shaped houses need a l-shaped roof. It is better to invite specialists to take the sizes and make drawings of this design, since this model requires certain knowledge and skills.
The hip roof is not too difficult to manufacture, and most importantly, during construction, make all the markup and calculations correctly, while using a special rail, as we said earlier, and a coefficient table.
Alas, no comments yet. Be the first!