
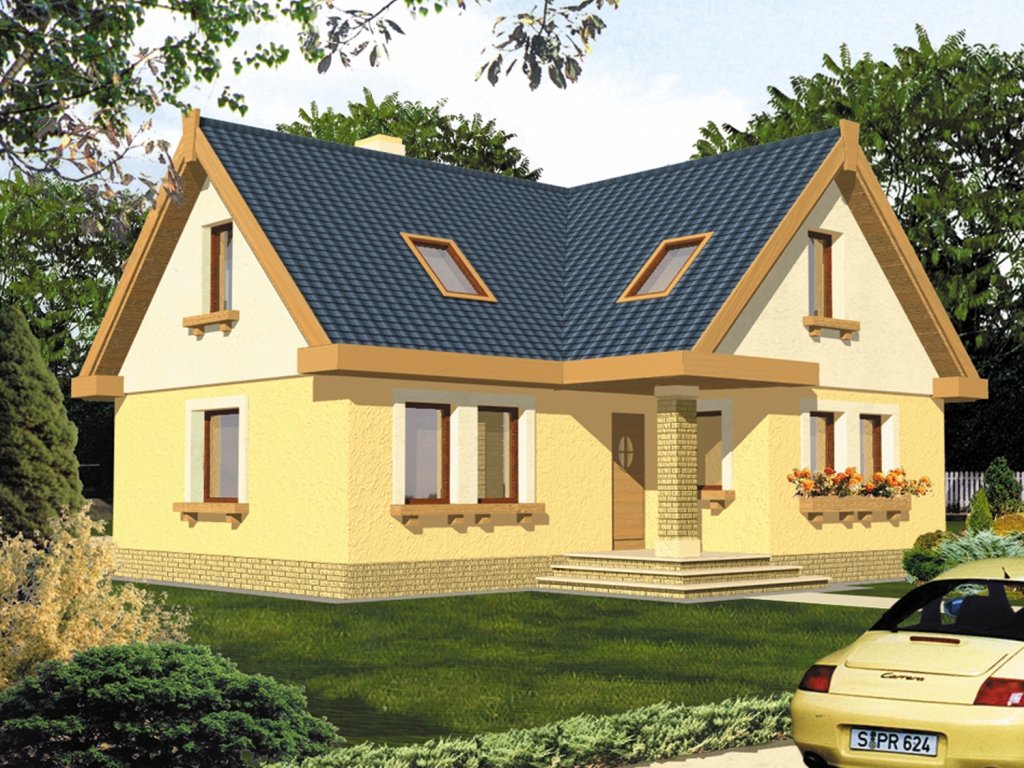
When planning a house resembling the letter "T", it will overlap with a roof of the same shape. It is due to its appearance that it is called the “T-shaped". The complexity of such a roof in the presence of internal corners - valleys. Accumulations of snow form in them, which has an additional load. Before erecting a T-shaped roof with your own hands, you need to familiarize yourself with the features of its design so that operation brings only pleasure.
Features of the T-shaped roof
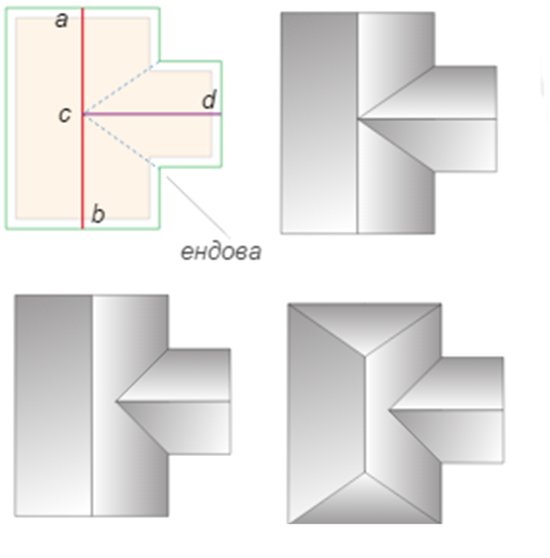
There are two ways to install such a roof.. The first is when the width of the gables is the same and the ridge is on the same level. This is obtained if the angle slope of all slopes same. If their width has a different meaning, then the skates located on the connecting roofs will be at different heights.
After the plan of the walls is drawn, in order to determine the size of the roof, it is necessary to retreat 50 centimeters from the extreme lines of the walls, and then draw the outer perimeter. Next, we designate the location of the roof ridge. To understand where the valleys will be located, it is necessary to connect the closing angle of the main roof and the extension. In these places, the installation of sloping rafters is carried out.
Mounting
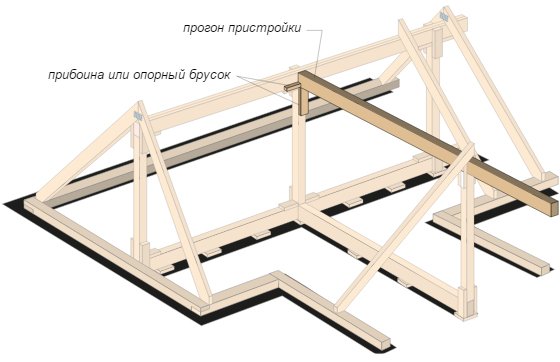
Installation of such a roof begins with the device of the gables. Then proceed to install the ceiling and Mauerlat (support bars laid on the walls).
After that, the racks and skate boards are mounted. When erecting the roof of the attic type at the end of the work, you can leave only the central one. In order to slightly relax the loads that she perceives, you should use the brace to strengthen it. At the same time, a beam of 10x15 cm will be suitable section parameters for such a rack. All racks, except the central one, are made of floorboards. For these purposes, boards of "fifty" are suitable. They are cleaned after completion of the roof construction.
Next, they make the manufacture and installation of rafters for slopes. For this, boards having a cross section of 5x15 cm are suitable. They are placed in increments of 60 cm. Before starting work, it is necessary to make a template using an inch board with a cross section of 25x150 mm. It must be attached to the installation site, and then make the top washed down on the site of the ridge, using a 5-centimeter block. It will simulate the depth of the rafter foot gash in the place where the connection with the Mauerlat occurs. This depth can also be calculated as 1/3 of the height of the cross section of the rafter leg. Washed down the lower part using the same bar as in the first case. After that, 50 centimeters are measured from the wall line - the optimal overhang of the cornice - and they draw a line vertically using a level. The made template is used for marking all the rest rafters. But you must understand that during any work an error may occur, therefore, before installing the rafters, it is better to check whether they are suitable.
When installing rafters, a situation may arise when brickwork interferes. In this case, you can remove the "extra" bricks at the installation site of the rafters.
When installing a short rafter that will combine the skates, a string is pulled parallel to it. This is done in order to limit the space and not allow the rafter leg to leave the plane of the ramp.
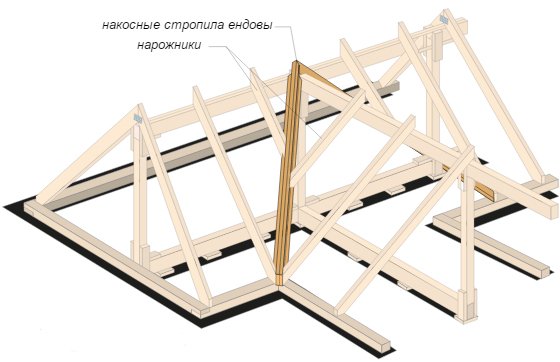
After this, angular rafters are installed on the inner corners of the roof. Such a rafter leg consists of two boards stitched together and having a section equal to the section of rafters for slopes. Mount a small equilateral triangular bar in the corner. As lumber, a 10x10 cm block is suitable for it, cut of which is made diagonally. Using taut lacing determine the angles.After this, a template for the rafters is made. Further, taking into account the measured and calculated angles, mark the lines of gash at both ends of the template. This will help determine the size for cutting the edges of the gash. In the place where the corner rafter is docked with the ridge, it is necessary to install struts. They will transfer the load to the walls.
Corner rafters on internal corners are similarly mounted for an L-shaped roof. Therefore, it is important to learn the principle and stages of work.
The next stage is the manufacture and installation of sprinklers. Their supports are produced on a diagonal rafter. But before that, support bars are sewn onto it. It is necessary to observe the rule: the installation of sprigs is carried out in a rash, they should not converge at one point of the mowing rafters.
To install the sprigs in the valleys, you can use the same options as for the rest of the rafters - non-stop and spacer. The second option involves connecting the rafters in the ridge node, while their bottom is supported by the end rafters, giving a spreader to it and creating compressive stress. The transmission of the thrust to the Mauerlat occurs on the condition that the bottom of the rafter leg rests in it, and the top in the ridge.The resulting spreader is removed using a scrum, which is located on the bottom of the rafter rafters and racks. When the scrum is located higher, compression of its crossbars is formed, which prevents the removal of the thrust. In the case when the lower node of the endovy rafter rafter changes from emphasis to support, the spacer does not go to the walls. At the same time, using the scrum, they intercept the strut that may occur when the ridge subsides.
After carrying out all the operations mentioned above, the racks and crossbars are installed, if necessary. The last stage is the installation of cornices and crates.
Alas, no comments yet. Be the first!